Create an Ancient History Timeline
Track the history of civilization and the rise and fall of empires with the ancient history template.
About the Ancient History Template
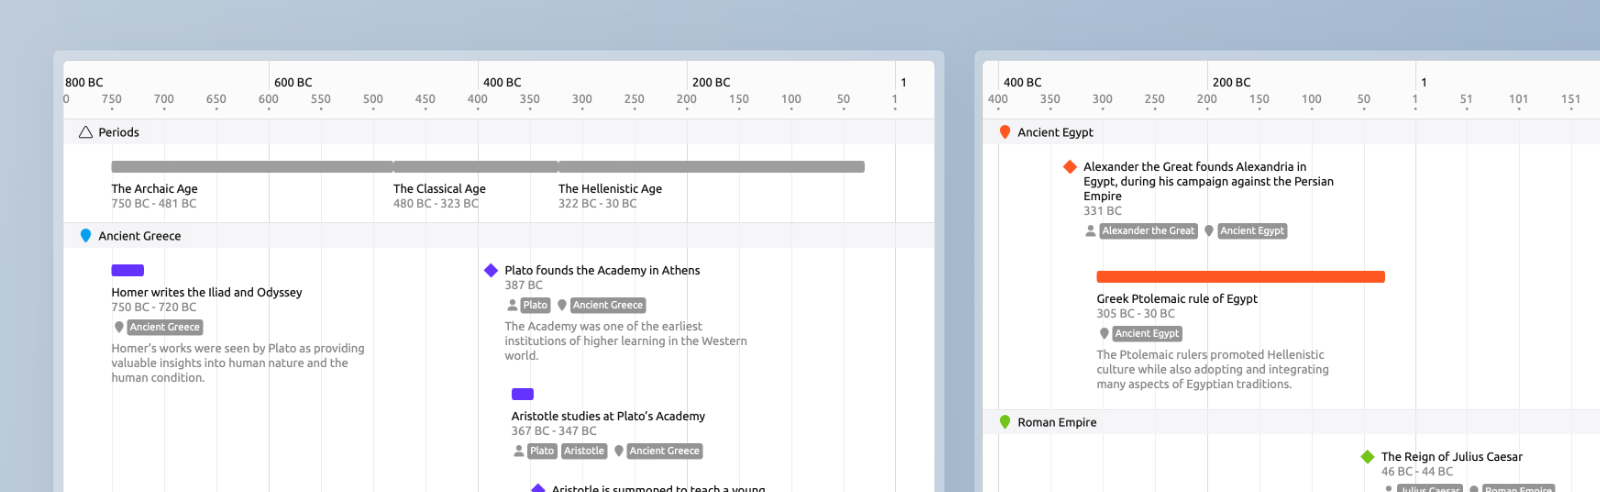
With the ancient history template, you can track the movements of ancient cultures and see the rise and fall of empires. Group events by person or place, and easily attach images, documents, or links to other resources.
The template is set up with grouping enabled, so you can easily add historical periods and events for any civilizations, empires, kingdoms, or cultural groups you’re tracking.
In this guide, we’ll show you how you can use the ancient history template to follow the events of any historical group. We’ll add events, link them to people and places, and use grouping to make it easy to compare everything on the timeline.
You can follow this same approach for any historical period and customize the template to capture all sorts of information.
Places
When you start a new file without example content, the template uses 'Place' as a default label for events related to a specific civilization or people. Just double-click the label or use the Inspector to rename it to whatever you need.
After that, you can create new events on the timeline and easily move them between groups on the timeline.
Rename Places
There are two ways to rename a Place:
- Double-click aPlace label to rename it on the timeline, or
- Select a Place on the timeline to rename it in the Inspector.

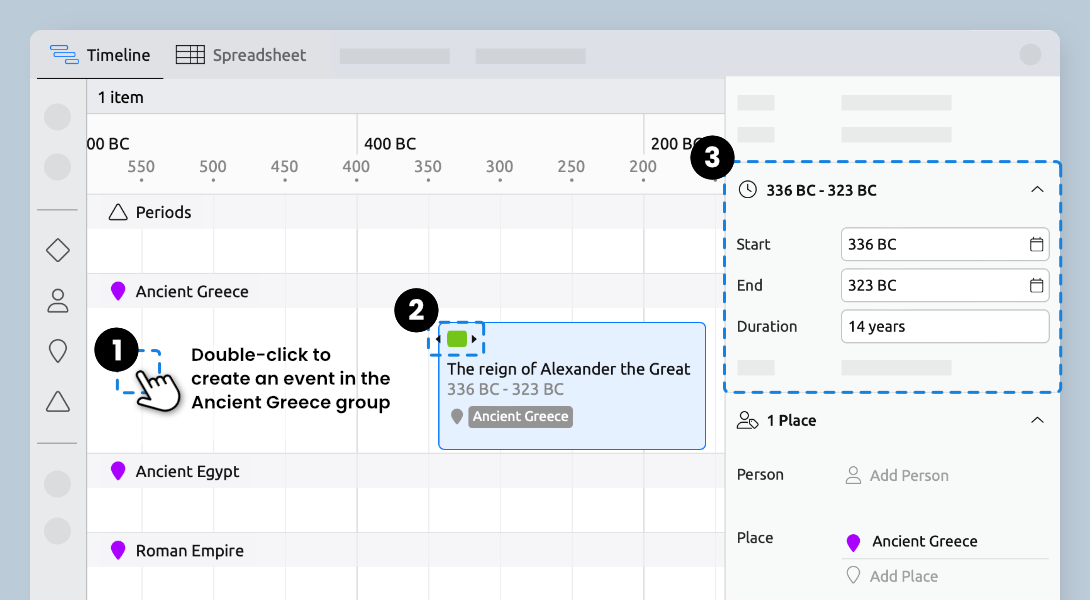
Create Event
- Double-click on a blank space on the timeline to create an event inside one of the groups.
- Click and drag to adjust the placement. Drag thearrows to change the duration.
- Select the event and use the date fields in the Inspector to enter precise dates.
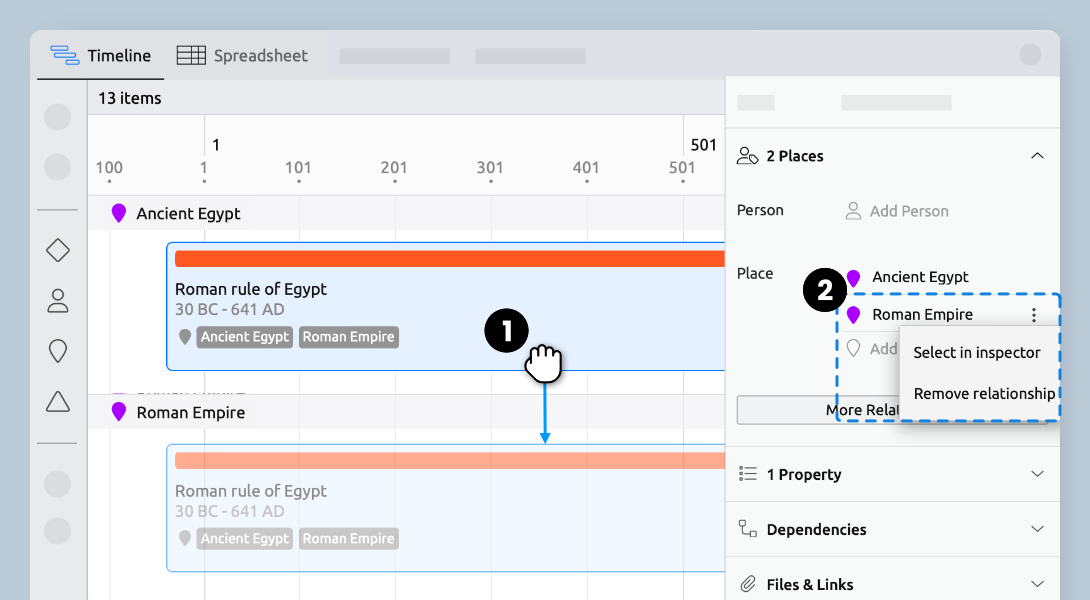
Add and Remove Events from a Group
- Drag an event into a group to make it appear in both.
- To remove an event from a group, select the event and click themenuicon next to the group label in the Inspector. Then choose Remove relationship.
Periods
The Periods group can be used to show the lifespan of a dynasty, a cultural movement, an archaeological period (like the Bronze Age), or anything else spanning an extended time frame.
To add new a new period, just double-click an empty space in the Periods group on the timeline, or create the event in the Periods Panel and drag it over.
- Click thePeriodsicon in the sidebar to open the Periods panel and select New Period.
- Drag a period from the panel to place it within the Periods group on the timeline.
- Drag thearrows to change the duration.
- Select the period and use the date fields in the Inspector to enter precise dates.

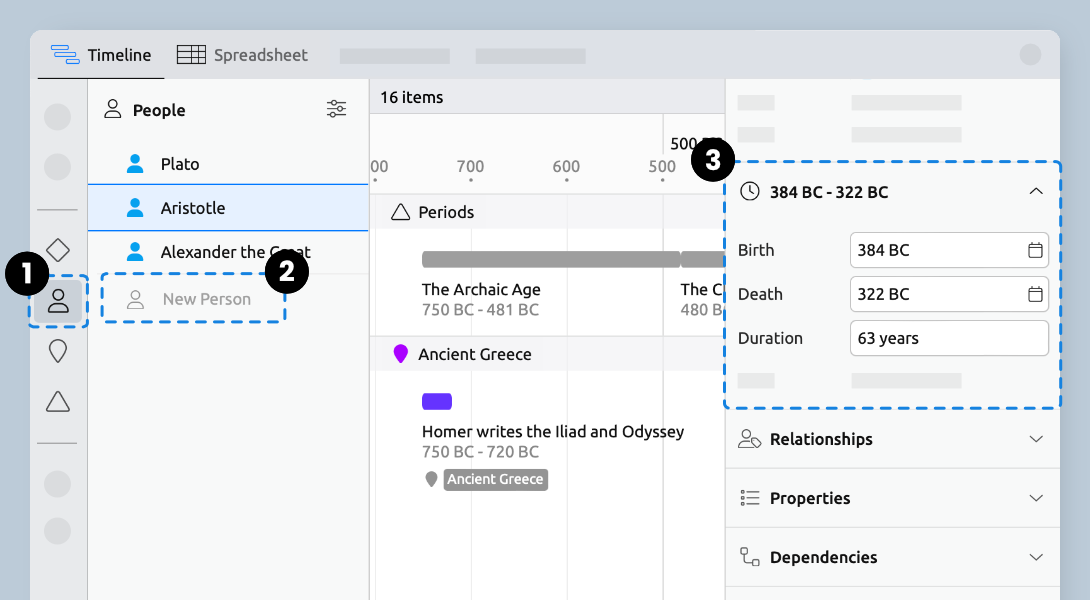
People
The people in your project could be rulers, conquerors, thought leaders, revolutionaries, adventurers—or anyone connected to your events.
- Select thePeople icon in the sidebar to open the People panel.
- Select New Person to create and name a person.
- Select the person and use theDatespanel in the Inspector to enter details like their birth and death dates.
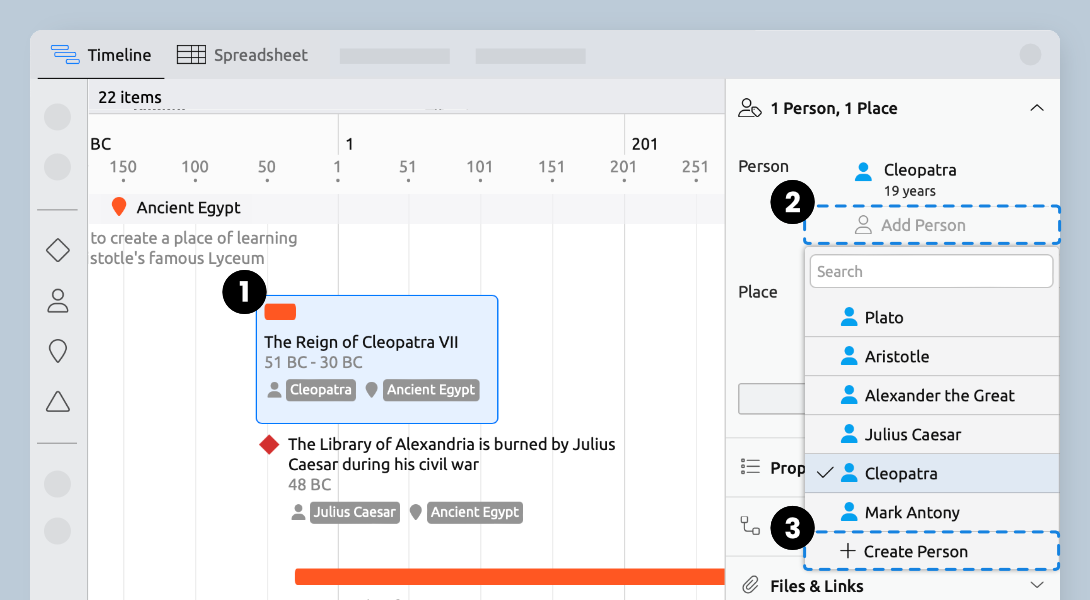
Linking Items
Linking events to people and places lets you capture details like who was involved and where it happened. Making these connections allows you to sort and filter information and view your timeline in different ways.
- Select an event on your timeline to open the Inspector.
- In theRelationshippanel, select Add Place or Add Person and choose an option.
- You can create a place or person and assign it to an event in the same step using the Create button.
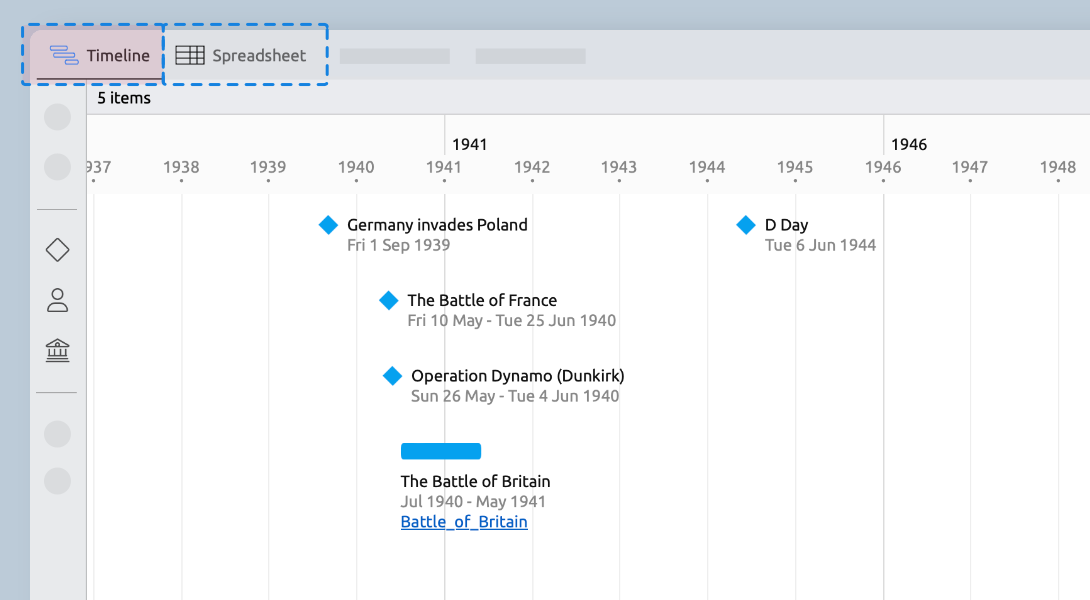
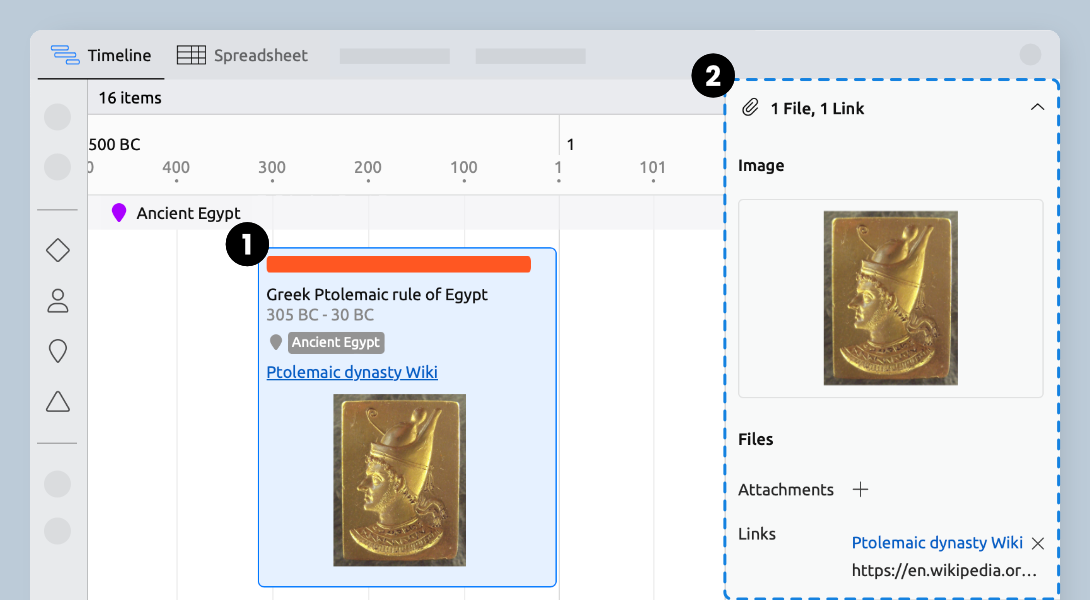
Attachments & Links
Add images, links, and attachments to make your timeline more engaging or connect to external resources for further exploration.
- Select an item to open up the Inspector.
- Use theFiles & Links panel in the Inspector to upload a file, or link to a webpage, document, or image.
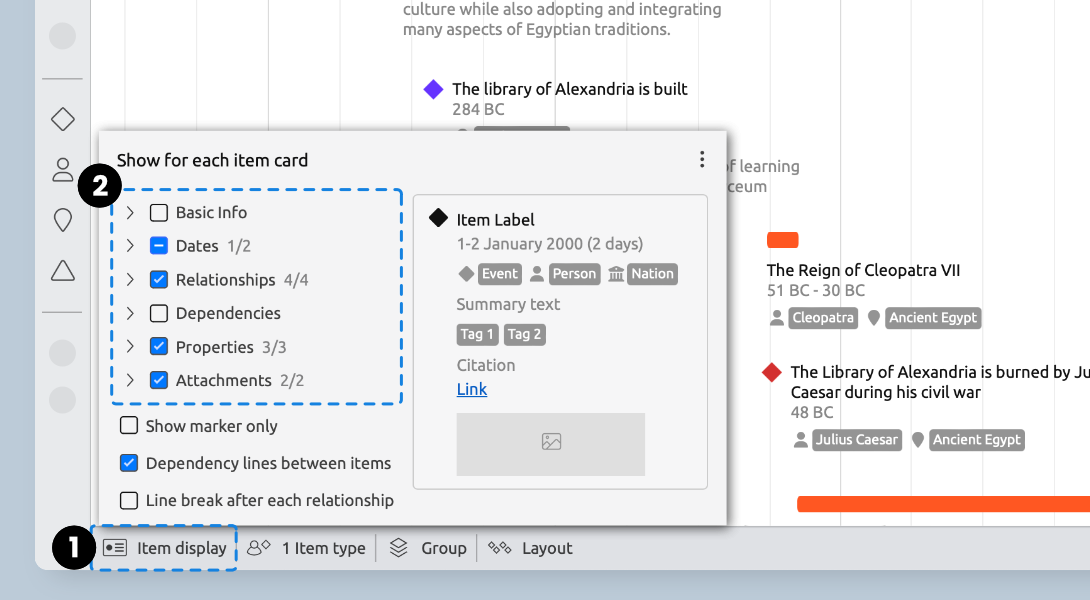
Customizing the Item Cards
The template shows images, links, and other event info by default, but you can turn these off in the Item Display menu if your timeline feels too cluttered.
- Click theItemDisplay button in the footer to open the menu panel.
- Tick the checkbox next to a label to select all options, or expand the list to pick each one individually.
Configuring Groups
Grouping helps keep your timeline organized as your project grows. The Ancient History template comes with grouping already set up, but you can easily tweak the settings in the Group menu. Try different options to see what works best for you and your data.
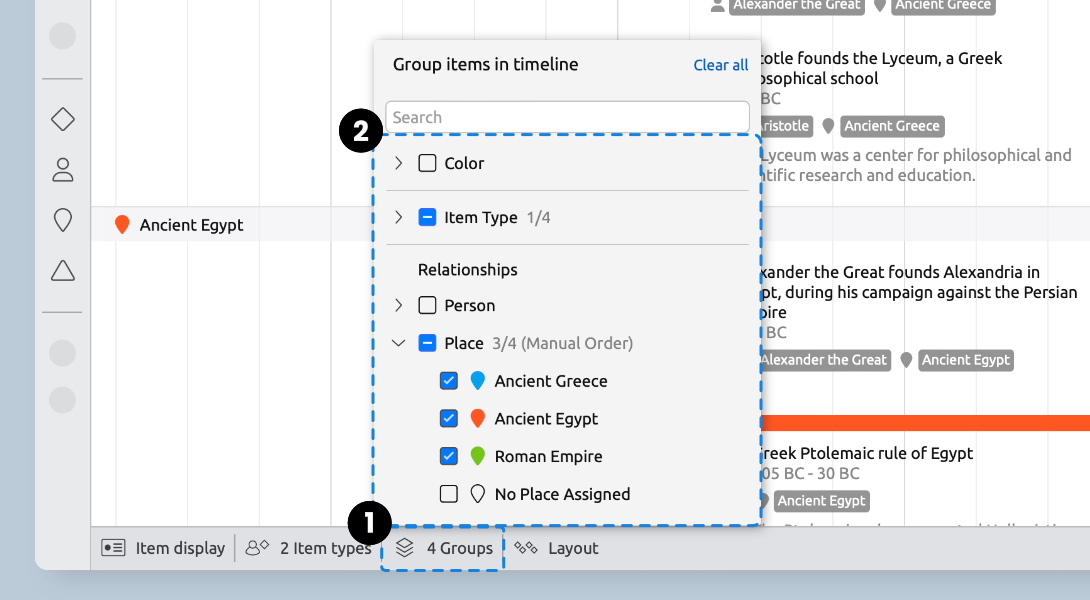
- Select theGroupbutton in the footer to open the Groups panel.
- Tick a checkbox to select all the options within the group, or expand the list to check each option individually.
Try Aeon Timeline free for 14 days
Get Aeon Timeline and easily visualize and organize your project.