Custom Item Types
What are Item Types?
Timelines Are Built With Items
Items are the building blocks containing all the information in your timeline. Whenever you create a new event, you are creating an item.
If you create a person to participate in an event, or a location to host it, you are also creating items, but they are items of a different type.
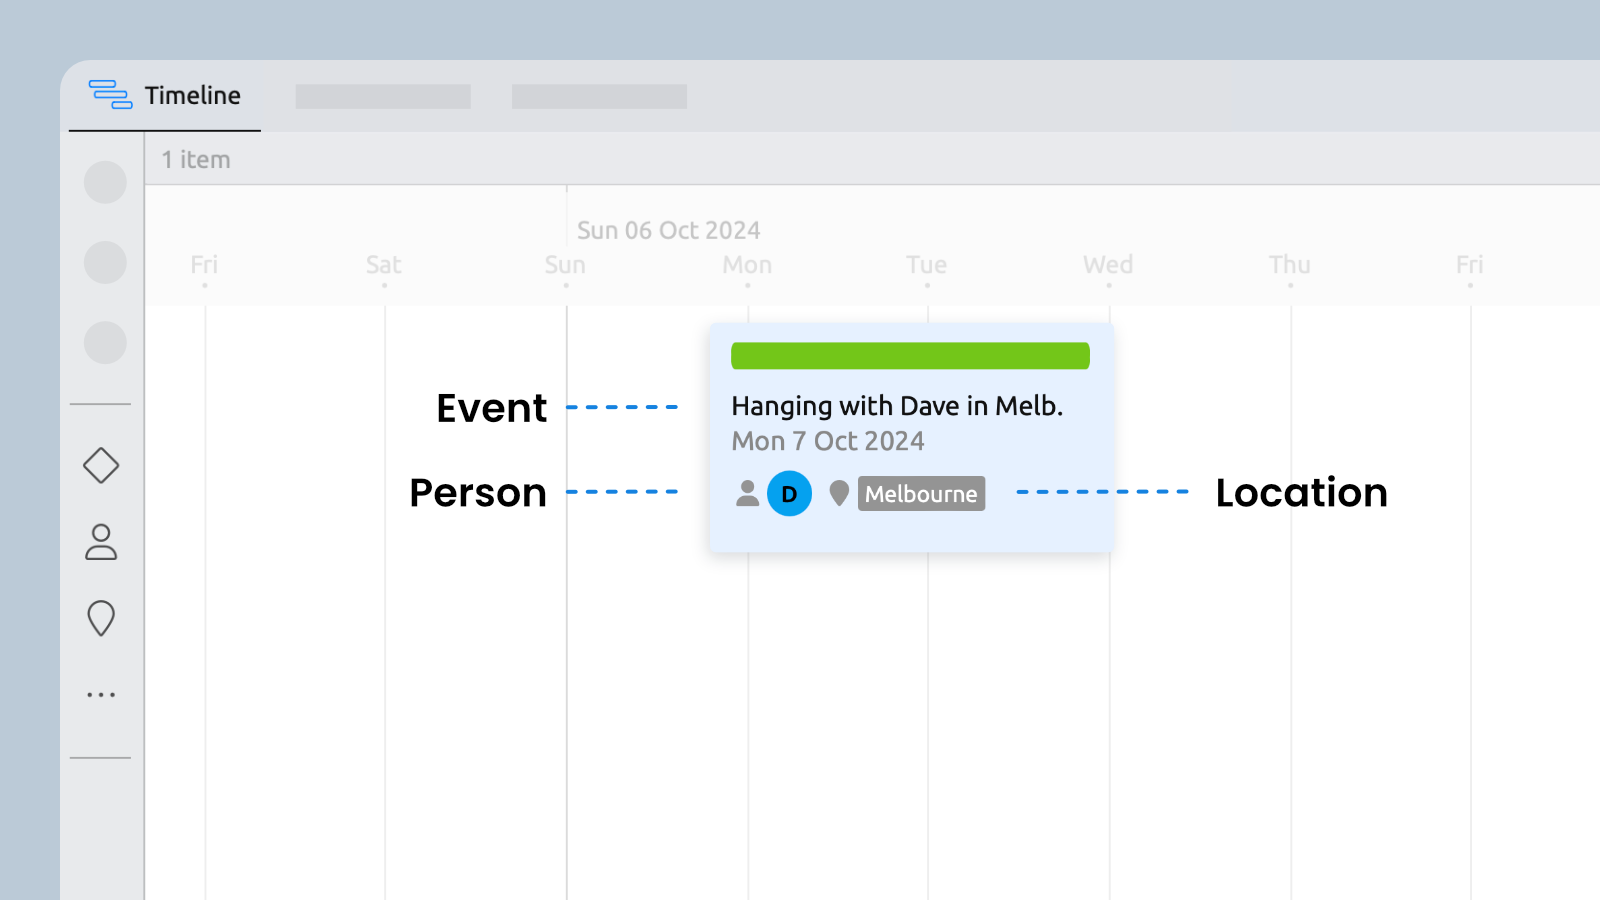
Item Types Help You Stay Organized
Item types help you manage and categorize your data. Events, people, and locations are common types that form the foundations of many timelines.
You can manage each type in its own dedicated side panel.
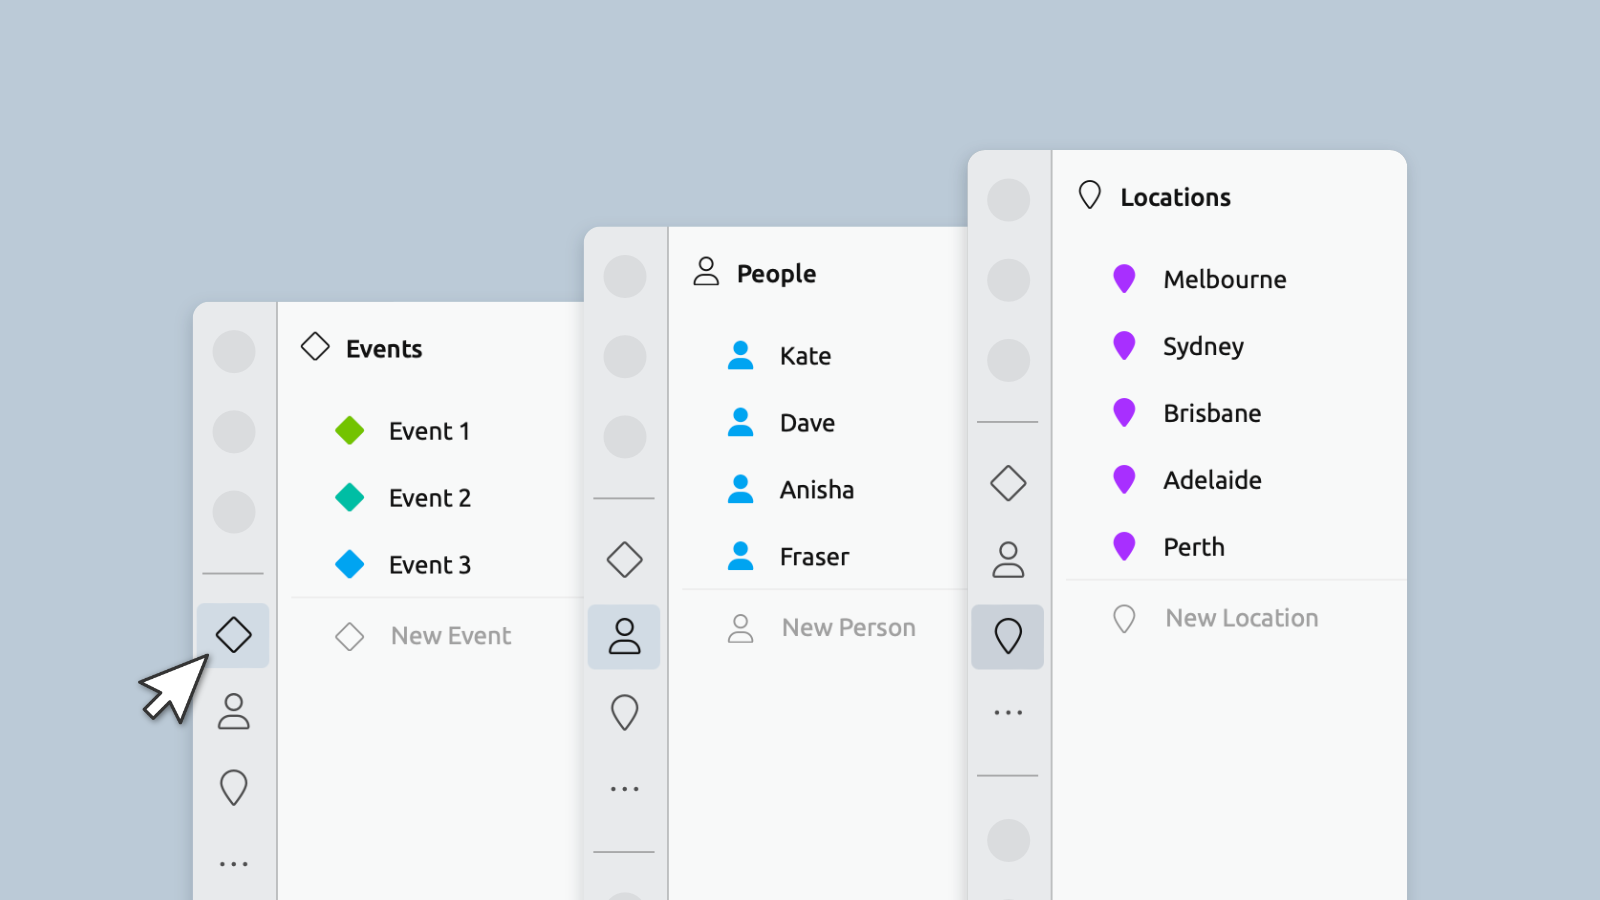
You can control which types appear on your timeline.
- Some key types define your timeline, like events or tasks.
- Others add context and can be shown as supplementary details, like people, locations, or categories.
Items of different types can store different details. For example:
- Events typically include a date.
- Tasks might have additional fields like status or budget.
- Locations could include an address field.
Find Your File's Types
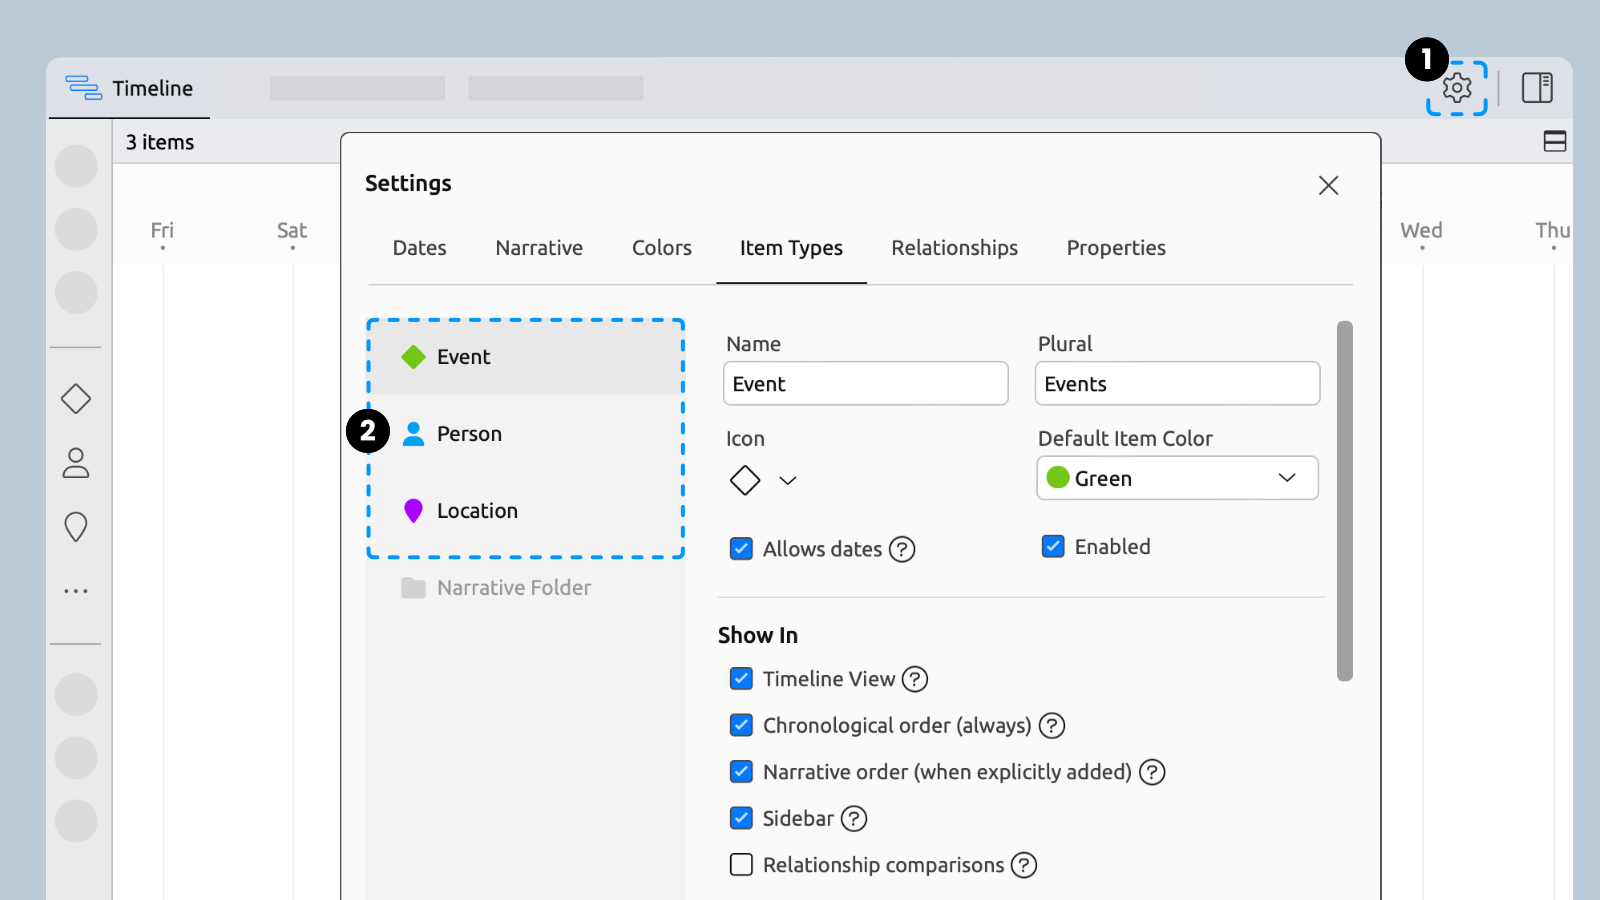
Each starting template comes with different types of items. To see what’s included in your file, check the Item Type Settings.
- OpenSettingsand select the Item Types Tab.
- You’ll find a list of all available item types on the left.
Change an Item’s Type
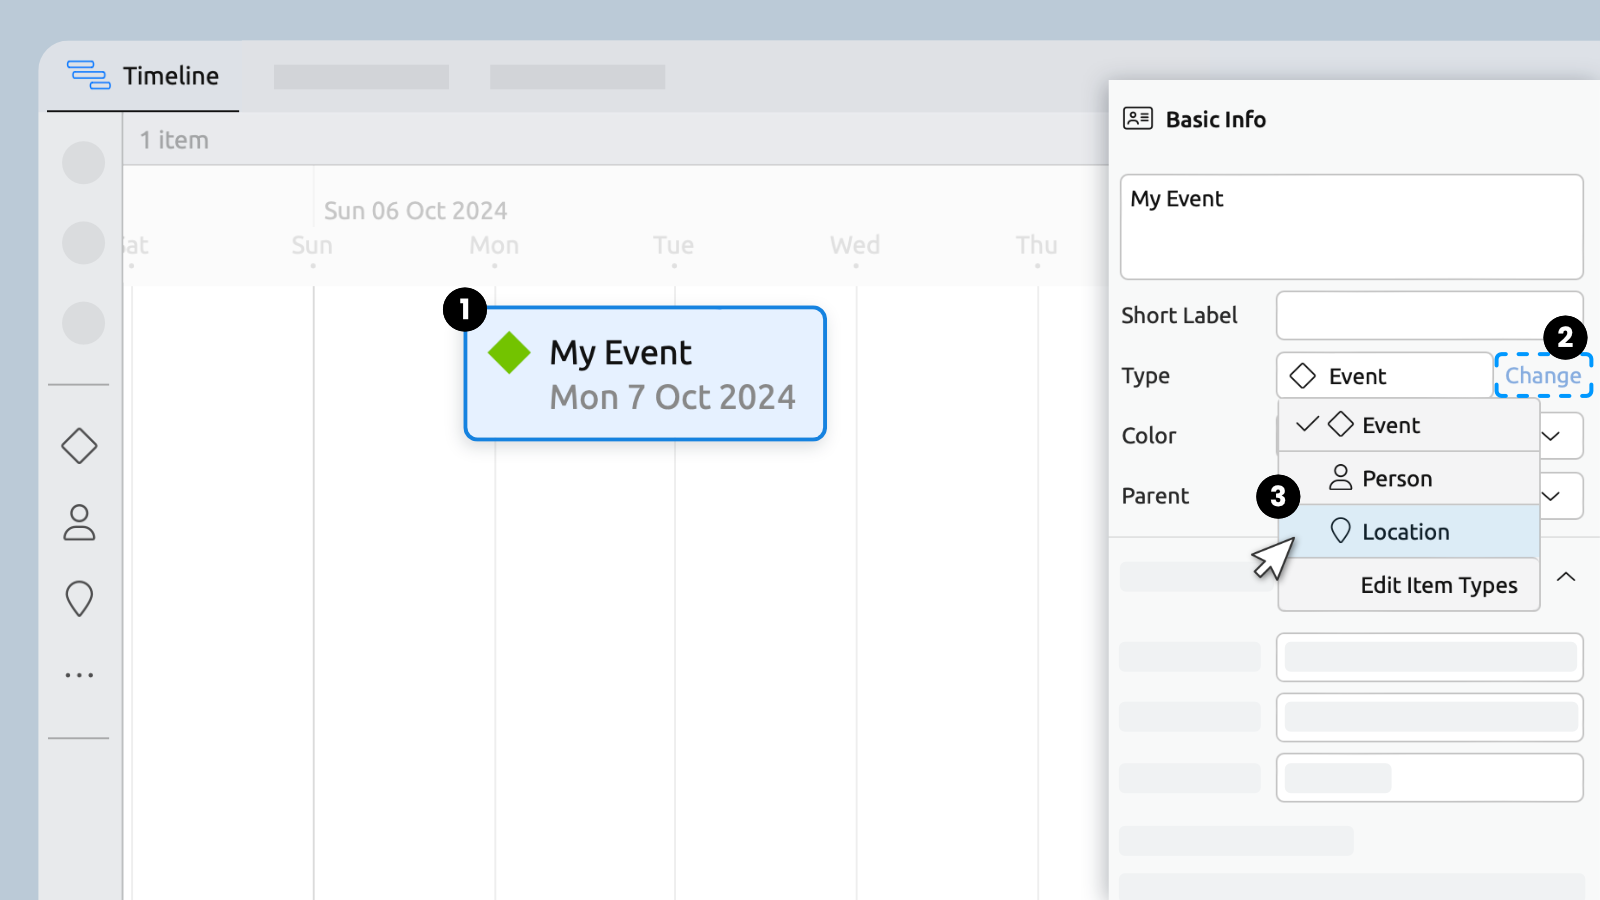
Items can be converted to other types when needed. If the new type doesn’t include all the same fields as the original, you’ll get an alert to review the details before confirming.
- Select the item to bring up the Inspector.
- In the Type section, click Change.
- Select an option from the list.
Set Up Relationships
Creating relationships lets you share information with other types of items in your file.
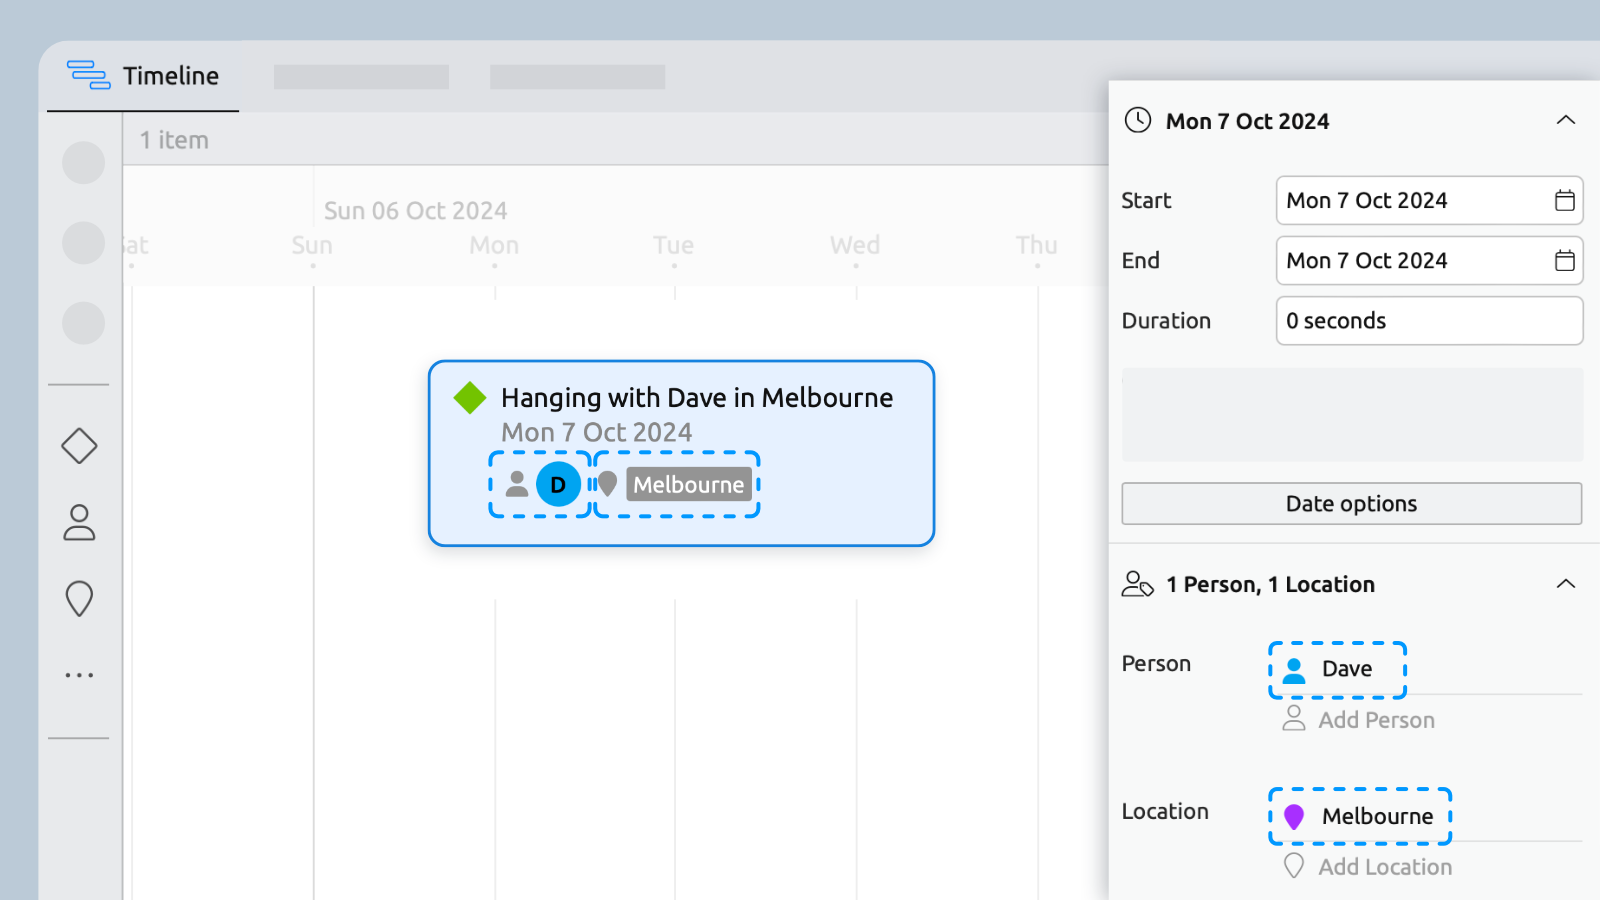
The example below features an event with a person and a location assigned. You can set these relationships in the Inspector, and they’ll show up on the event card in the timeline.
Create a Relationship Type
Creating new relationships between items takes just a few steps. The next example uses the types included in the General template to connect people with locations, making it easy to keep track of where everyone in the file is based.

- OpenSettings.
- Select the Relationships tab.
- Enter a Label to describe the relationship.
We’ll be using it to show a person’s Hometown. - Under Item Types with a field for this relationship, select the type you want to link from.
We’ve selected Person to give every person in the file a field to enter their Hometown. - In the Allowed item types section, select the type you want the field to link to.
For this one, it will be Location, so that so the Hometown field lets us pick a Location. - Make sure the Always show in inspector box is checked so that the field will be visible, even when it’s empty.
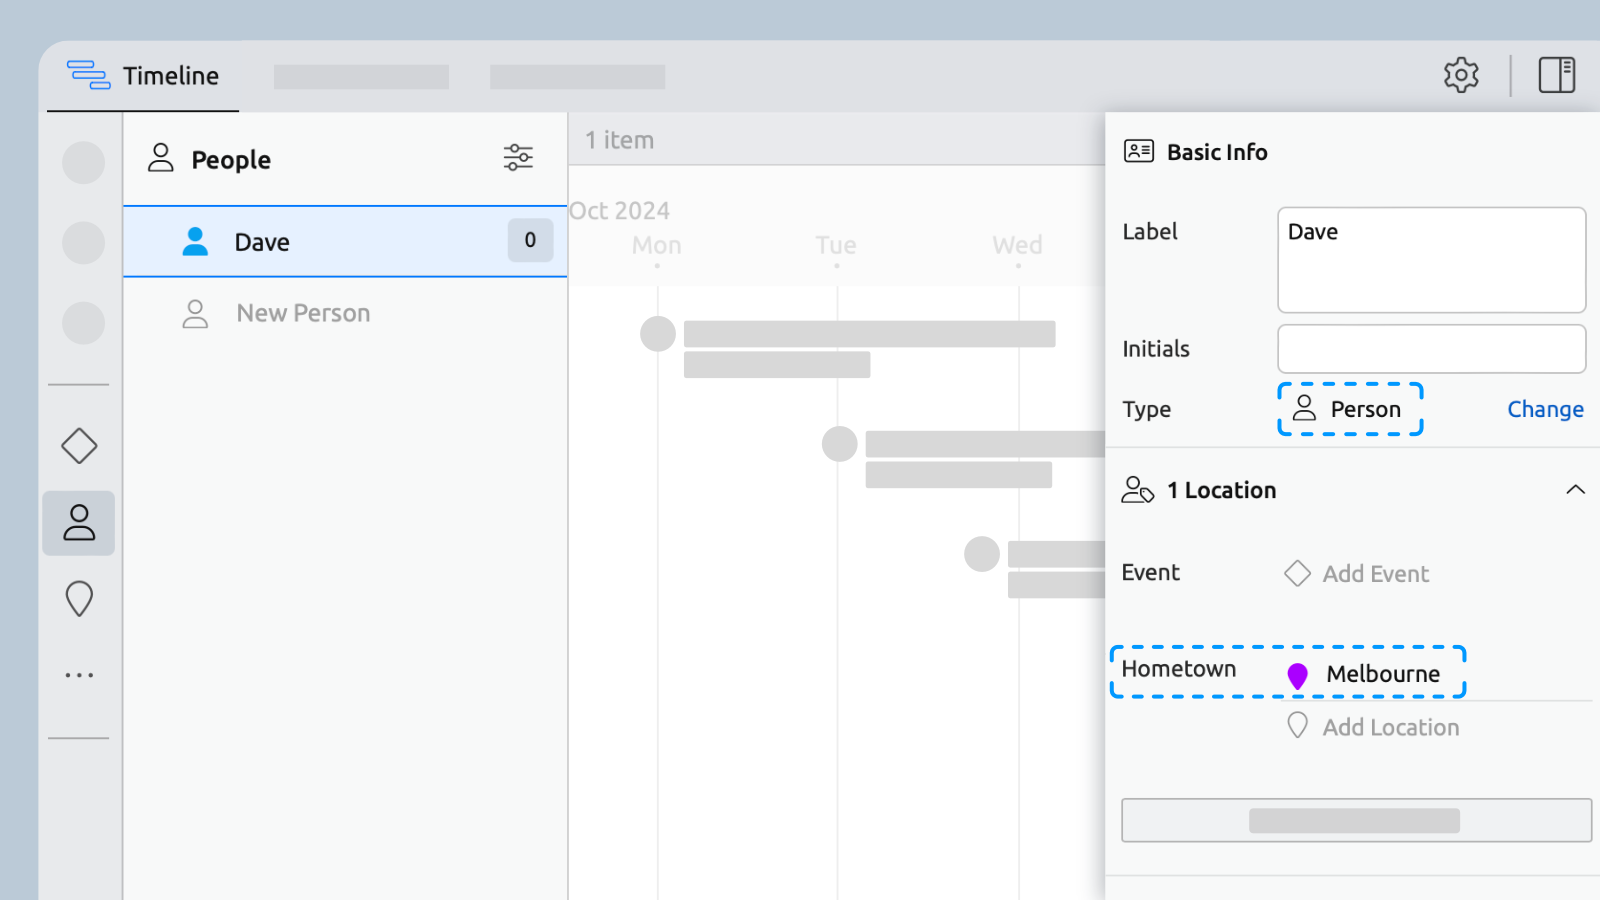
Now, when viewing a person in the Inspector, you can assign them with a Hometown.
Showing Both Sides of a Relationship
You can also configure it to work the other way, where viewing a location shows who lives there and lets you add new people.
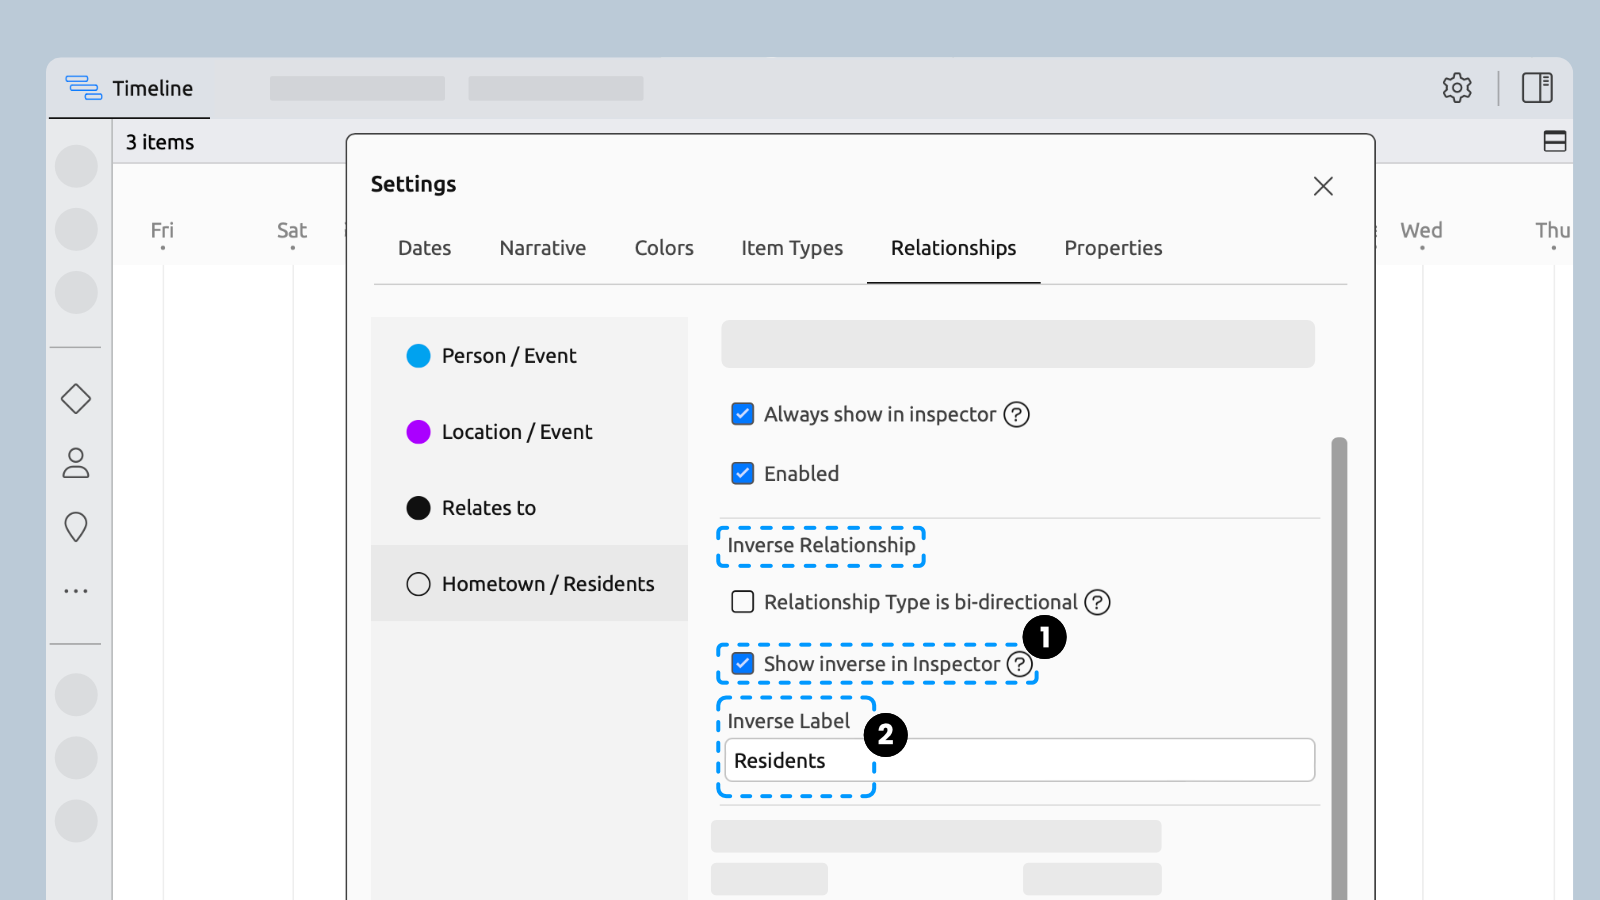
- Select Show Inverse.
- Under Inverse Label, enter a label to describe how people might be related to a location.
(In this example, Residents feels like a good fit.)
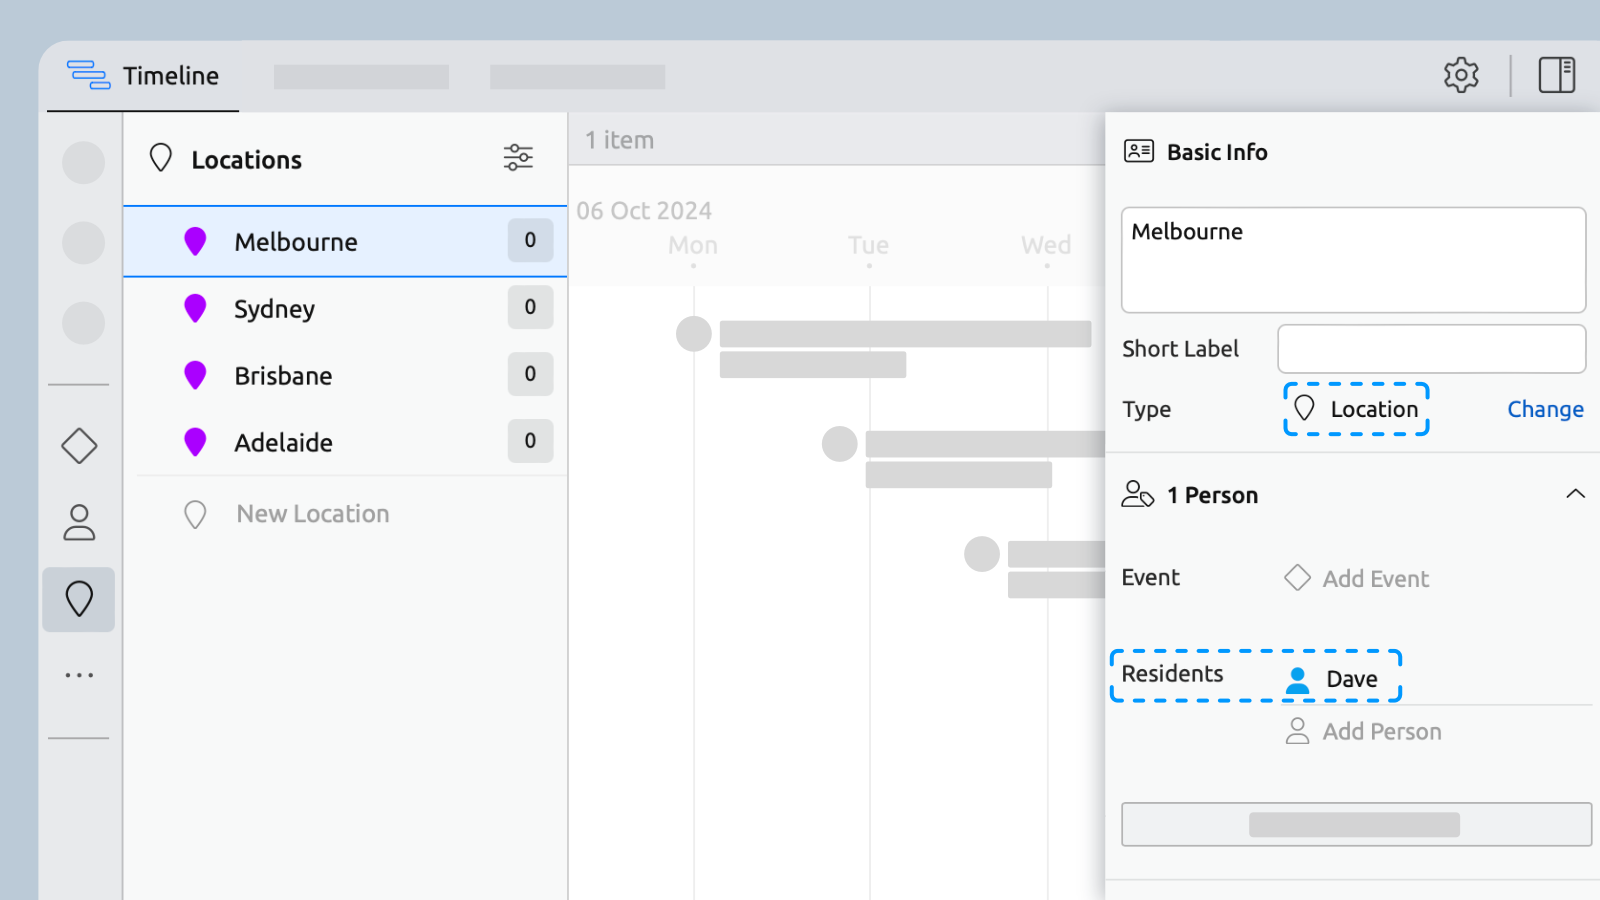
Now, when selecting a location, you can see a list of its residents.
Customizing Item Types
Tweak the display settings, control nesting behavior, and more.
Set the Name or Icon
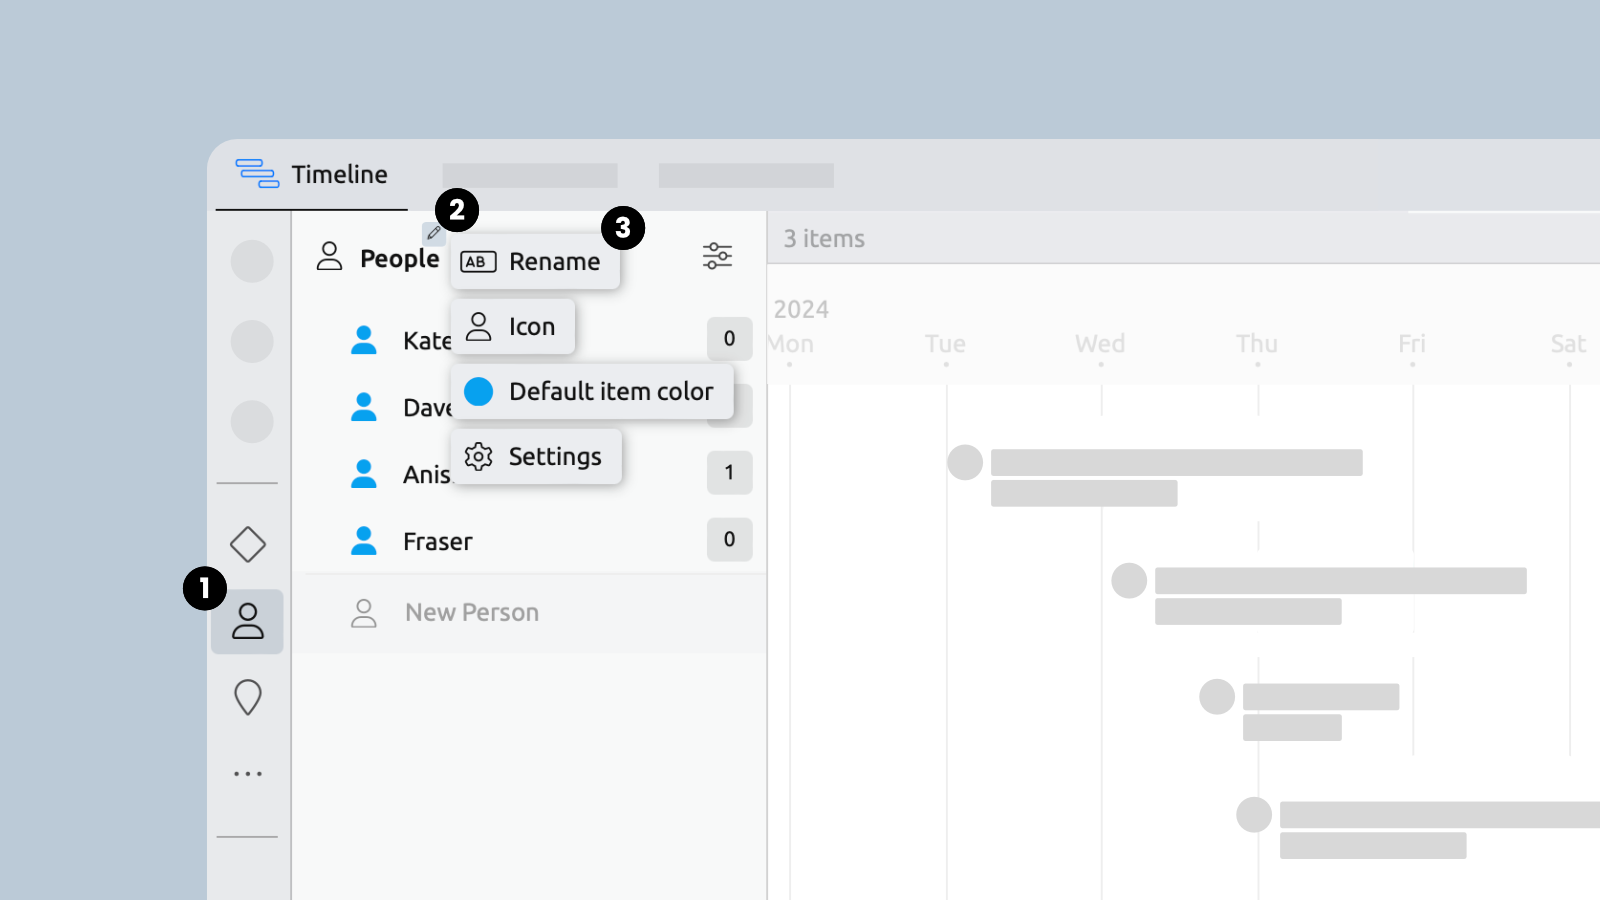
Use the edit menu to adjust the basic appearance of any type listed in the Sidebar.
- Select the Item Type in the Sidebar.
- Hover over the name to reveal theEditicon.
- Use the edit menu to change the name, icon, or default item color.
Show in Views
Choose where each type can be displayed.
- OpenSettings.
- Select the Item Types tab.
- Select an Item Type.
- Select from the Show In options to choose where an Item Type is displayed.
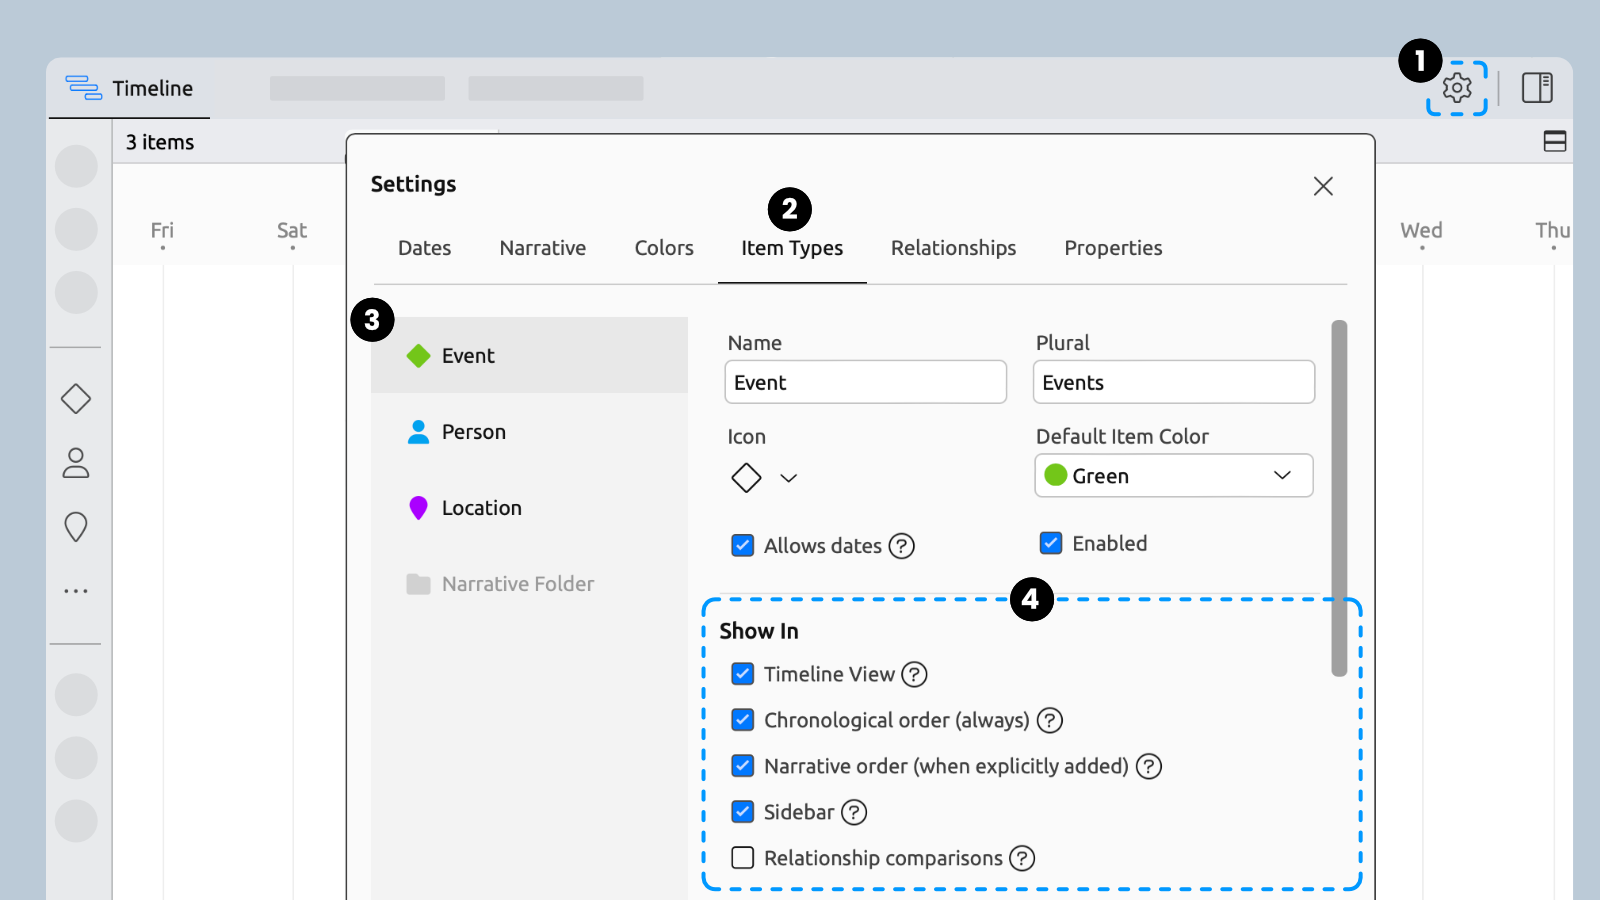
Timeline View: Shows items with dates appear on the timeline, alongside events and tasks. Select this option to visualize the lifespans of people, or the founding (or destruction) of locations on your timeline.
Chronological Order: Allows for items to be sorted from first to last based on their dates. Every item of the selected type will be included in Spreadsheet, Relationship, and Subway views.
Narrative Order: Select this if you want to be able to add certain types of items to the Narrative and Outline views.
Sidebar: Turn this on for quick access to the selected item type in the Sidebar.
Relationship Comparisons: Allows items of this type to be chosen as Timeline view groups, Relationship view columns, and Subway tracks.
Allowed Parent Types
Choose what each type can be nested under.
- OpenSettings.
- Select the Item Types tab.
- Select an Item Type.
- Select from the Allowed Parent Type options to choose what items of the selected type can be nested under.
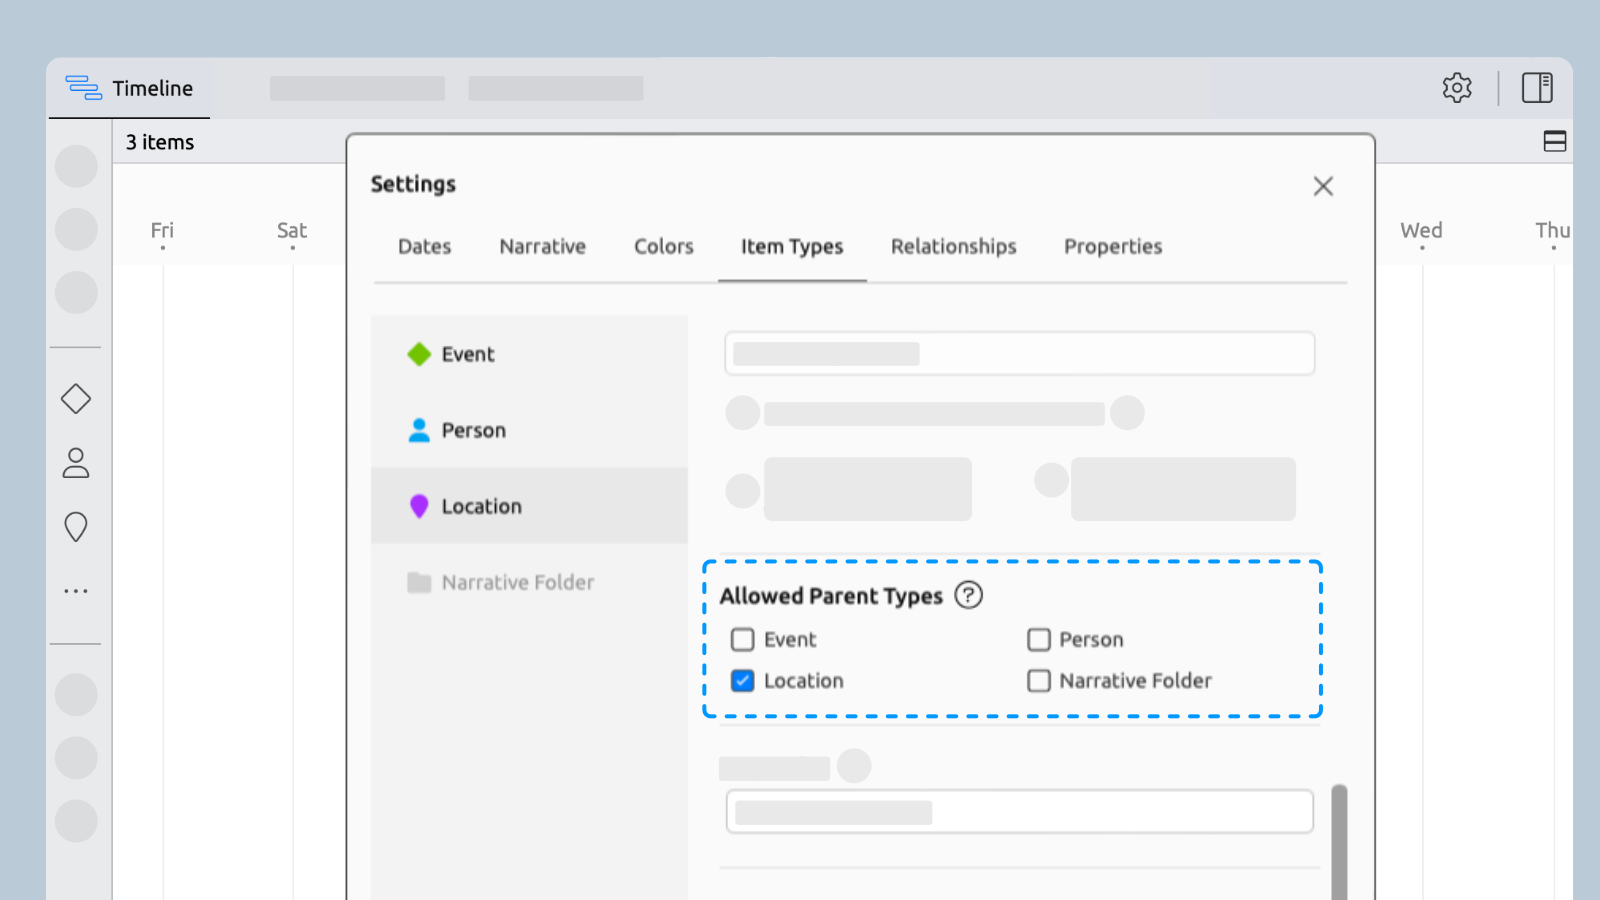
The image above is for the Location item type and shows that a location can be nested within another location. You might use this to show that a city belongs within a country, or to create a point of interest inside the city.
Nesting is also useful on other types of items to show:
- A subtask within a task
- A person within a team
Creating Custom Properties
Every item type is fully customizable, letting you add fields for text, numbers, checkboxes, and more.
You can create new fields for things like tracking publication info for citations, adding details to your characters, or marking tasks as completed.
Add Text or Numerical Fields
Custom fields let you keep input things like task budgets, city populations, character descriptions, or publication information.
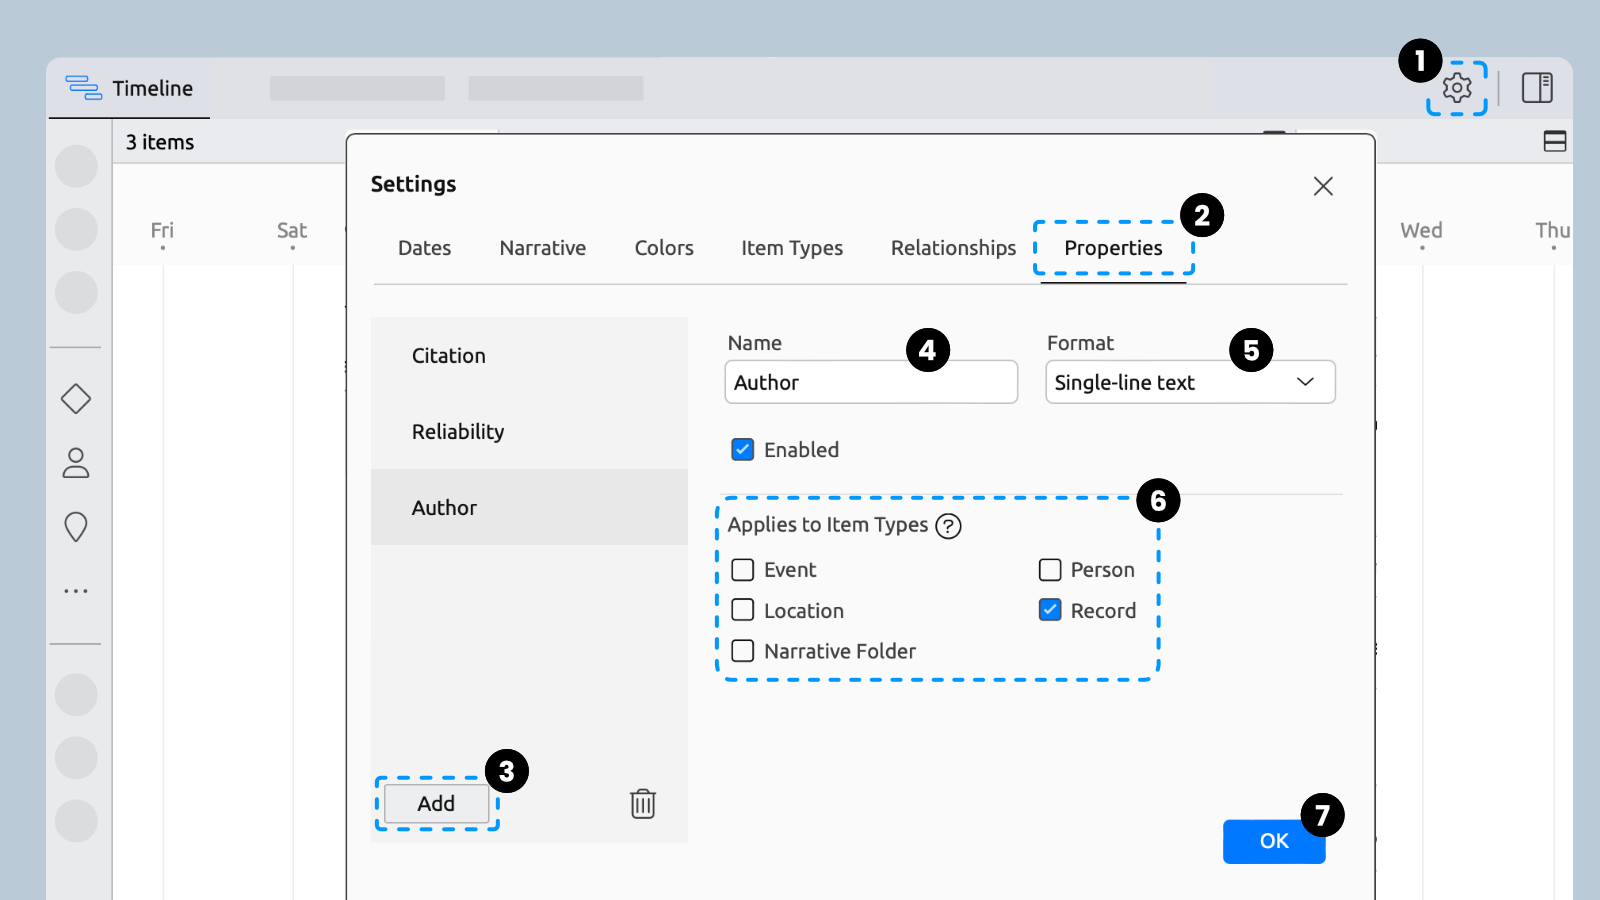
The example below shows how you can create a new field to capture the name of an author of a record.
- OpenSettings.
- Select the Properties tab.
- Click the Add button.
- Enter a label for the new property.
- Under Format, choose Single-line text or Integer number.
- Choose which item type should contain the new property.
- Click OK.
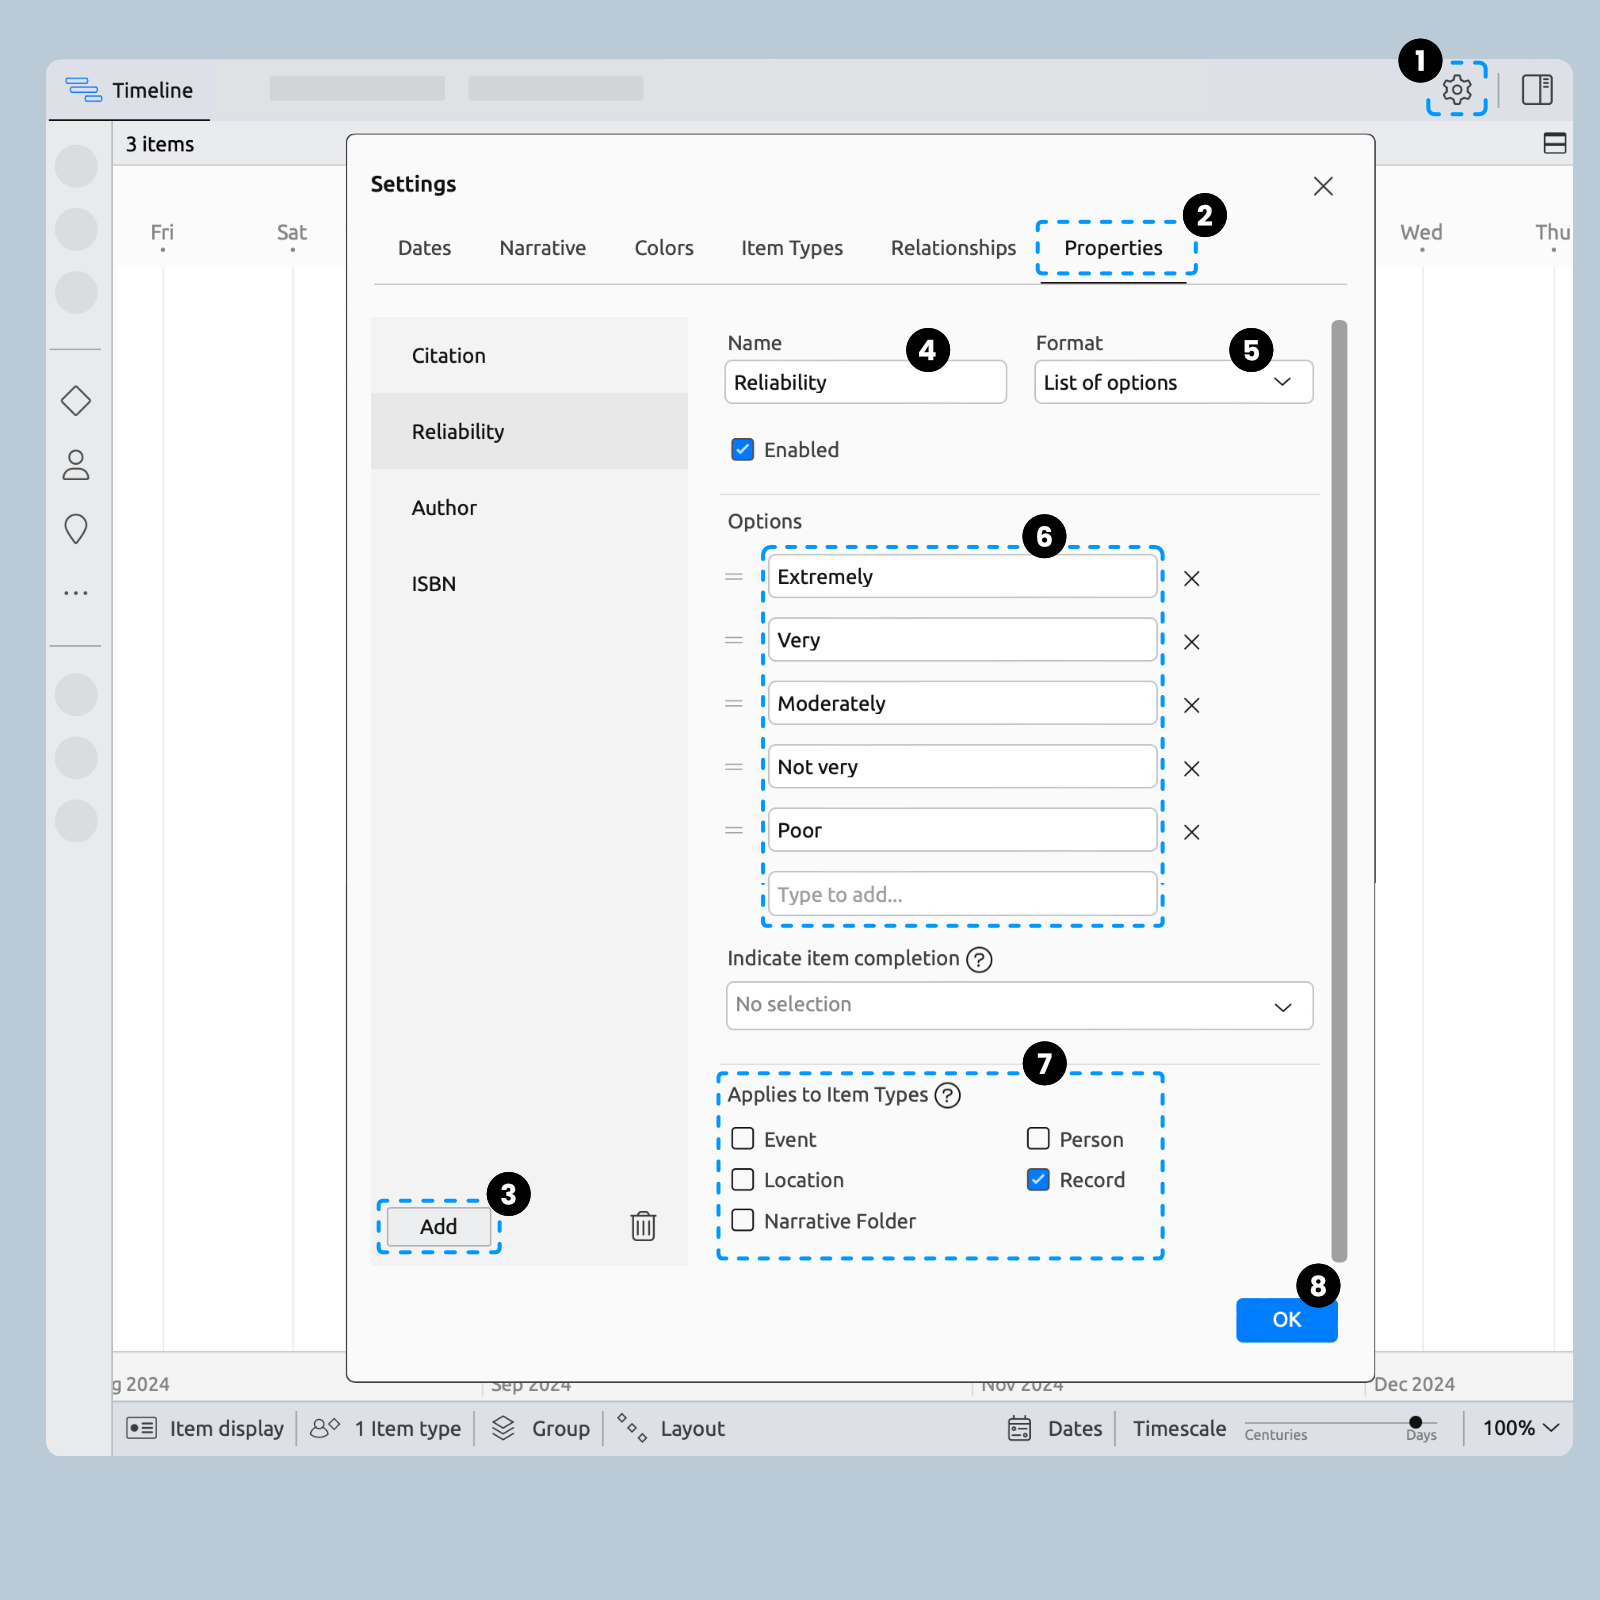
Add a List of Options
Create a list of options to easily track things like status, rating, or category.
- OpenSettings.
- Select the Properties tab.
- Click the Add button.
- Enter a label for the new property.
- Under Format, choose List of options.
- Create as many options as you need.
- Choose which item type it should apply to.
- Click OK.
Create an Item Type
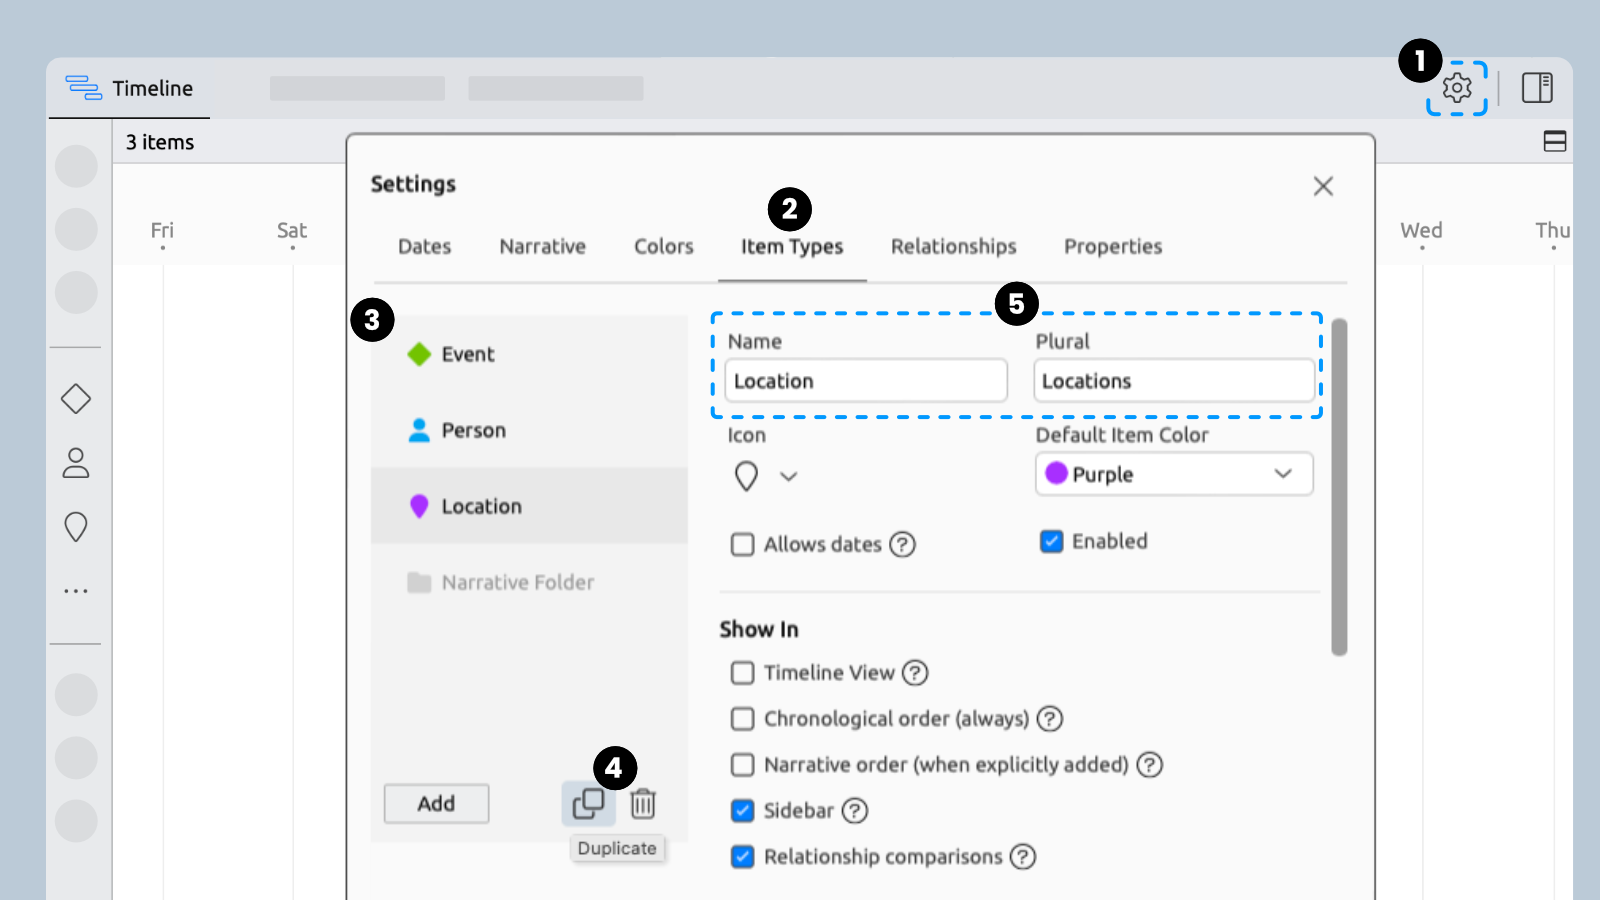
Make a Duplicate
The original item types in each template are a good starting point, but as your timeline grows, you might want more ways to organize your data.
Duplicating an existing type copies all of the settings of the original, but doesn’t copy over any of its items.
- OpenSettings.
- Select the Item Types tab.
- Select the one you’d like to copy.
- Click Duplicate.
- Change the Name and Plural fields to something unique.
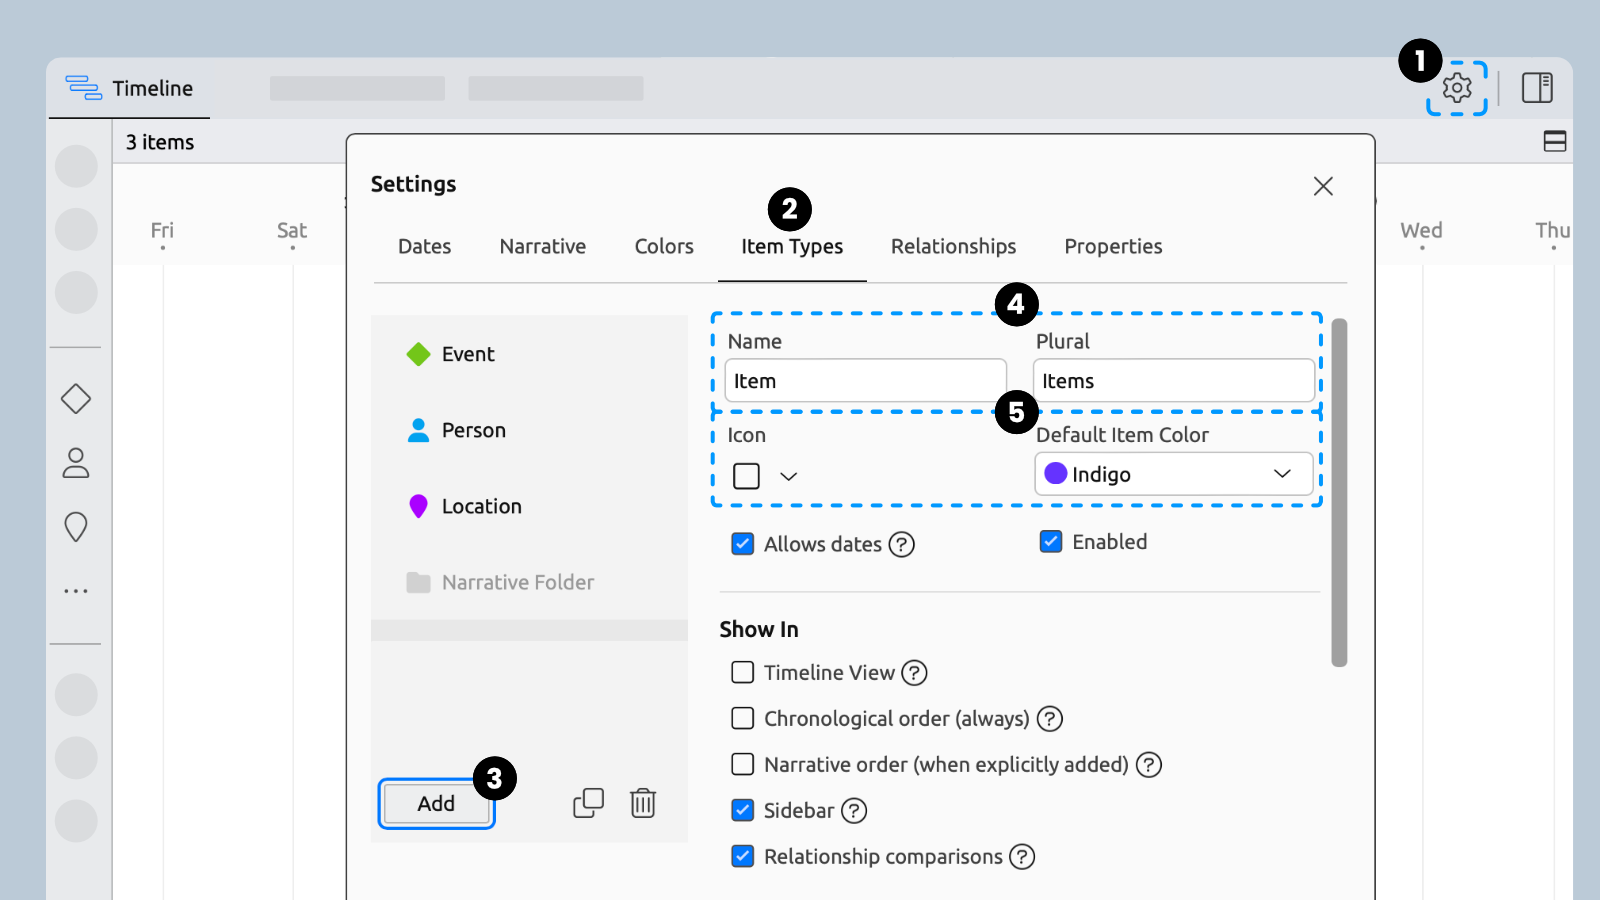
Create a New Type
Sometimes, you’ll want to create a unique type of item, without carrying over any settings from the original.
- OpenSettings.
- Select the Item Types tab.
- Click Add.
- Enter a name and a plural for the new item type.
- Select an icon and a color to help you identify it.
Try Aeon Timeline free for 14 days
Get Aeon Timeline and easily visualize and organize your project.

