Create a Novel Outline
Shape your story’s structure with the novel template.
You are viewing documentation for a previous version of Aeon Timeline, version 3.4.
See our guides for the most up-to-date information >

About The Novel Template
Whether you're exploring a fresh idea or reworking an old one, the novel template gives you the tools to develop your story's structure, backstory, and narrative flow.
The template comes with narrative folders for the beginning, middle, and end, plus an extra folder for unplaced events. We’ll start by grouping events into these folders, and then reorganize them into chapters as we add characters and backstory.
If you are new to Aeon Timeline and unfamiliar with anything covered here, check out our Quickstart Guide for a walkthrough of the interface and common functions.
The Narrative View
The Narrative view is a board with rearrangeable cards that represent the building blocks of your story. The Outline view displays the same information presented in a table format.
Cards can be either:
- Events:The scenes in your story
- Narrative Folders:Folders for organizing events into chapters or acts

Outline Your Story
We’ll start with our events roughly sorted into acts with the included folders, then refine the structure in a later step.
Creating Events and Folders

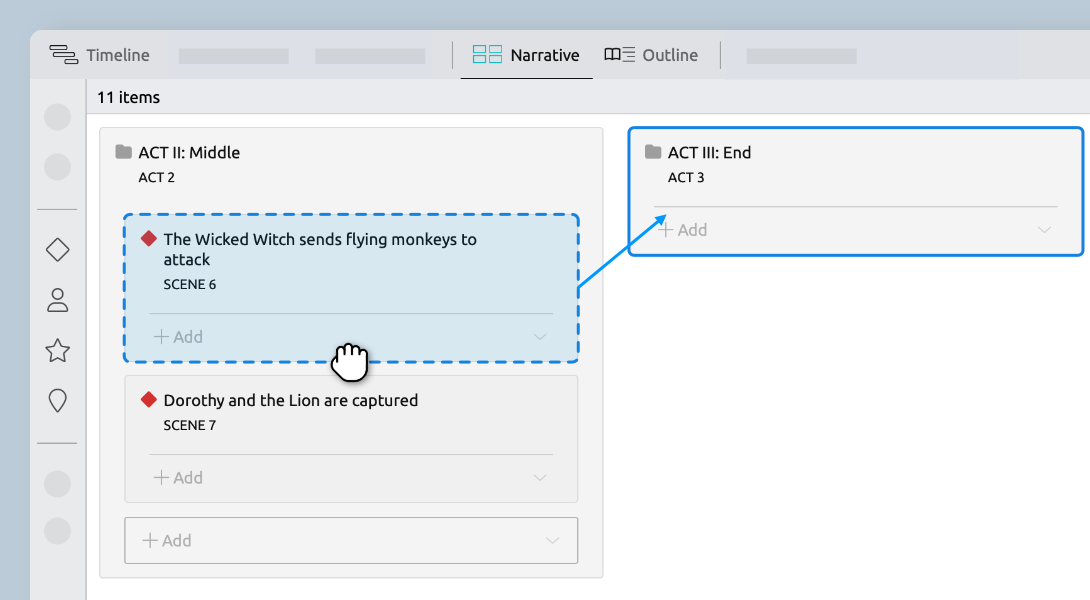
Arrange by Dragging
Restructuring your narrative is as simple as dragging and dropping.
You can add new folders and nest events to go well beyond the basic three-act structure we started with.
The Unplaced Scenes folder is useful for storing scene ideas you want to include, but haven’t decided where to place yet.
Assigning Characters
Add your characters and connect them to the events they’re involved in.
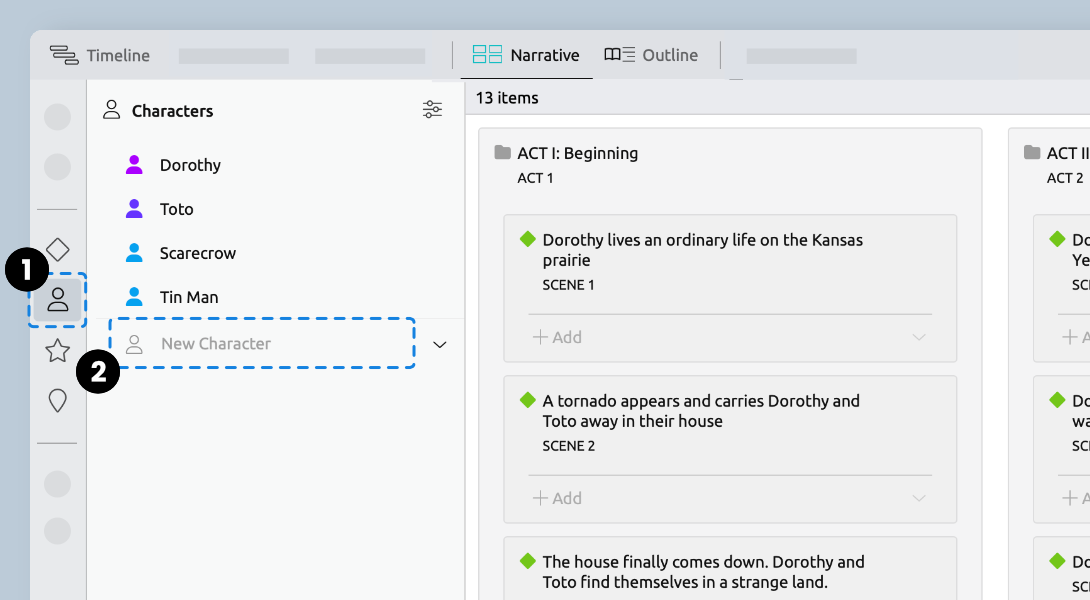
Creating Characters
- Click theCharactericon in the sidebar to open the Characters panel.
- Select New Character to list any characters you are ready to add.
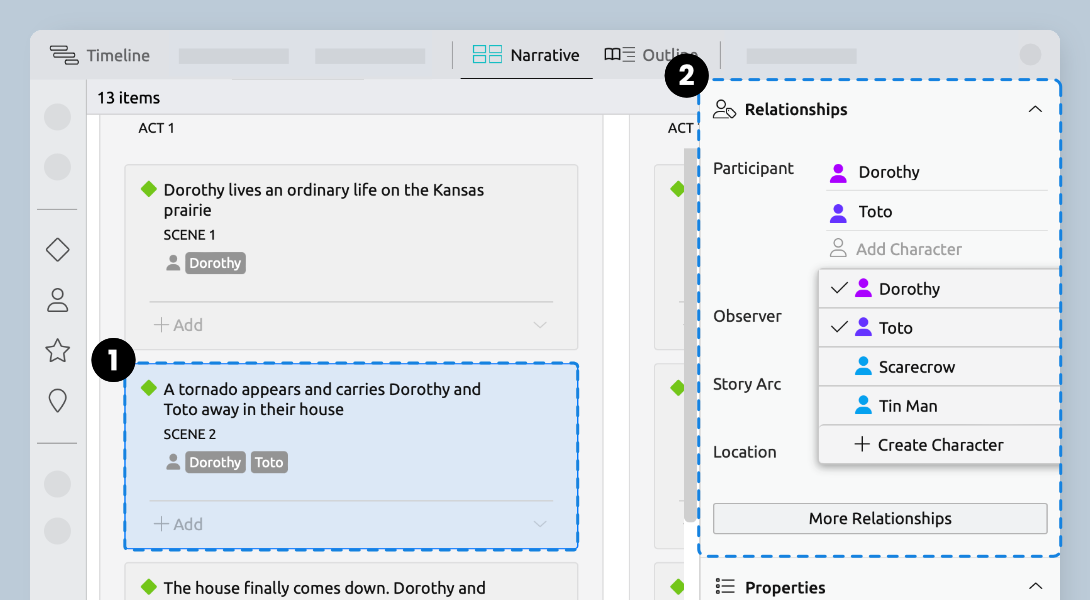
Assigning Characters to Events
- Select an event in the narrative to open the Inspector.
- Use theRelationshipspanel to assign a character to the event.
Event Dates & Durations
You can work with dates in multiple ways throughout the app. Use the Outline to enter specific dates, or set them visually on the Timeline.
Undated events won’t appear on the timeline, but they’ll always show up in the Outline view.
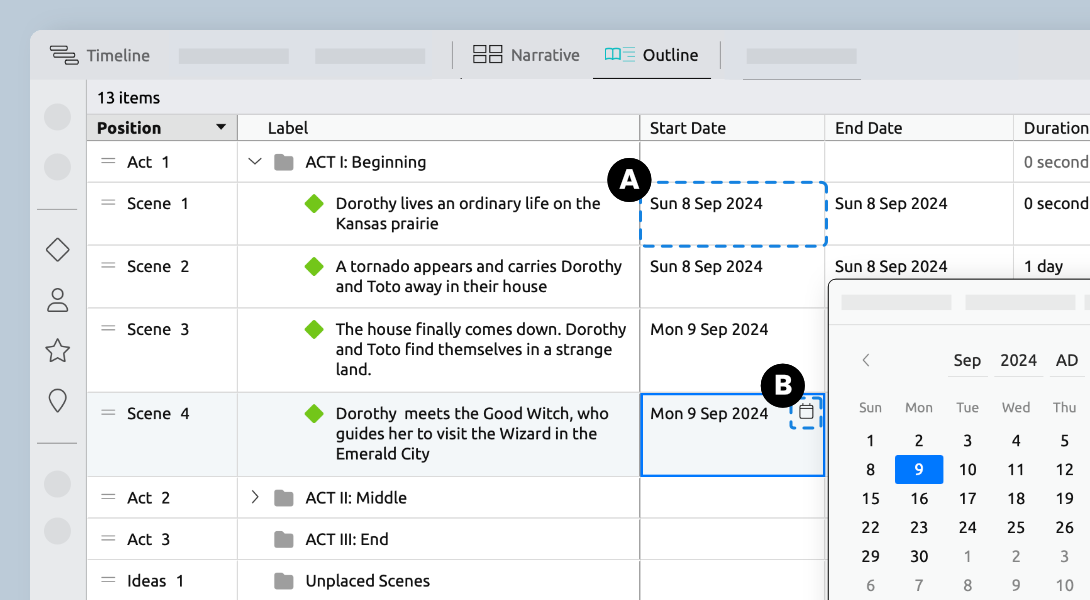
Editing Dates in the Outline View
- Click on a cell and start typing. (No need to double-click), or
- Click thecalendaricon to bring up the date picker
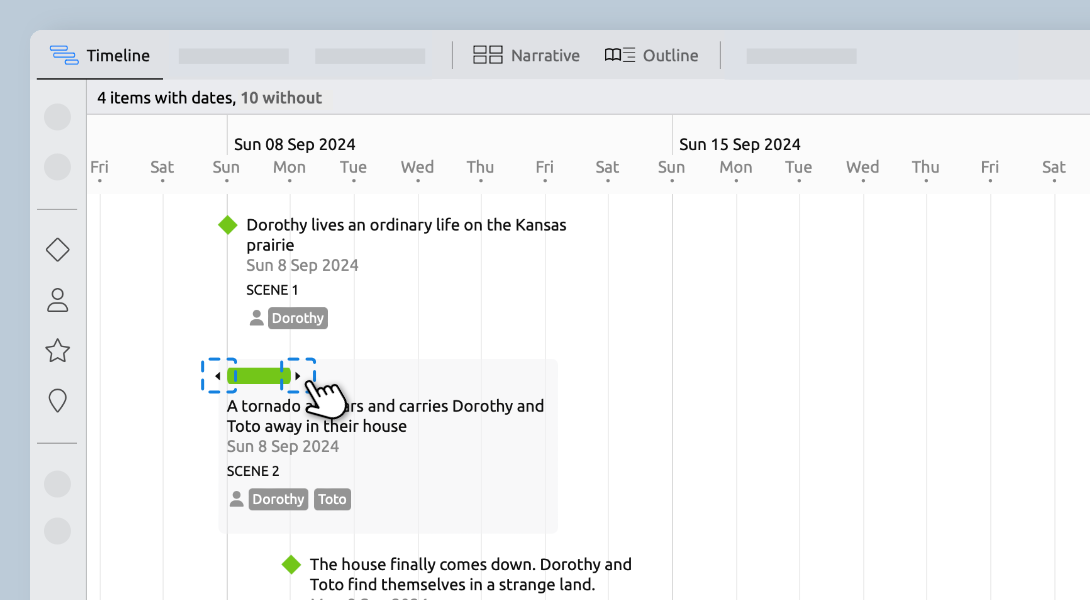
Working With Dates on the Timeline
- Select Timeline in the view selector to switch to the Timeline view.
- Open theEventspanel, then click and drag to place an event on the timeline.
Timeline Duration Adjustments
Backstory Elements
Build a detailed timeline with all your backstory and contextual events, then add only what you need into the narrative.
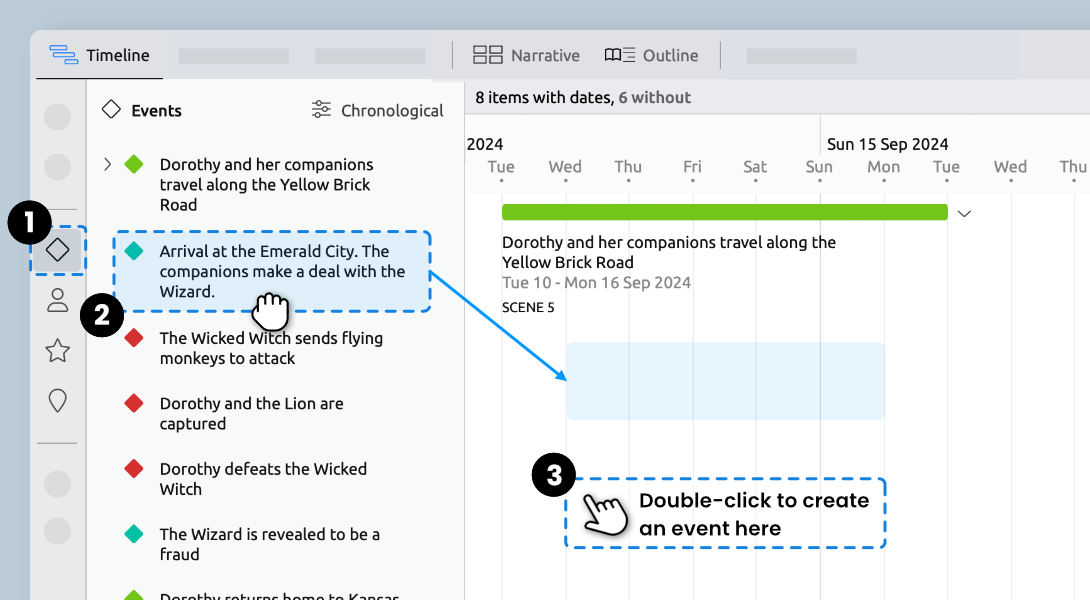
Creating Backstory Events
- In the Timeline view, click theEventicon to open the Events panel. Select New Event.
- Click and drag events from the list to place them on the timeline.
- Alternatively, double-click a blank space on the timeline to create a new event at that point.
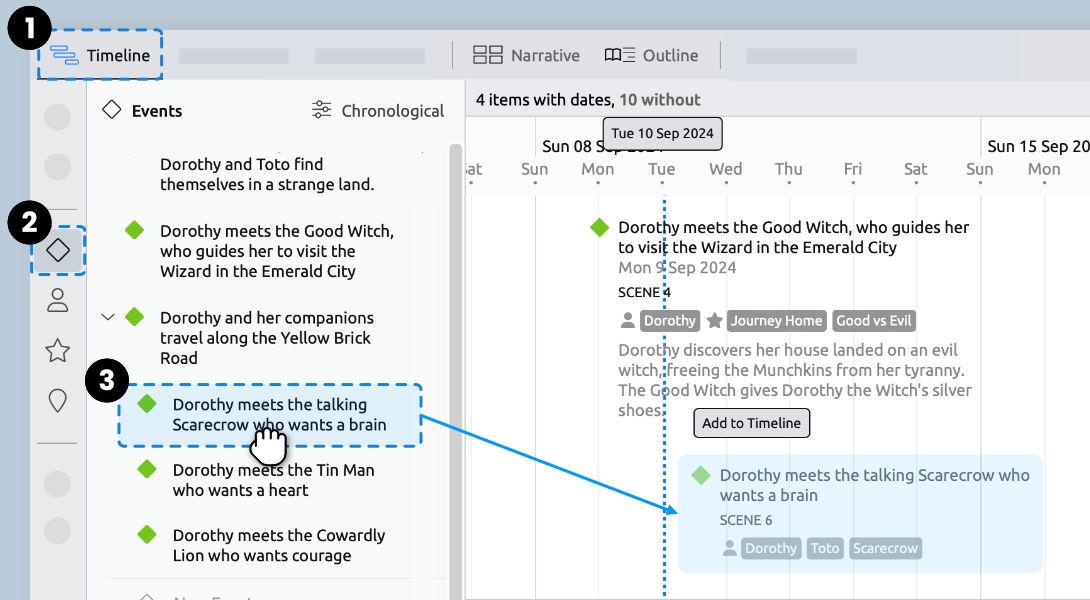
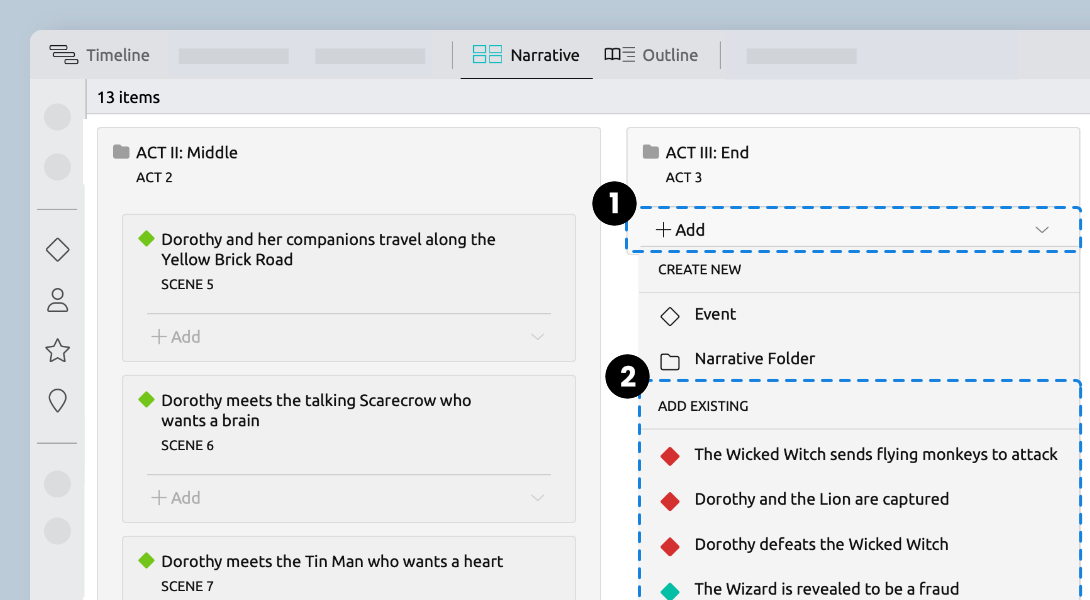
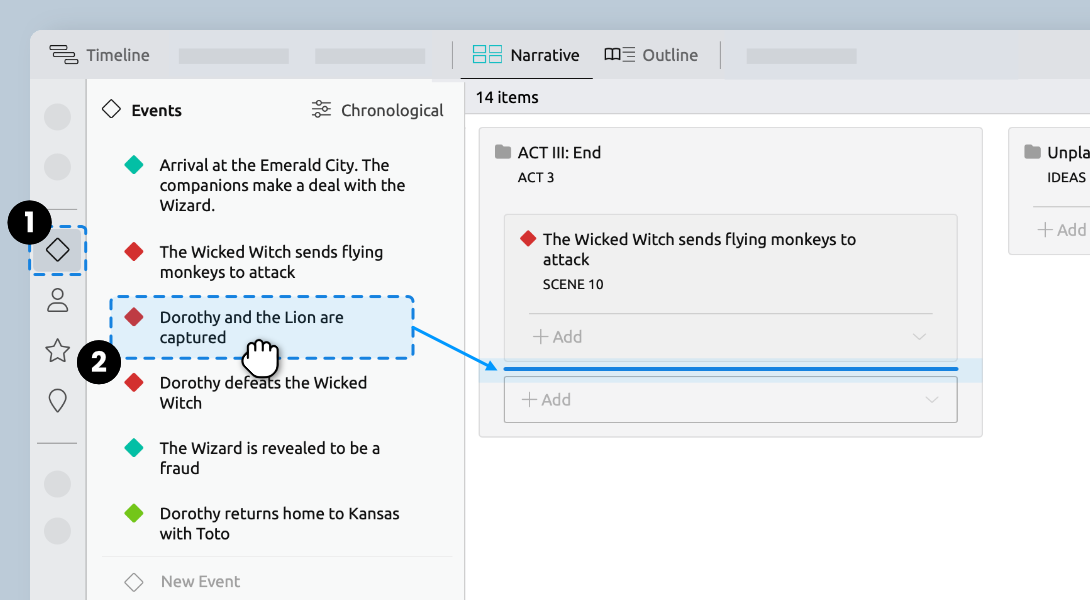
Add Events to the Narrative
- In the Narrative view, click Add where you'd like to add the event.
- Select from events not existing in the narrative.
Add Events by Dragging
- Click theEventicon in the sidebar to open the Events panel.
- Drag the event into place.
Try Aeon Timeline free for 14 days
Get Aeon Timeline and easily visualize and organize your project.