Create a Warfare Timeline
Track the history of worldwide conflict throughout the ages with the warfare template.
About the Warfare Template
The warfare template is a flexible tool for anyone interested in documenting military history. Use it to track key details like dates, locations, and participants of military events worldwide.
The template is easy to customize and add or rename elements to keep track of specific units, vehicles, equipment, commendations, awards, etc.
Getting Started
In this example, we’ll explore some battles in Western Europe during World War II. You can follow the same steps for any other area of study.
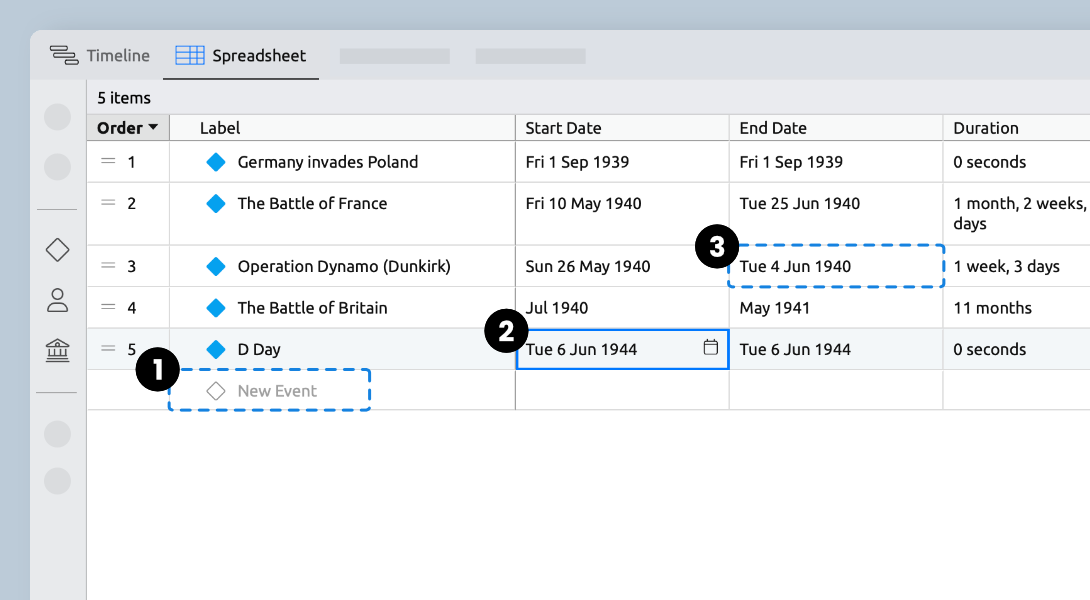
Create your First Event
- Starting in the Spreadsheet view, select New Event and type the name of your first event.
- Enter a start date to make the event display on the timeline.
- Give it an end date to see the duration.
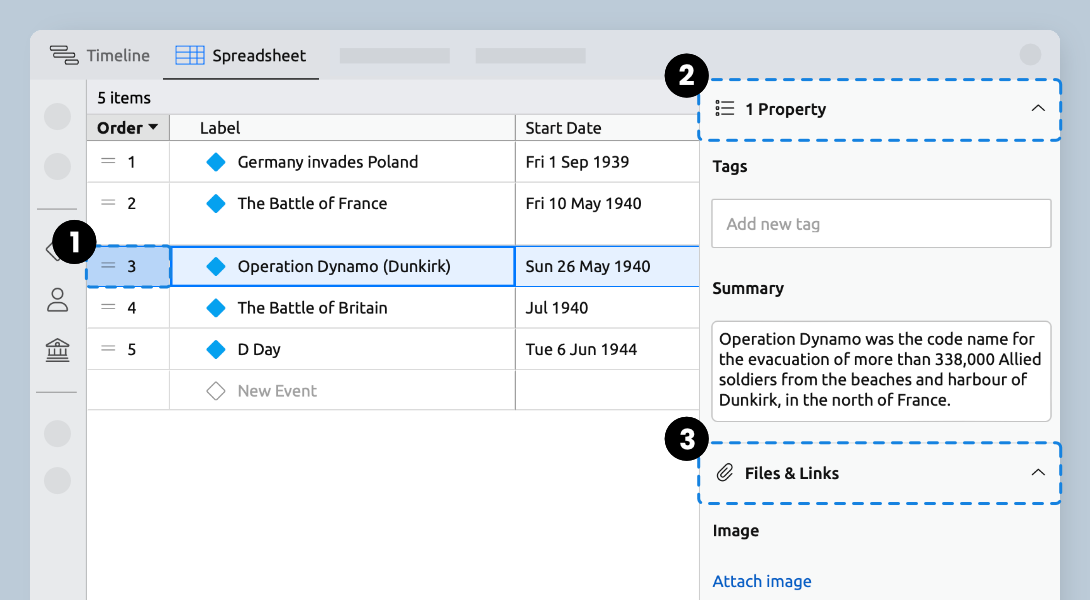
Flesh Out the Details
- Click thefirst cell in the row to select the event and bring up the Inspector.
- In theProperties panel, write a synopsis in the summary to add more detailed information.
- Add images, documents, and resources with theFiles & Links panel.
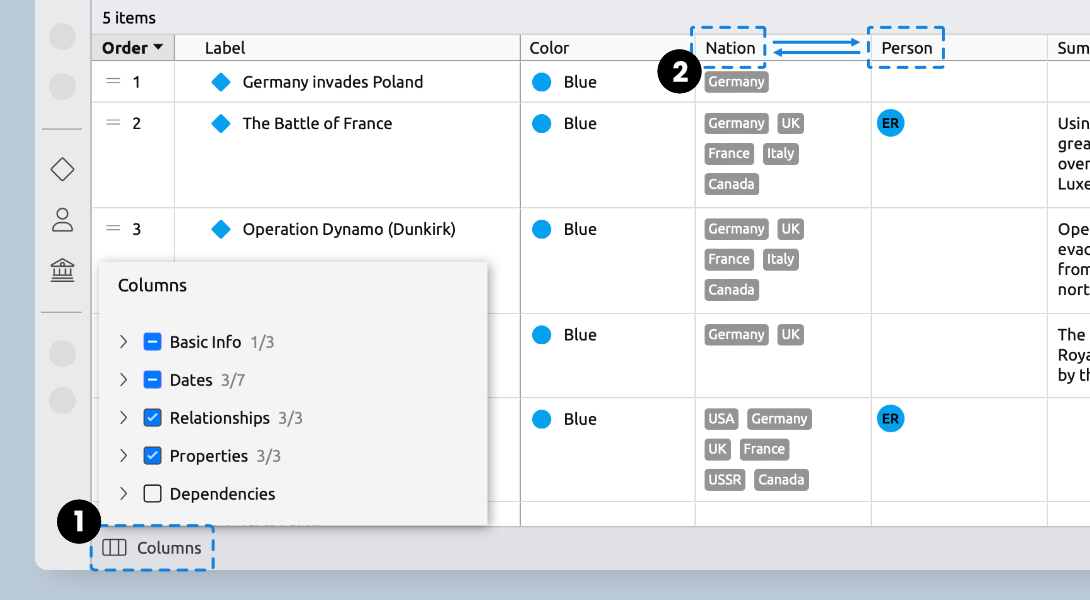
Customize Columns
- Use thecolumn selector to show the columns you need, hide the ones you don’t.
- Drag headers to reorder columns.
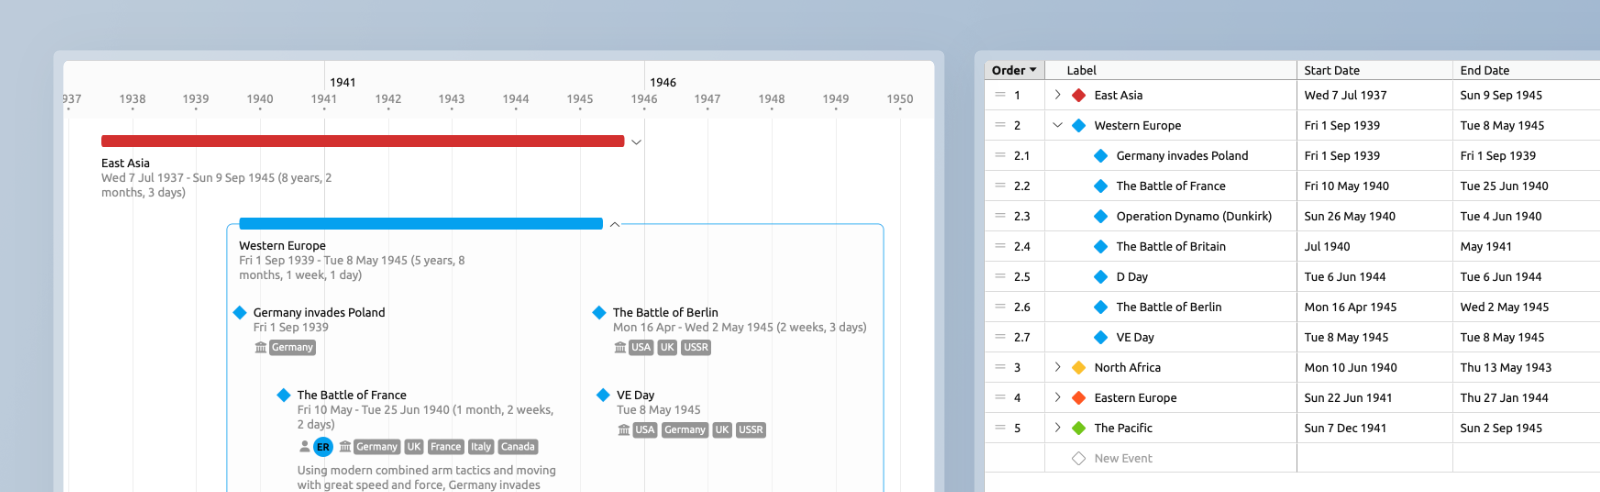
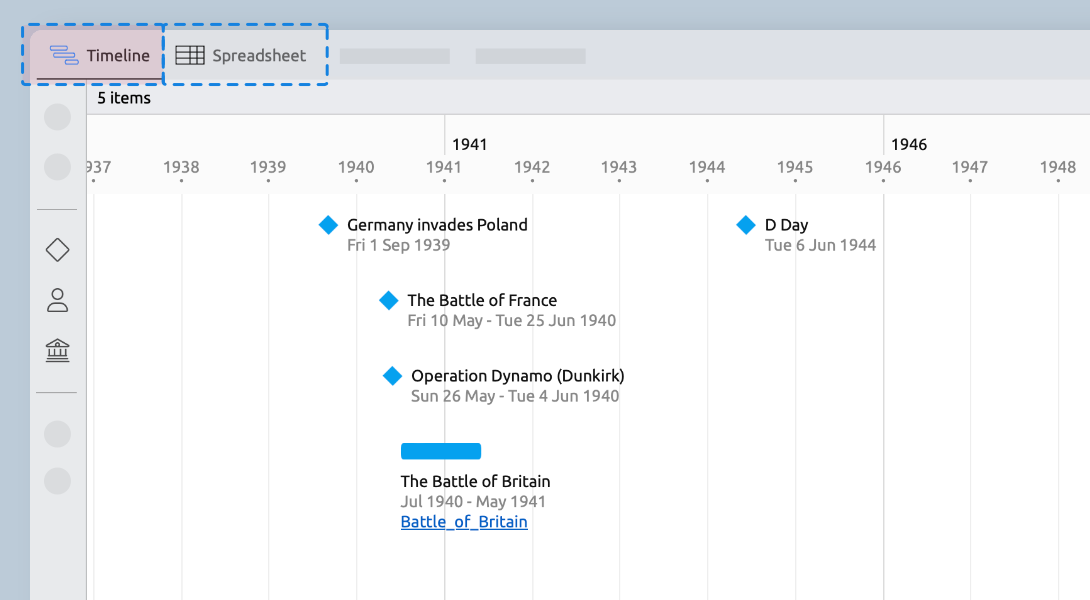
View Selection
Use the view tabs to switch between the Spreadsheet and Timeline views. The data is the same, just shown in different ways.
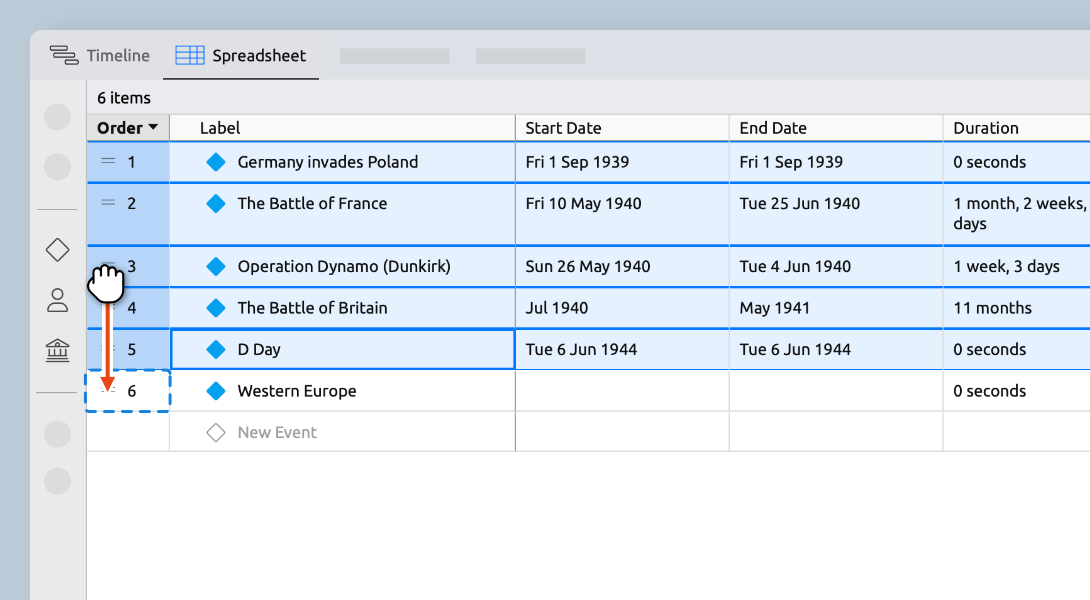
Creating Sub-Events
Nesting events is a great way to structure and organize your information. Once you’ve created a few battles, you can group them as sub-events of a more significant event—like all these battles fought on the Western Front.
Drag and Drop
- Use thehandles to drag an event onto another to nest it as its child.
- Shift-click a range and drag to nest multiple events.
Creating Nations & People
Next, create the nations and key figures involved in the battles. In this example, the people will be the commanders of each nation’s forces.
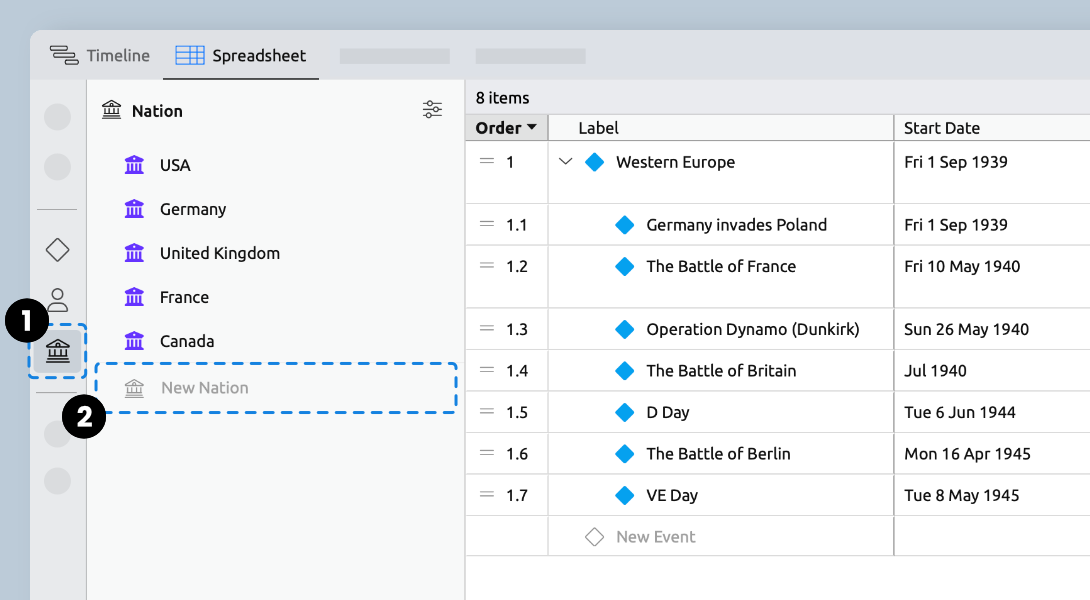
Creating Nations
- Use the sidebar to open theNationspanel.
- Click New Nation, and list the nations involved in each battle.
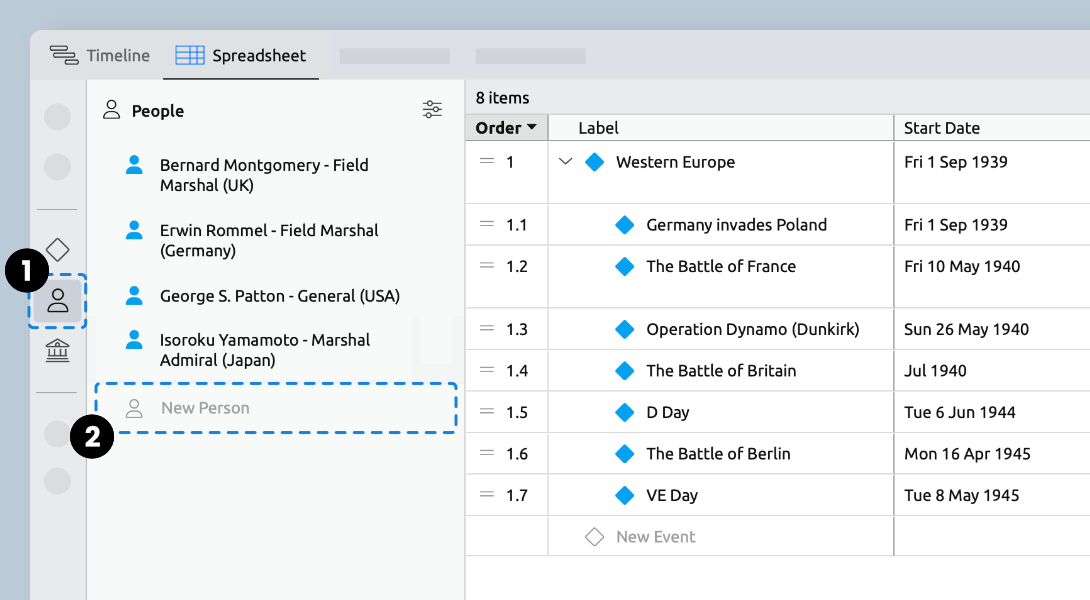
Creating Key Figures
- Open thePeople panel in the sidebar.
- Click New Person, and list the primary commanders of each nation’s forces.
Linking & Assigning Data
Once you've set up the battles, nations, and key figures, you can connect all the data to see the relationships displayed.
Linking Data in the Spreadsheet View
- Use the dropdown menus in the Nation or Person columns to link existing items with an event.
- Items can also be created and linked to events in the same step with the Create buttons.

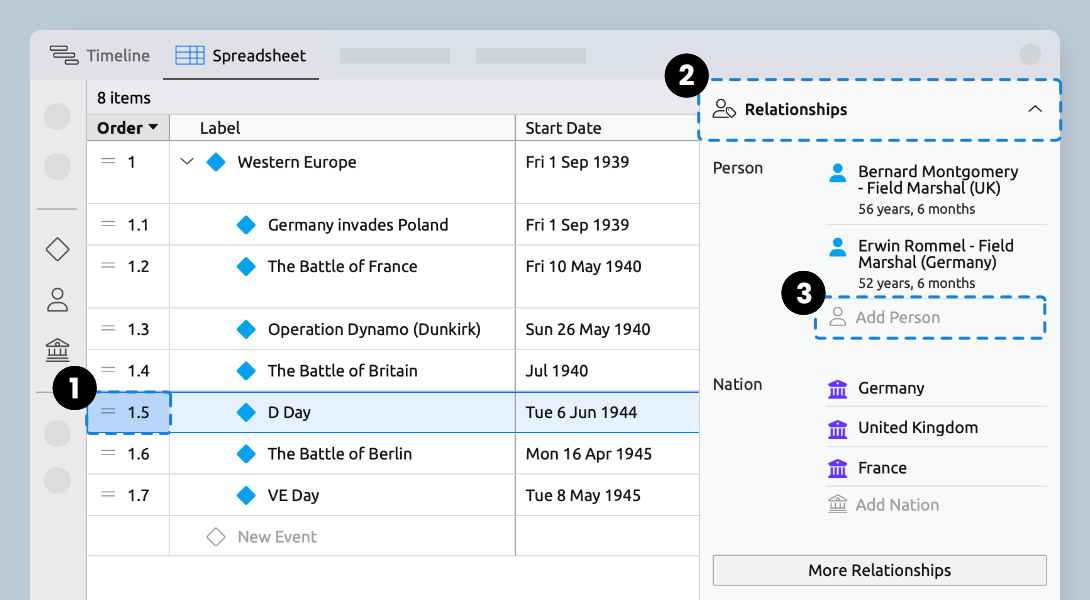
Linking data in the Inspector
- Click the first cell in the row to select the event and bring up the Inspector.
- Use theRelationshippanel to link existing items to the event.
- Items can also be created and linked to events in the same step with the Add buttons.
Customize the Timeline
Item Display
Use the Item Display panel to control the density of information on the timeline.
- Switch to the Timeline view and selectItemDisplay.
- Use the dropdowns and checkboxes to choose which properties you’d like to display.
- The preview serves as a handy reference if your events don’t have the relevant info yet.

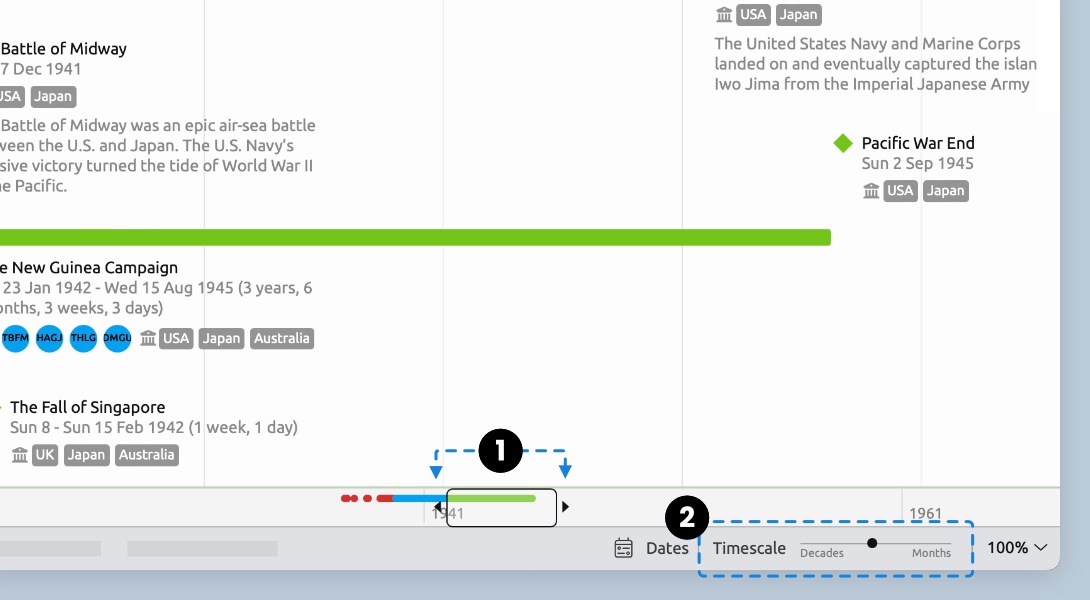
View Controls
Try Aeon Timeline free for 14 days
Get Aeon Timeline and easily visualize and organize your project.