Grouping & Nesting
As your timeline grows in size and complexity, you may want more control over how your information is displayed.
Grouping and nesting are two ways to organize and structure your data to make your timeline more useful and easier to manage.
Grouping
Grouping collects related items into separate rows on the timeline, making them easy to identify and compare with other groups.
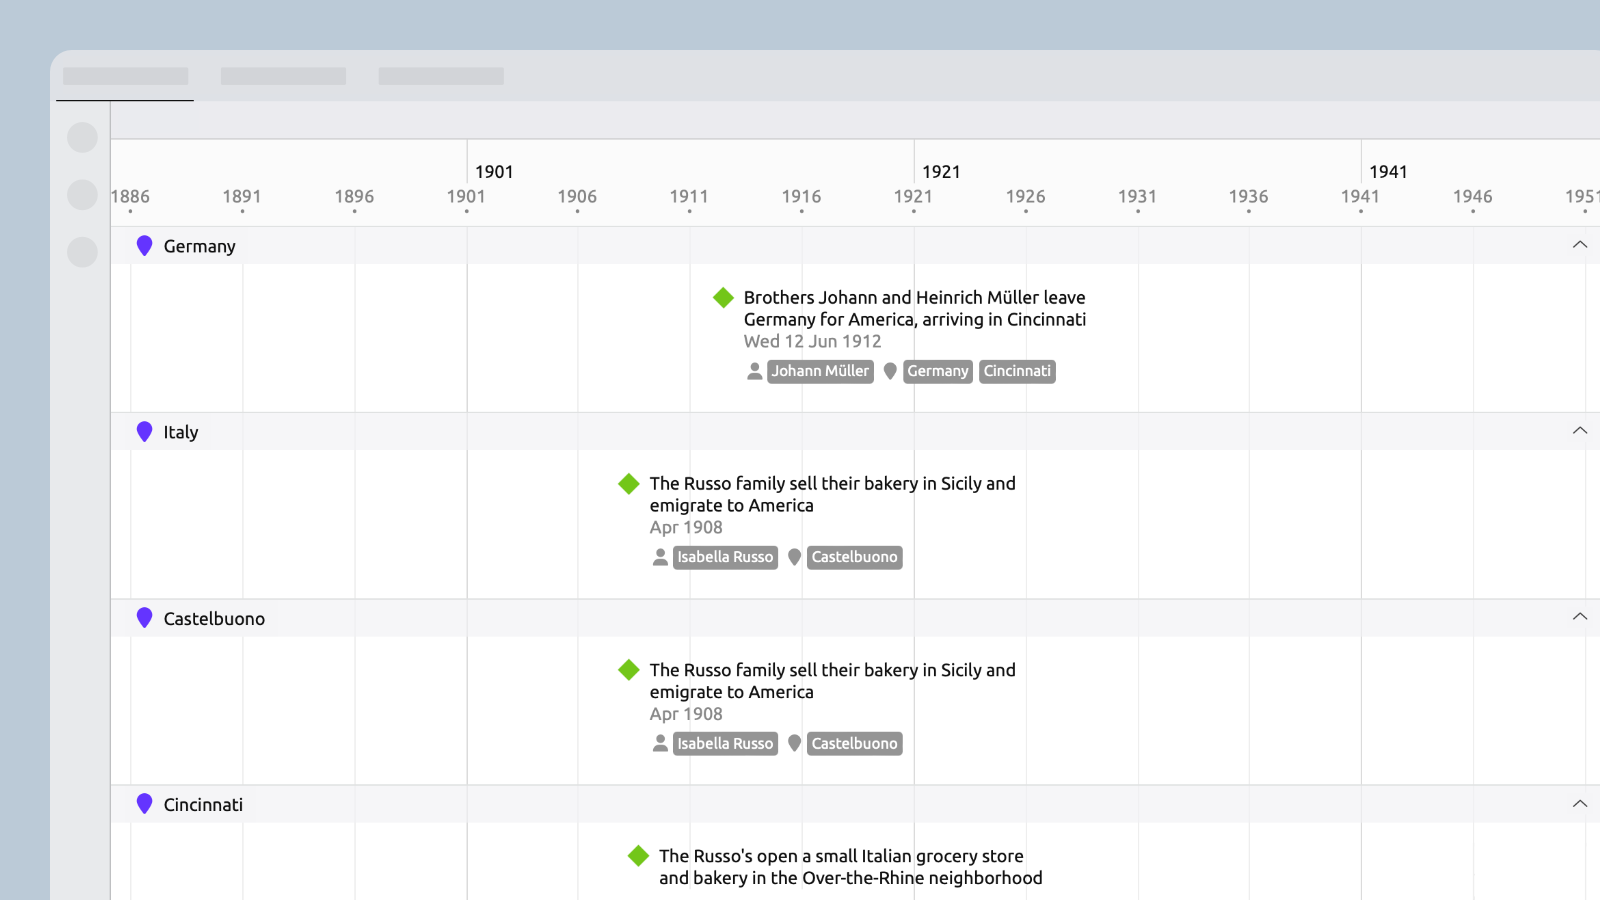
Events can be grouped by type, color, or their relationships with other items.
Events can belong to multiple groups. For example, an event assigned to both Jack and Jill will show in both of their groups.
You can change how your timeline is grouped at any time. For example, view tasks grouped by assignee, and then view them grouped by project.
How to Activate Grouping
- Switch to the timeline view.
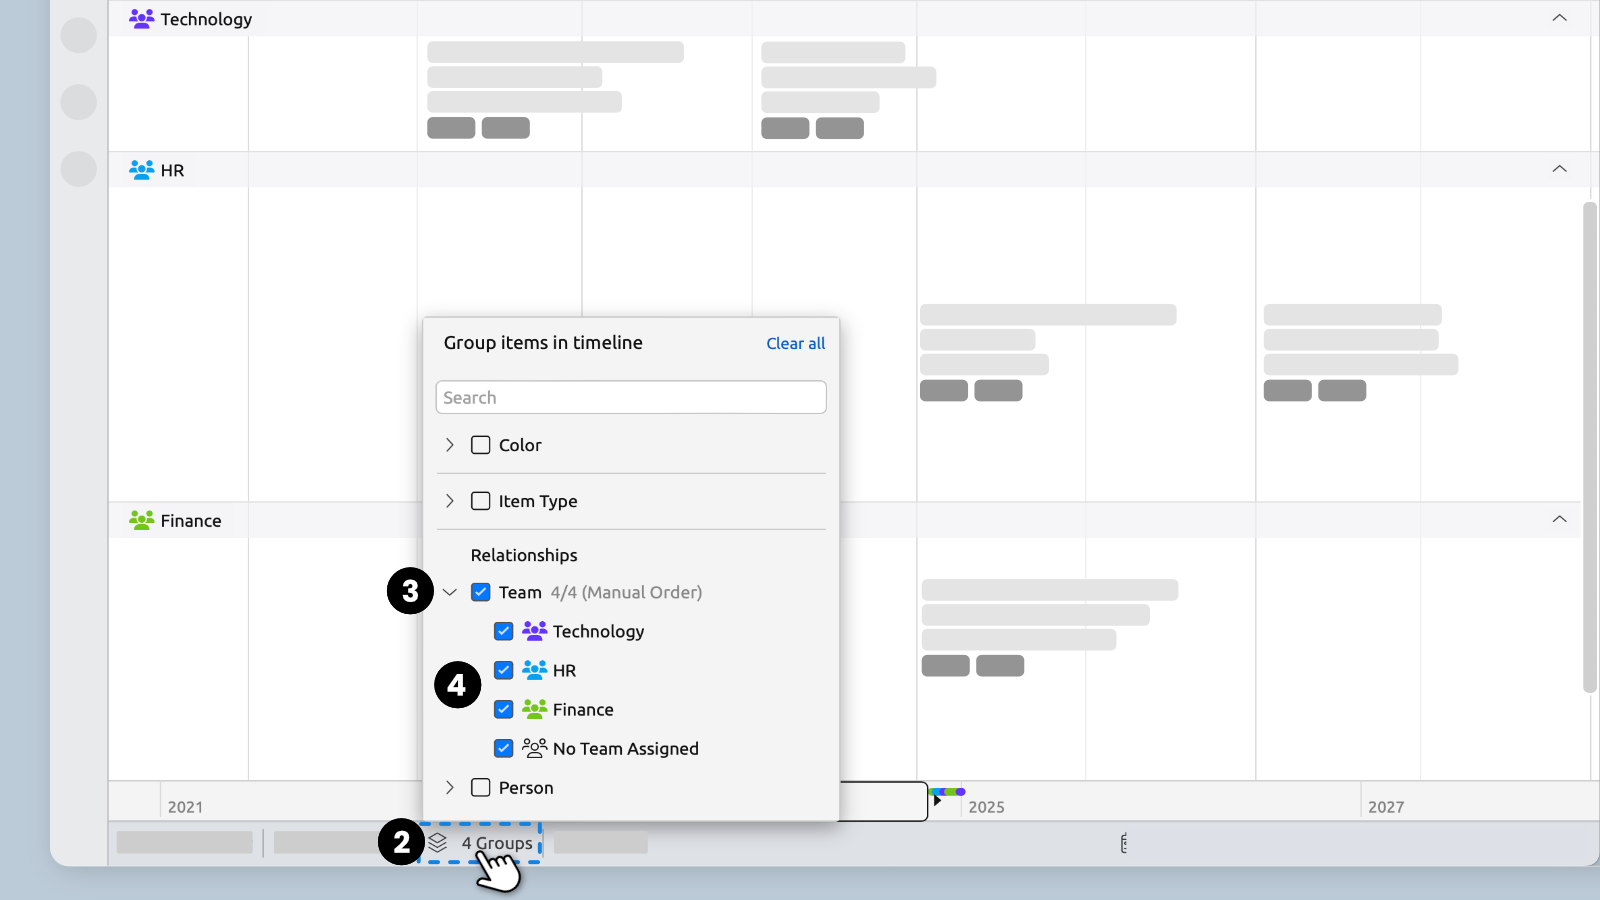
- Click theGroupbutton in the view footer.
- Check a top-level box to show groups for all items of that type, or
- Click thearrowto show all options and check only specific ones.
Add New Events to a Group
- Activate grouping if it isn’t already.
- Double-click within a group on the timeline to add a new item within the group.

Move Events Between Groups
If grouped by color:
To change an item's color, drag it from its current color group into a different one.
If grouped by relationship:
As you view grouped timelines, you may want to add an event to an additional group. For example, if another character was involved, or the event crosses story arcs.
Drag an item into a relationship group to add it to the group. It will then be assigned to both groups.
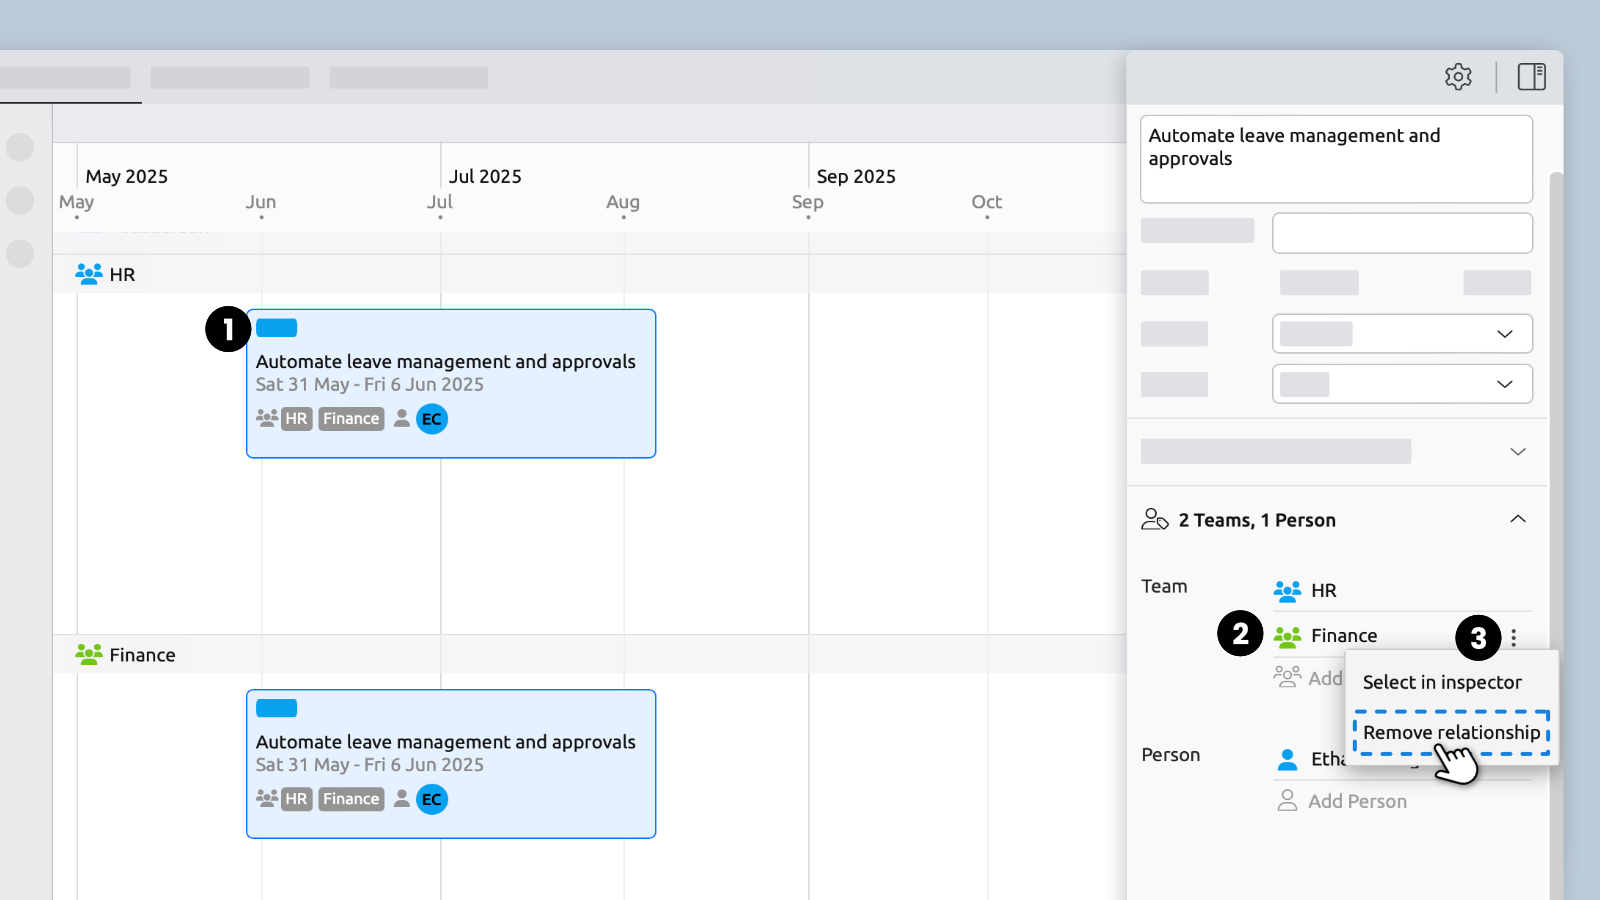
Remove an Event from a Group
- Select the item to open the Inspector.
- In the Relationship panel, find the one you’d like to remove.
- Click theicon and select Remove relationship.
Nesting
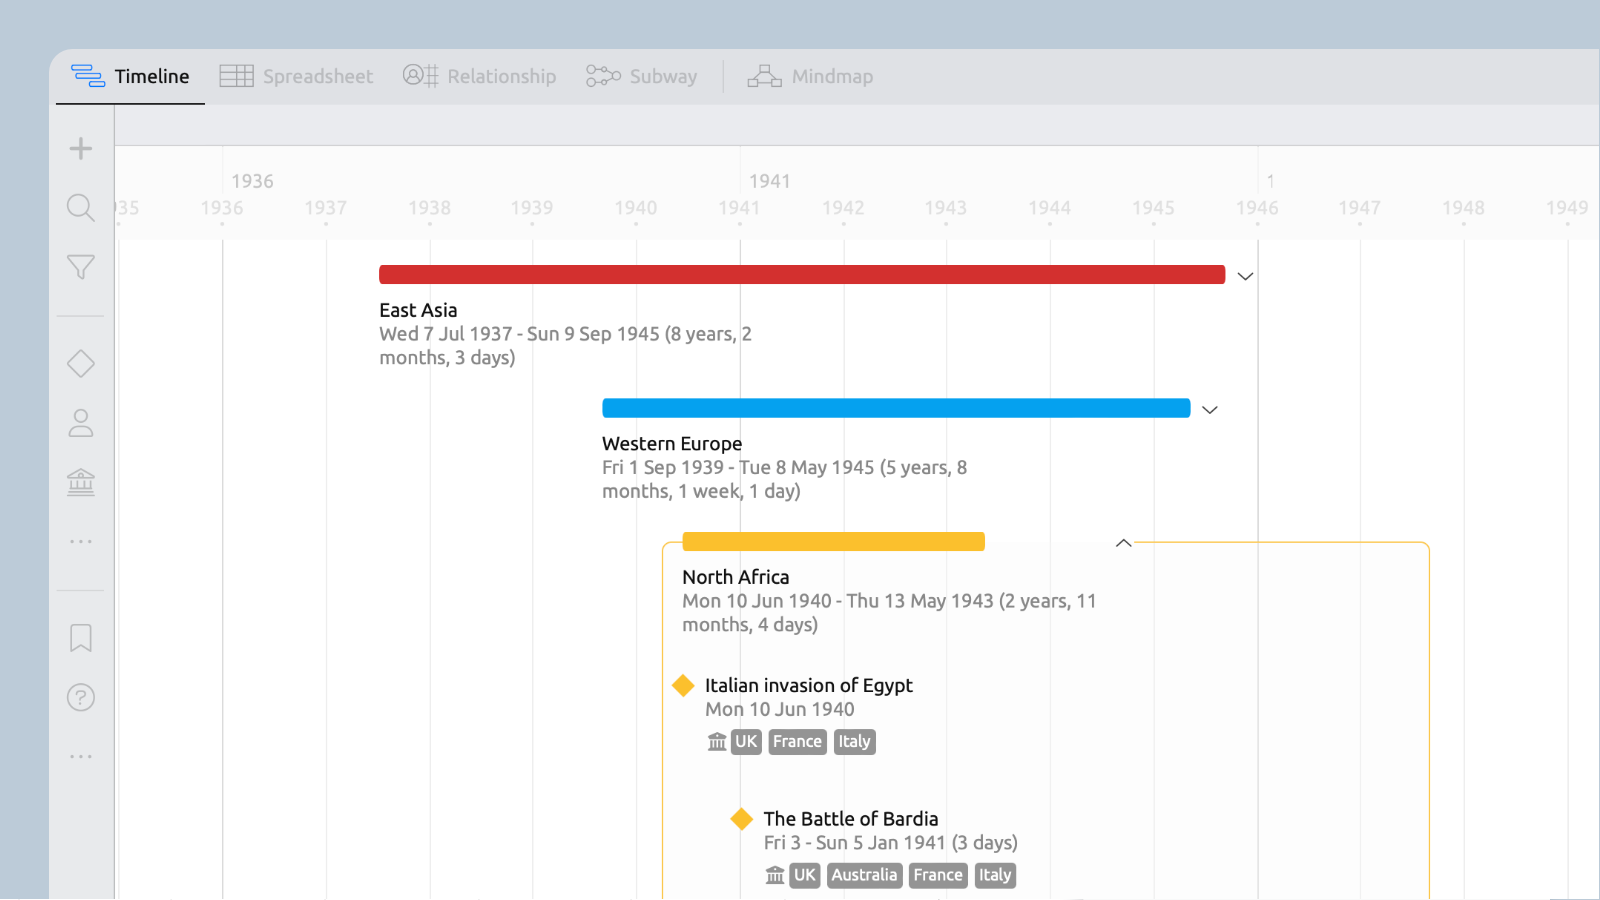
Nest events under a parent to break larger events into smaller, detailed sub-events, like battles in a war or subtasks in a task.
Nesting isn’t just for events. You can also use it to arrange characters into groups, or organize key locations within cities or countries.
Expanding a parent event lets you see the details of its nested children. Collapsing the parent tucks the children out of sight, making it easier to focus on the major events.
Tip: Right-click a parent event for the option to expand or collapse all events in the view.
How to Nest Events
Cmd/Ctrl + Drag on the Timeline
In Timeline View, hold down the Command (Mac) or Control (Windows) key while dragging to move an event in or out of a parent.
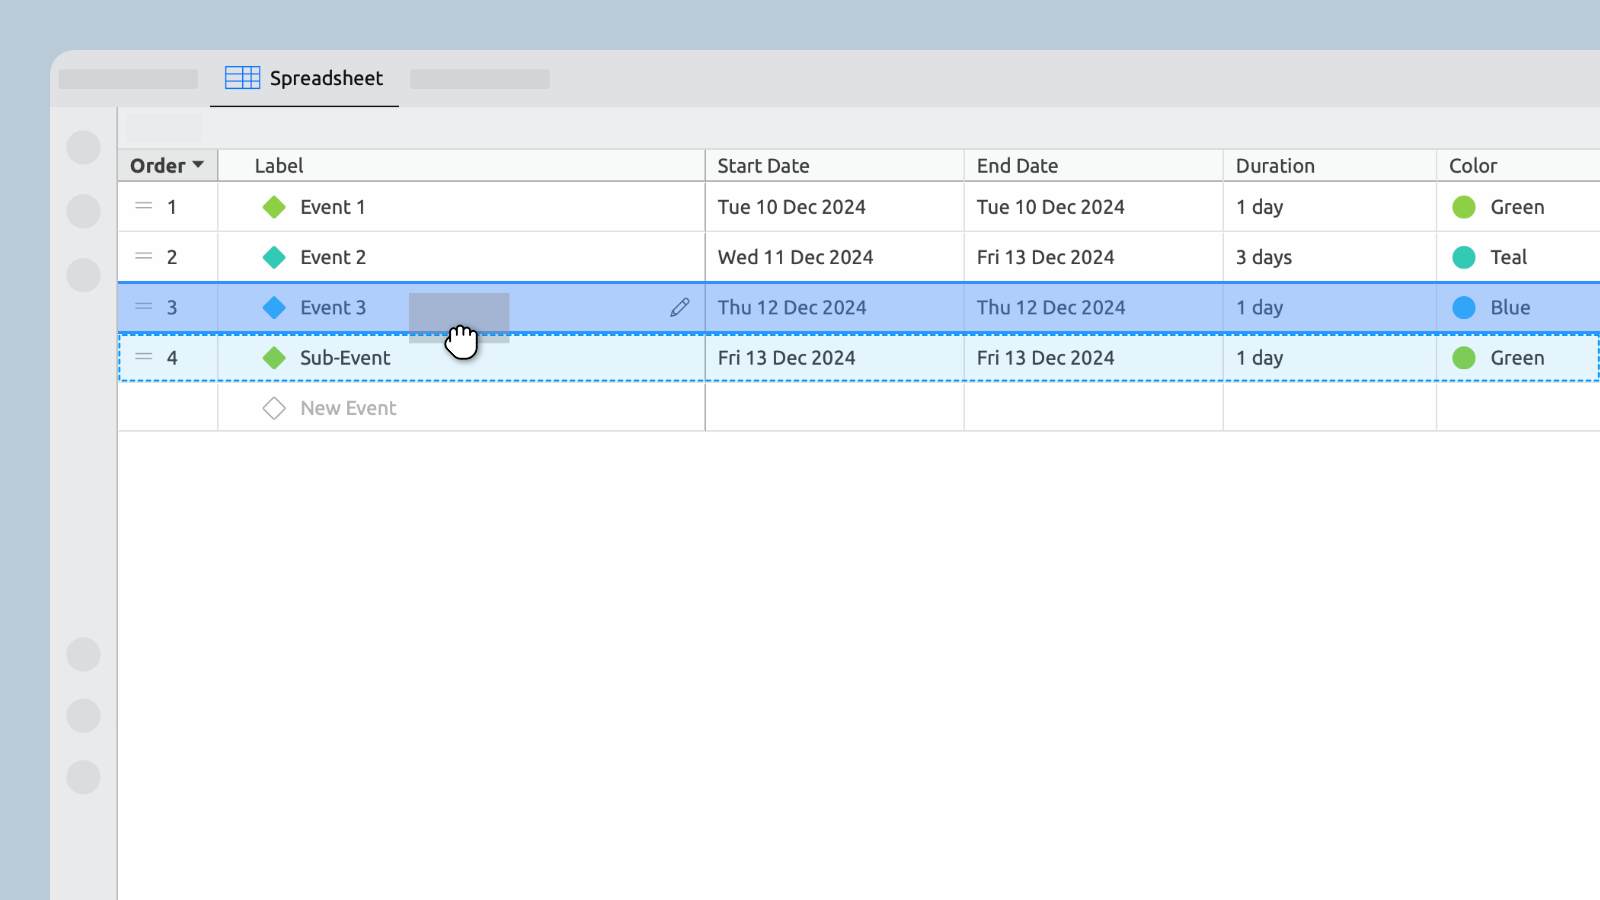
Drag Rows in the Spreadsheet
- A highlighted row means that it will be nested inside that event when released.
- A single blue line means that it will land between the two surrounding events when released.
Set a Parent in the Inspector
- Select an event to open the Inspector.
- In the Basic Info section, click the Parent field.
- Choose from a list of possible events.

Right-Click to Create Child Events
- Right-click an event in one of the views.
- Hover the cursor over Create item.
- Create child item creates a new child within the selected event.
Right-Click to Create Parent Events
- Select a range of events that could fit within the context of a larger event, such as battles within a war.
- Right-click and hover the cursor over Create item.
- Select Embed in new parent.
- Name the new parent with an encompassing title, e.g. World War II.
Try Aeon Timeline free for 14 days
Get Aeon Timeline and easily visualize and organize your project.