The Narrative
The narrative is a separate structure from your timeline, where you can organize your story’s events as they appear in your book or project.
- The timeline shows the full sequence of events.
- The narrative is where you choose how to tell the story to your audience.
The narrative lets you choose what to reveal to your audience and when, by selecting and arranging events into story sections such as acts, chapters, or scenes.

This separation helps you keep track of both the full history and logical flow of your story on the timeline, and the reader’s experience of your story in the narrative.
Why Use the Narrative vs the Timeline
You can approach working with the narrative in various ways. There is no right or wrong way to use it, and you can move back and forth between the narrative and the timeline easily as needed.
When to Use the Narrative
Whether you’re starting with a rough idea or bringing in an existing story, the narrative helps you shape and organize your story. Here’s when to use it in your process:
- You want to develop or improve an existing story
Bring in your existing story outline to further develop it, or use it as a starting point for building a timeline of your story's details. - You want to focus on storytelling
Map out how your story unfolds for the reader, without worrying about dates or logical consistency. - You want to focus on pacing
If you're writing to story beats or following a specific structure, the narrative helps you place key moments at the right points in your story. By seeing your story laid out, it’s easier to position those beats exactly where they need to fall.
When to Use the Timeline
Building out a timeline gives you a strong foundation for writing your story. Here's when the timeline can help your process:
- You want to develop backstory
Map out a character’s past or your world’s history—even if those details don’t appear in the story. The timeline lets you see the events surrounding your narrative. - You want to map the true sequence of events
Laying out events in order helps keep your story logically sound, and helps you plan realistic dates, ages, and the flow of events. - You're writing a story based on true events
Use the timeline to organize the facts, so you can anchor your story in real events.
How to Enable the Narrative
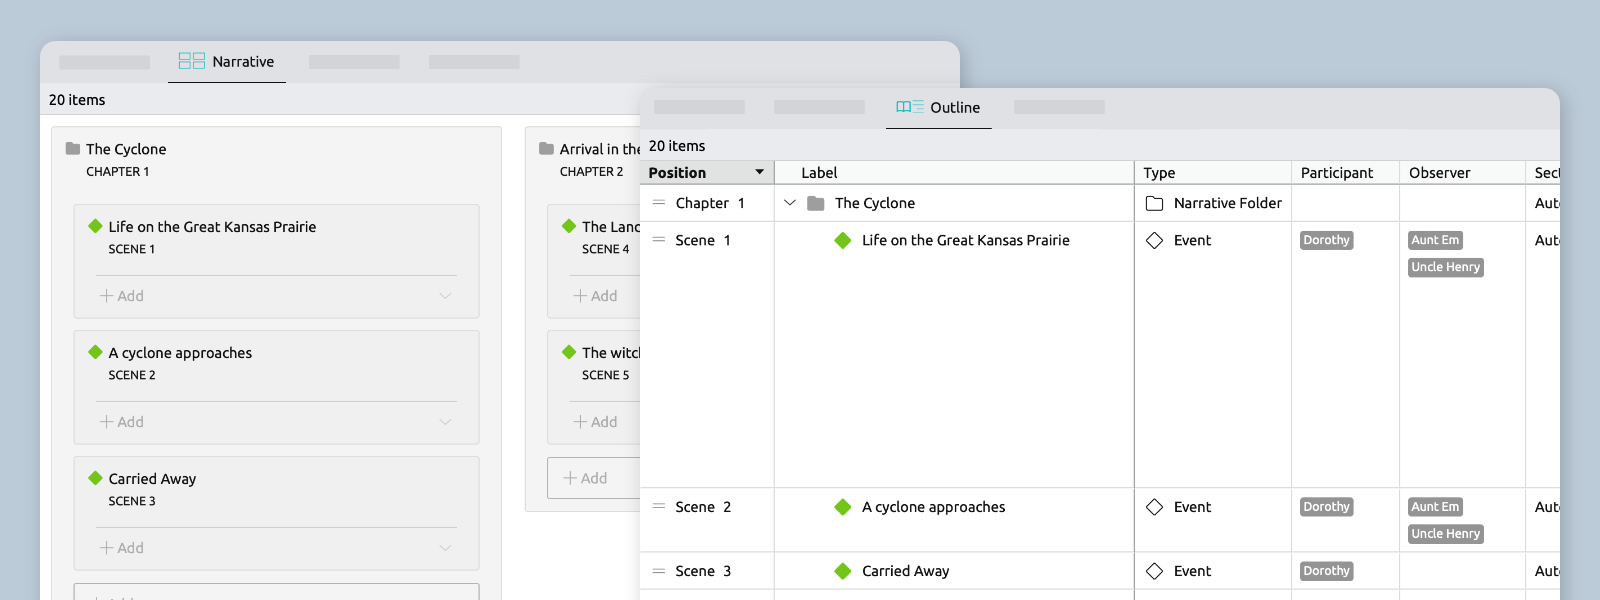
There are two ways to view your narrative in Aeon Timeline:
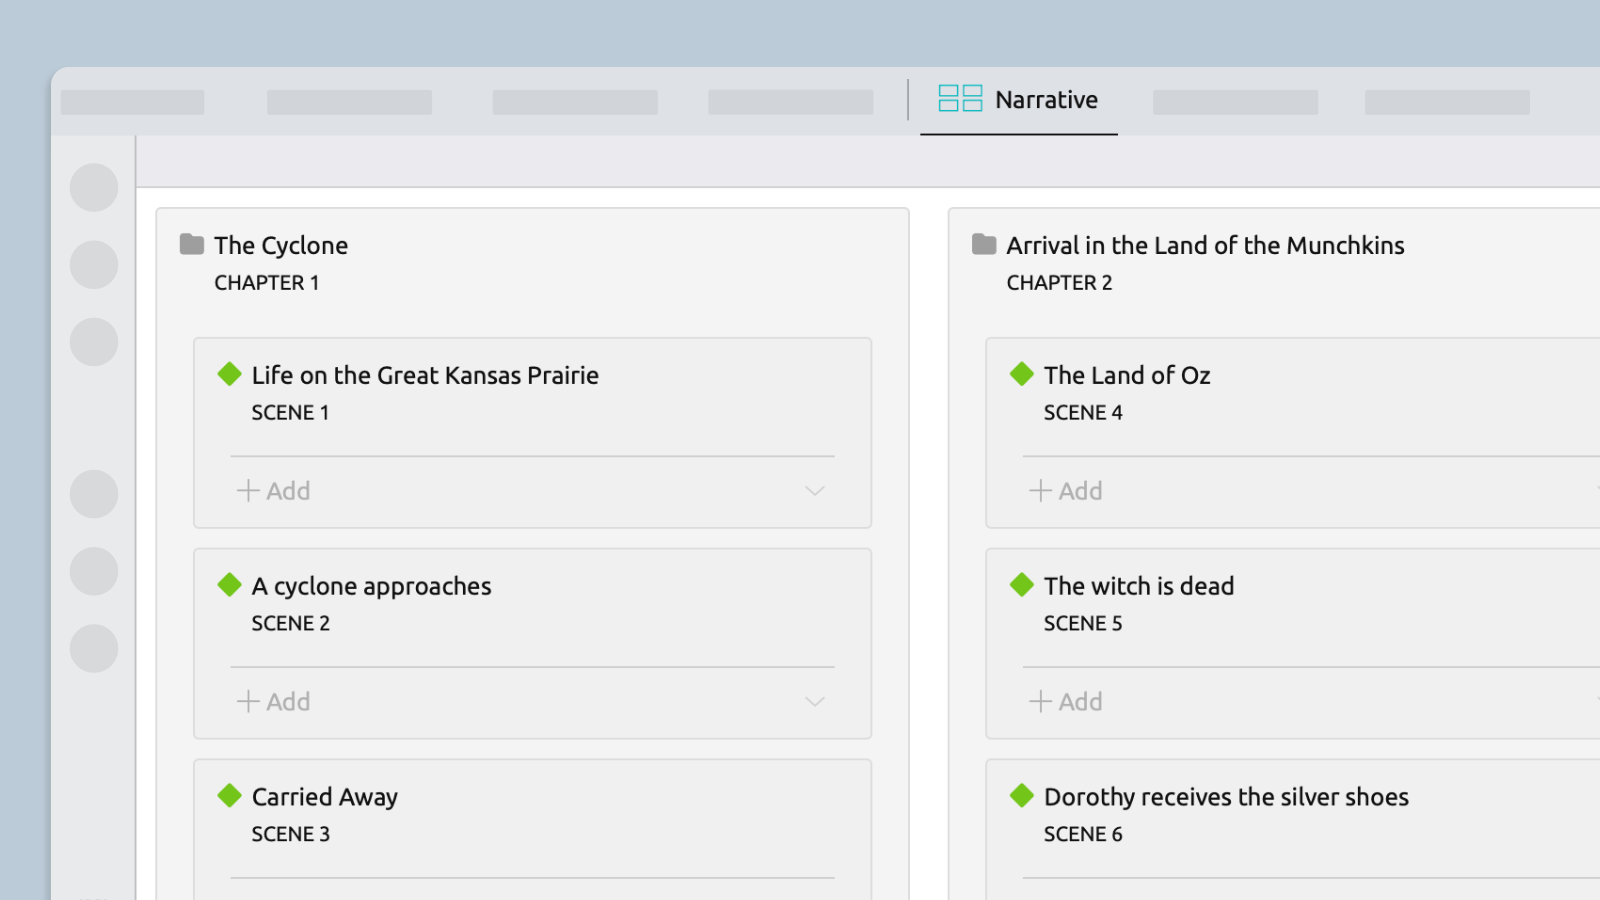
- Narrative view: A board with draggable cards
- Outline view: A table view of the narrative
If the Narrative and Outline views aren't available in the toolbar, you can enable them by:
- OpenSettings.

- Select the Narrative tab.
- Check the box for "Track independent narrative".
- Click OK to confirm your settings changes.
- The toolbar will now show the Narrative and Outline buttons.

Add Events and Folders to Outline Your Story
Build your story's structure using chapters, scenes, and acts, and organize your story in a way that makes sense for you.
You can create both events and folders in the narrative.
- Events represent your story's key moments.
- Folders help you create structure for your story, by letting you group events into acts, books, chapters, or other sections.
Create a New Event or Folder
- In the Narrative view, click theAdd button.
- Select an option to create either an event or a narrative folder.
- Type a name to give it a title.
Add an Event to a Folder
Once added, events can be dragged and dropped to adjust their placement or nested within folders or other events.
You can also use the Add buttons to create new events within existing folders or events.
Bring Over an Existing Scrivener or Ulysses Project
You can bring your Scrivener or Ulysses project into Aeon Timeline by syncing your Manuscript folder with the narrative. Syncing creates a mirror image of your document structure, and you can optionally sync document titles, synopses, colors, keywords, and more.
Once syncing is set up, your edits in Aeon Timeline will flow back to your writing project. Whether you’ve adjusted the order of scenes or tweaked the titles, everything will be in place and ready to go when you switch back to Scrivener or Ulysses to continue writing.
For a complete rundown of everything you need to know about syncing, check out our syncing articles in the knowledge base >
Change Between Acts, Chapters, and Other Sections
Events and folders in your narrative are assigned a section label and a number, such as Act 1 or Chapter 2.
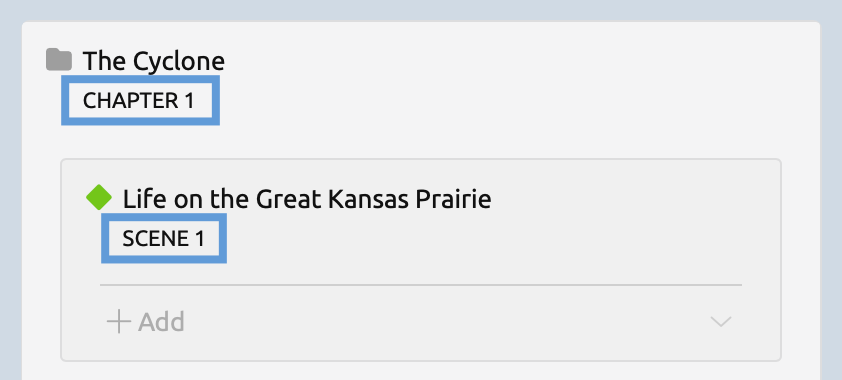
You can change event or folder labels to suit your project's structure, or to use one-off labels like Prologue when needed.
- Select an event or folder to bring up the inspector.
- In the Narrative panel, use the Section dropdown to select a different section label.
When you create an event or folder, its section label will be set to Automatic by default. This means the section label will be set based on the event's folder depth in the narrative. What labels are used for what depths can be customized in the settings.
The order you arrange them—from top to bottom—determines which section label is applied at each folder level in the narrative.
Build a Timeline From Your Narrative
Once you’ve used the narrative to create a rough outline of chapters and scenes, you can then use the timeline to view how your story unfolds chronologically.
How to Add Narrative Events to Your Timeline
There are multiple ways events from your narrative can be added to the timeline:
By Adding Dates in the Inspector
Giving an event in your narrative a date will make it show on your timeline.
- In the Narrative view, select an event to bring up the inspector.
- In the Dates panel, enter a start date.
- The event will now be visible on the timeline when you switch to the Timeline view.
By Dragging from the Events Panel
The events panel lists all events you have created. It includes the events on your timeline, plus any not shown on the timeline because they don't have dates.

- Switch to the Timeline view.
- Click theevent icon in the sidebar to open the event panel.
- Drag and drop an event to place it on the timeline.
An event’s date and narrative position are independent of each other. If you change an event’s date or drag it around your timeline, it won’t change where it is positioned in your narrative. Likewise, if you move an event’s position in your story in the narrative, it won’t change its date or position on the timeline.
All other event details, however, are shared, such as the event’s title or assigned characters. If you change its title in the narrative, you’ll also see the updated title on the timeline.
How to Further Build Out Your Timeline
Events on the timeline can add backstory or context to your narrative, helping you track what’s happening beyond the main plot. They will only appear in the narrative if you choose to add them to it.
See Create Your First Event to learn how to create and edit events on your timeline.
If you want to add an event to the narrative later, follow the steps in How to Add Timeline Events to Your Narrative.
How to Add Timeline Events to Your Narrative
Once you've laid your story's groundwork with a timeline, you can use those events to build the narrative your readers will experience.
You have complete control over which timeline events appear in the narrative. This helps you separate the moments shown to readers from those that unfold in the background.
There are multiple ways events can be added to the narrative:
By Using the Narrative View Add Buttons
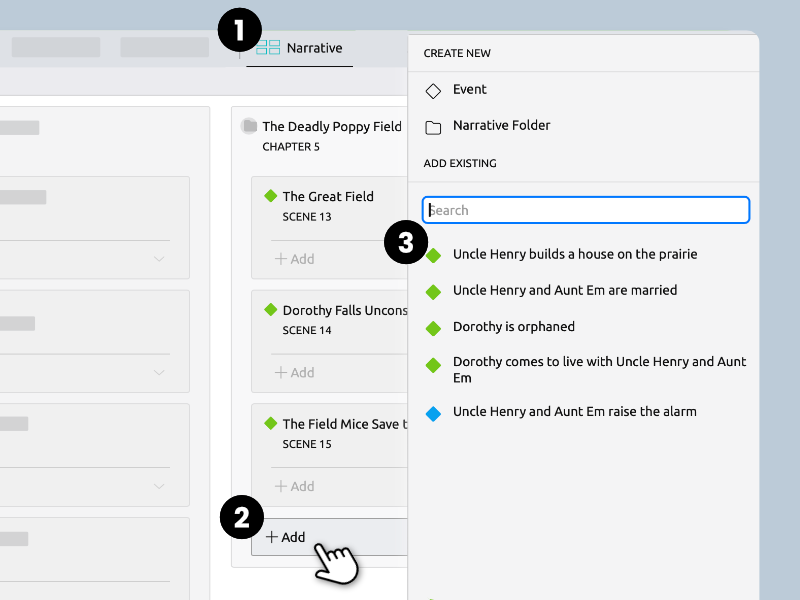
- Switch to the Narrative view.
- Click theAdd button where you want the event to be placed in your narrative.
- Select an event from the Add Existing list.
By Dragging from the Events Panel
The events panel lists all events you have created. It includes both the events in your narrative as well as those that aren’t, such as events used for backstory or context that appear only on the timeline.
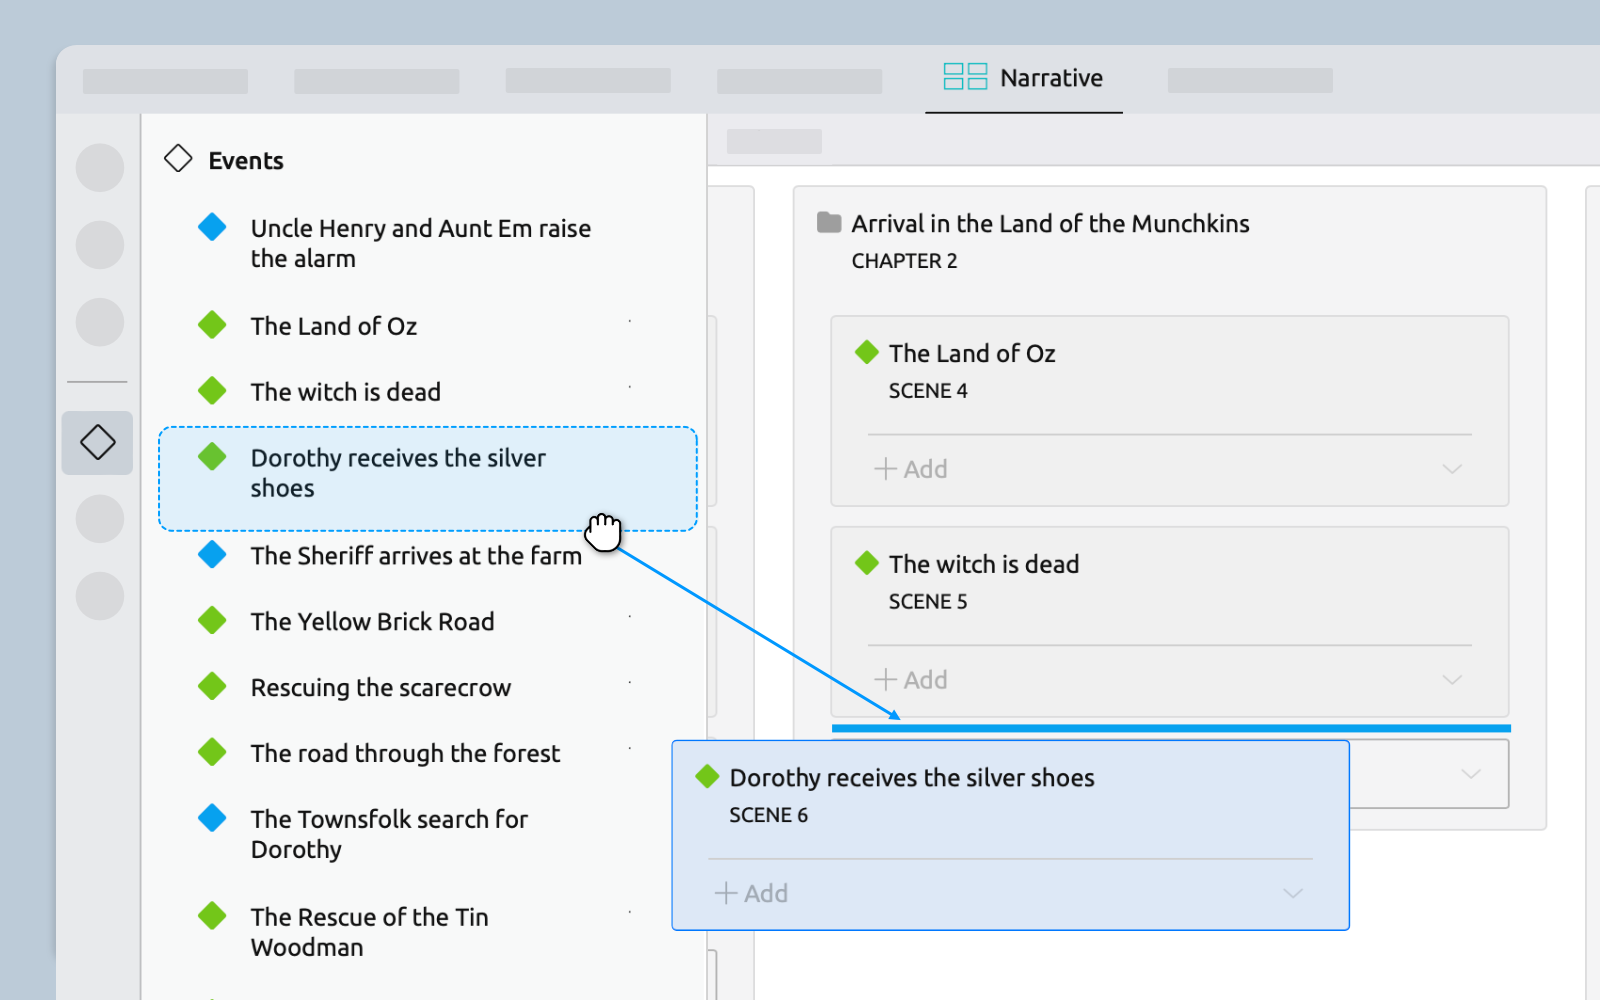
- Switch to the Narrative view.
- Click theevent icon in the sidebar to open the event panel.
- Drag and drop an event to place it in the narrative.
By Using the Inspector
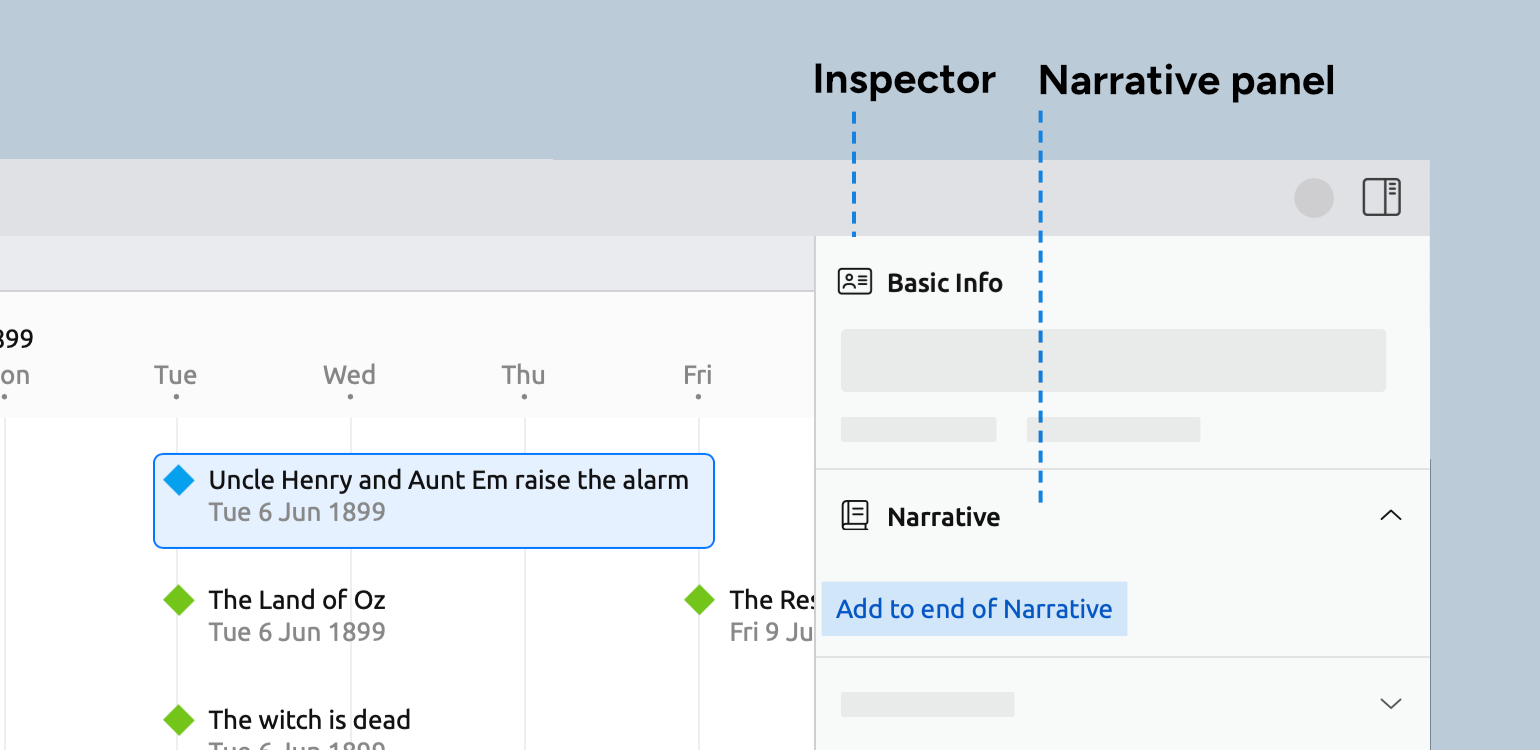
- In the Timeline view, select an event to bring up the inspector.
- In the Narrative panel, choose Add to end of Narrative.
By Right-Clicking
- In the Timeline view, right-click the event.
- Hover over the Add to narrative option to show its submenu.
- Select to add the event to the start or the end of the narrative.
Editing and Experimenting
The narrative view gives you the freedom to shape your story without affecting your timeline. You can experiment with different story orders, cut or combine scenes, and move key moments around to explore what works for your story.
Rearrange Events in the Narrative
Events in the narrative can be arranged in any way without affecting their position on the timeline, leaving you free to experiment with story sequencing and chapter structure without impacting the true chronology of events.
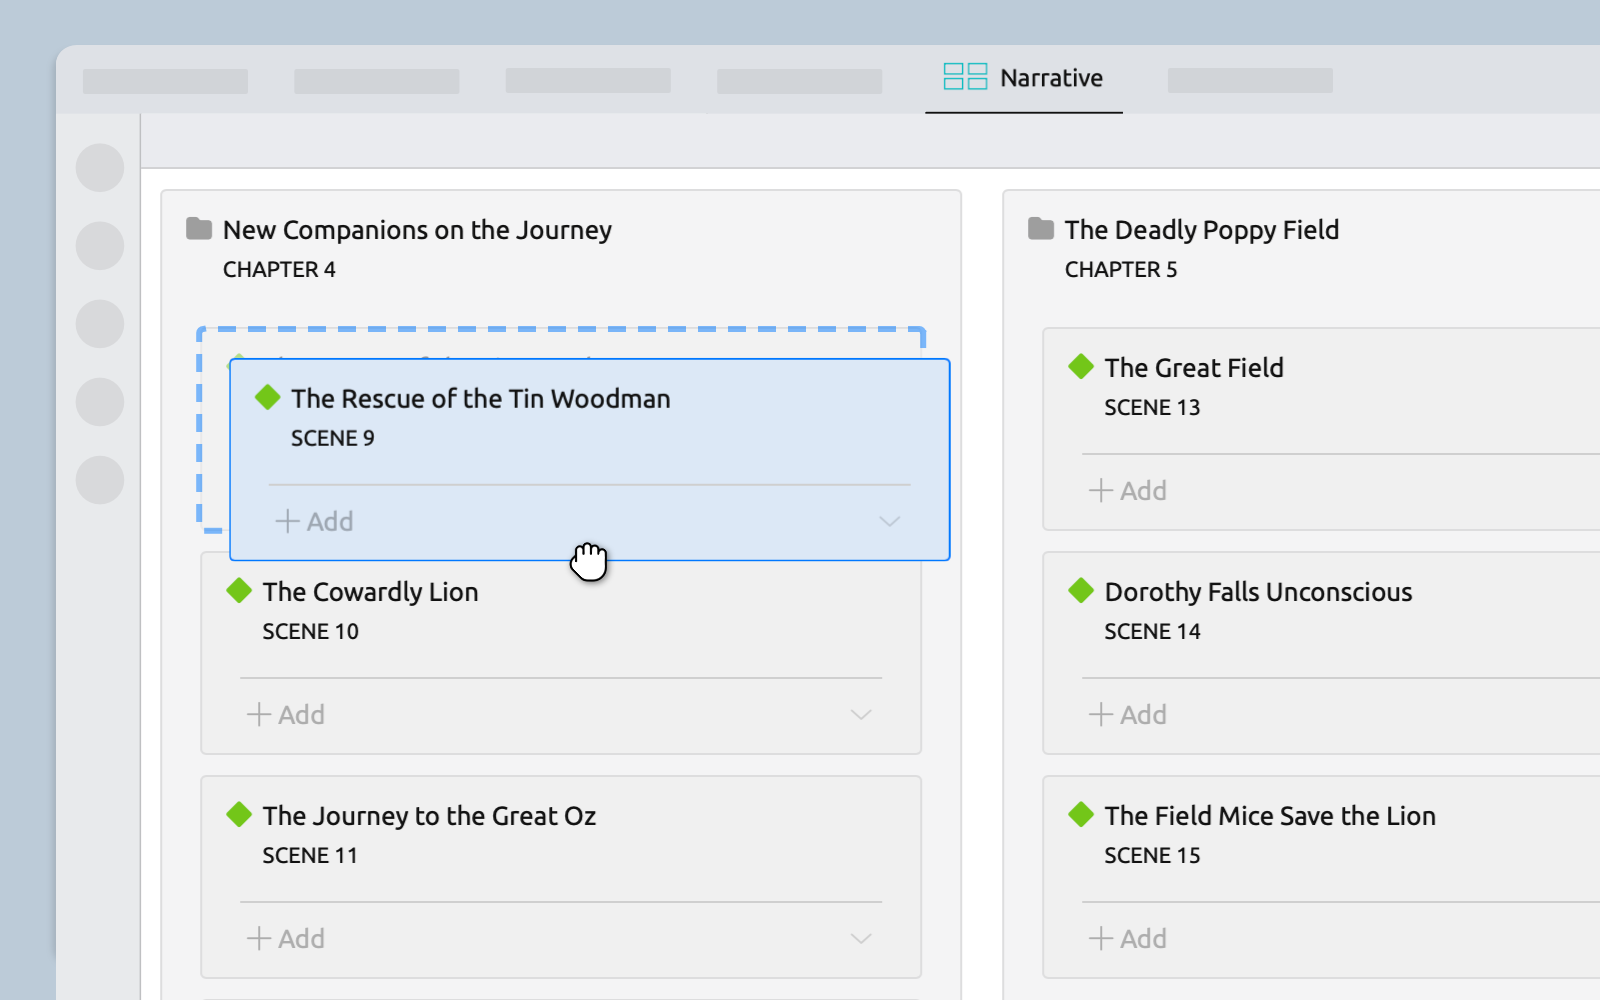
- Click and drag an event to move it anywhere within the narrative.
- Drop an event onto a folder to make it part of that act or chapter.
- Drop an event onto another to turn it into a sub-scene.
Remove an Event from the Narrative
You can remove an event from your narrative in a couple of ways, depending on whether you want to delete it from the project entirely or let it stay on the timeline if you’ve given it dates:
- Deleting an event removes it from your project entirely. It will no longer exist in your narrative OR your timeline.
- Remove from Narrative removes the event from the Narrative view, but doesn’t affect any placement on the timeline.
To remove an event only from the narrative:

- Select the event to bring up the inspector.
- Click Remove from Narrative.
- Alternatively, right-click the event and choose Remove from Narrative.
Try Aeon Timeline free for 14 days
Get Aeon Timeline and easily visualize and organize your project.