Create a Story Timeline
Map out your events and connect them to characters, locations, story arcs, and more with the Story Template.

About the Story Template
The story template is a flexible starting point for novelists, screenwriters, or anyone looking to capture all the details of a story—from events and characters to backstories, arcs, subplots, and more.
In this guide, we'll start with a handful of events and introduce characters along the way. If you'd rather start by adding your characters, you can skip ahead to that section.
If you are new to Aeon Timeline and unfamiliar with anything covered in this guide, check out our Quickstart Guide for a walkthrough of the interface and common functions.
Creating Events
The Spreadsheet view is perfect for quickly capturing information, whether that's sketching out a story framework or entering all the details.
We’ll cover customizing the order and visibility of columns later in this guide. In the meantime, you can learn more about the Spreadsheet view here.
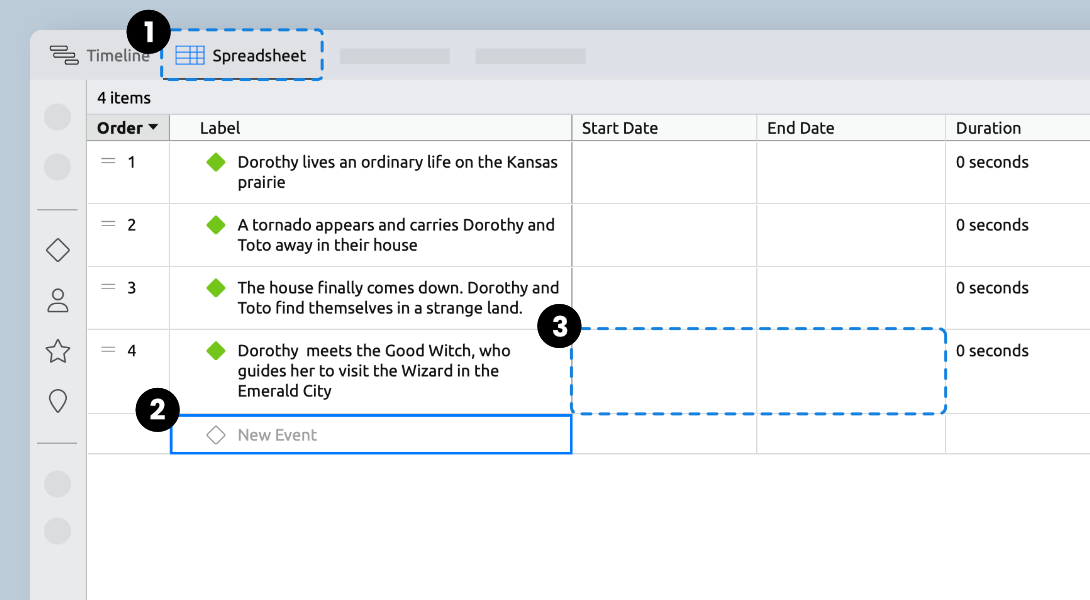
Creating Events in the Spreadsheet
- Use the View Selector to change to the Spreadsheet view.
- Select New Event to create and name events.
- Add dates if you’re ready, but it’s optional at this point.
Reordering & Nesting
- Look for thearrowto check that the Order column is active.
- Use thehandlesto drag an event to change the order. Or, drag an event onto another event to nest it within.
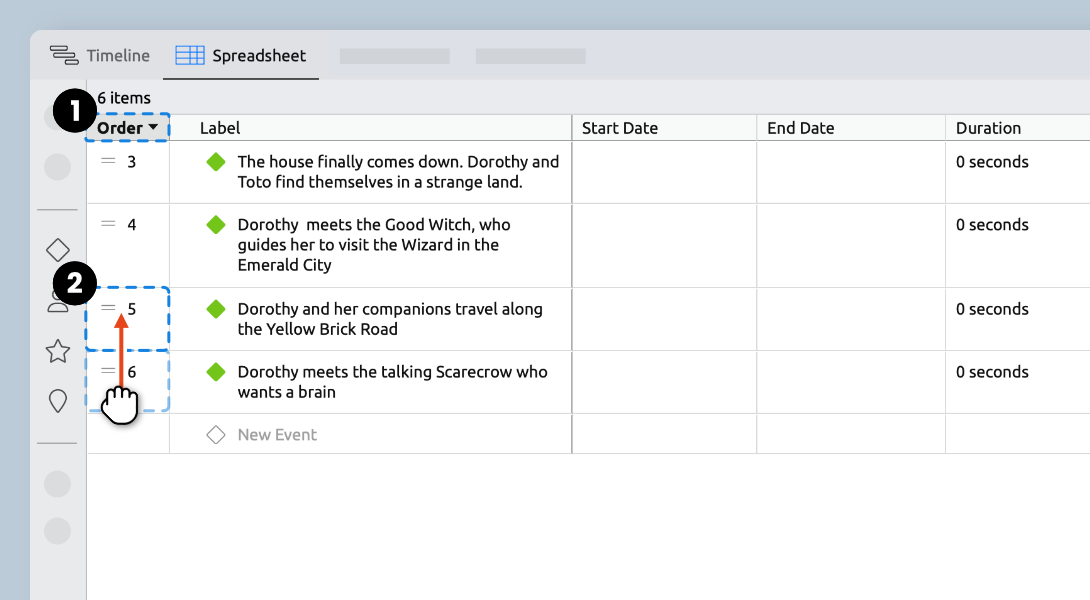
Events in the spreadsheet reorder automatically when dates are entered.
Event Dates & Durations
You can work with dates in a few different ways across the app. Use the Spreadsheet view to enter specific dates, or switch to the Timeline view to set them visually.
Just keep in mind that events won't appear on the timeline until they have a date, but they'll always be visible in the Spreadsheet view.
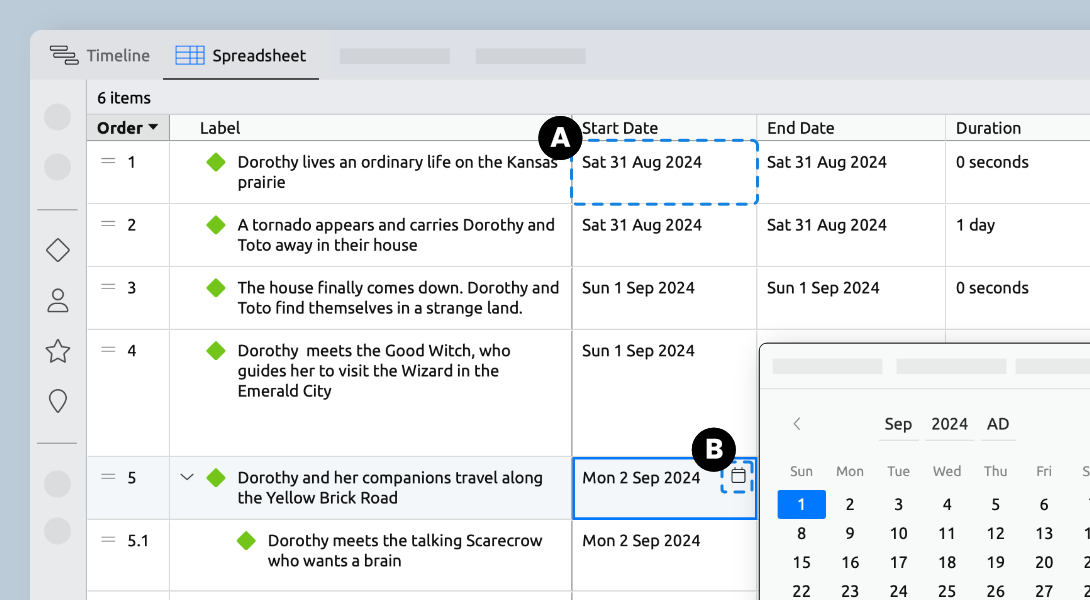
Editing Dates in the Spreadsheet
- Click on a cell and start typing. (No need to double-click), or
- Click thecalendaricon to bring up the date picker.
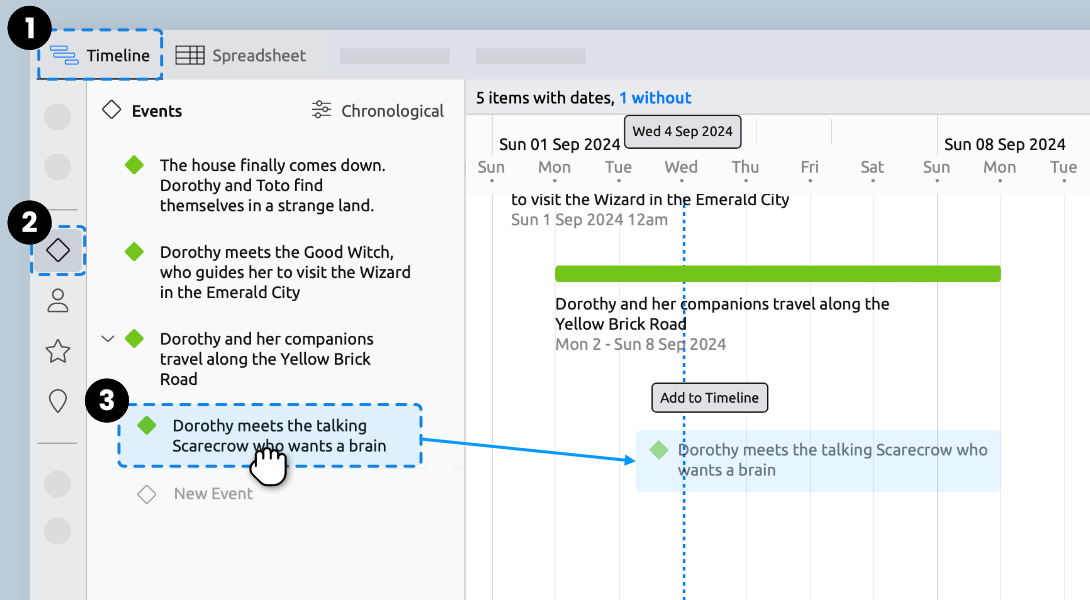
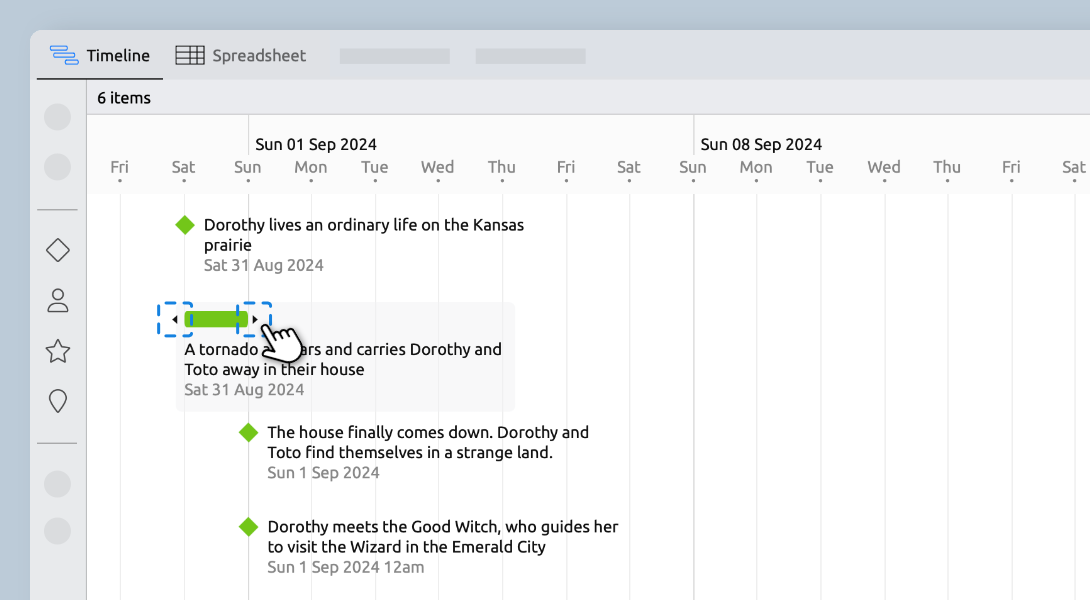
Working With Dates on the Timeline
- Use the view selector to switch to the Timeline view.
- Open theEventspanel, then click and drag to place an event to place on the timeline.
Timeline Duration Adjustments
Characters & Character Groups
Use the Character panel to enter your character ideas. Start with names or titles, and add more details in the Inspector whenever you’re ready.
Creating Characters
- Click theCharactericon in the sidebar to open the Characters panel.
- Click New Character to create and name a character.
- Select a character in the panel to edit their information in the Inspector.

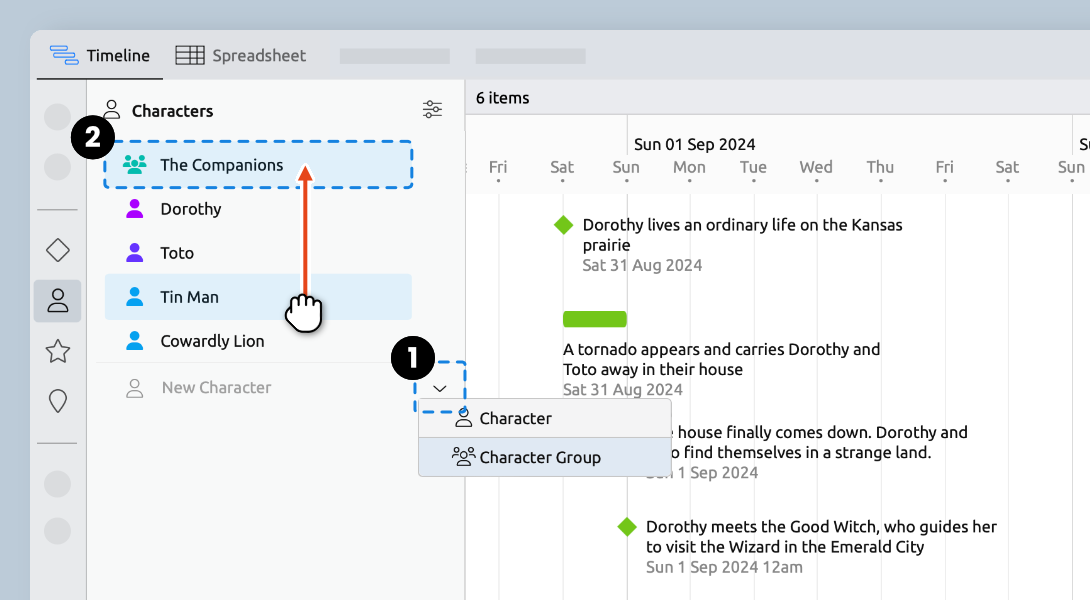
Creating Character Groups
- In theCharacterspanel, click the dropdown arrow and selectCharacterGroup. Give it a name.
- Drag and drop existing characters to add them to a group.
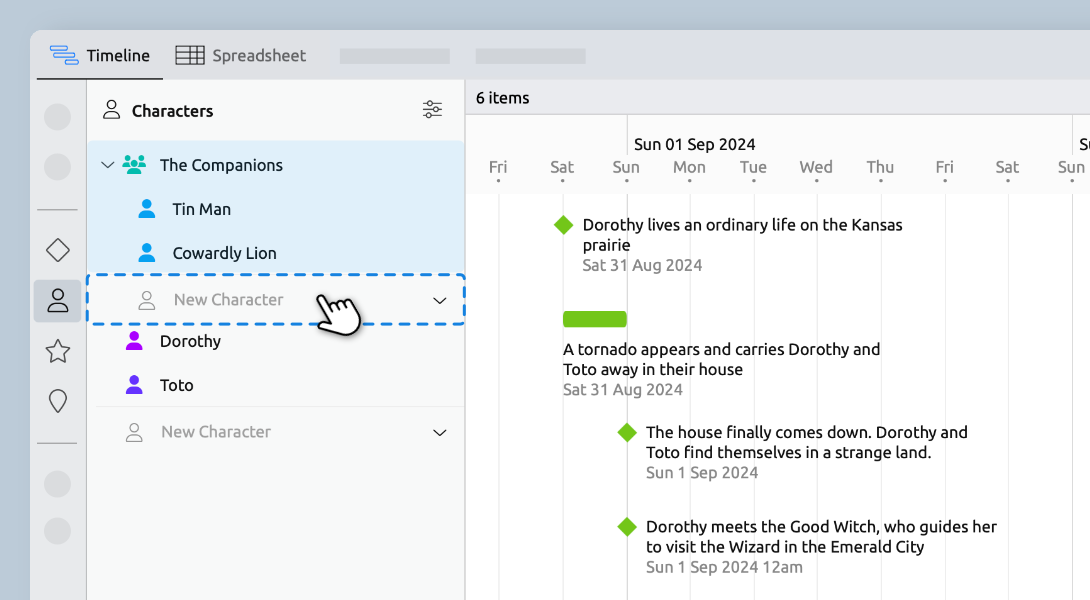
Creating New Characters Within a Group
Assigning Characters to Events
As the events in your story start to take shape, you can keep track of your characters by linking them to the events they are involved in.
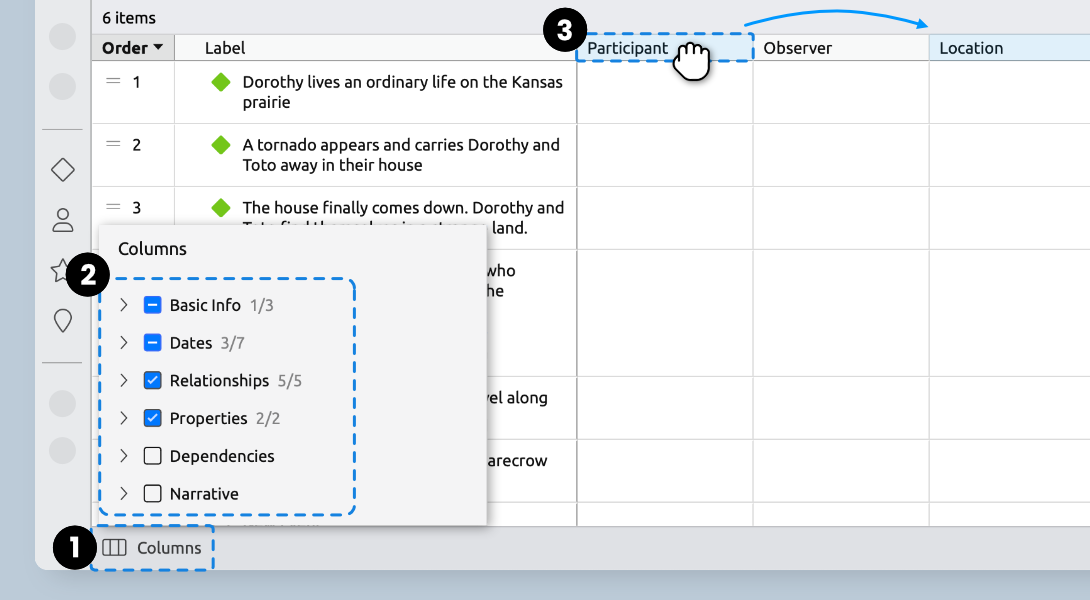
Column Selection
- In the Spreadsheet view, click theColumn iconto bring up the column selection menu.
- Select the columns you want to display.
- Drag the column headers to put the columns in any order.
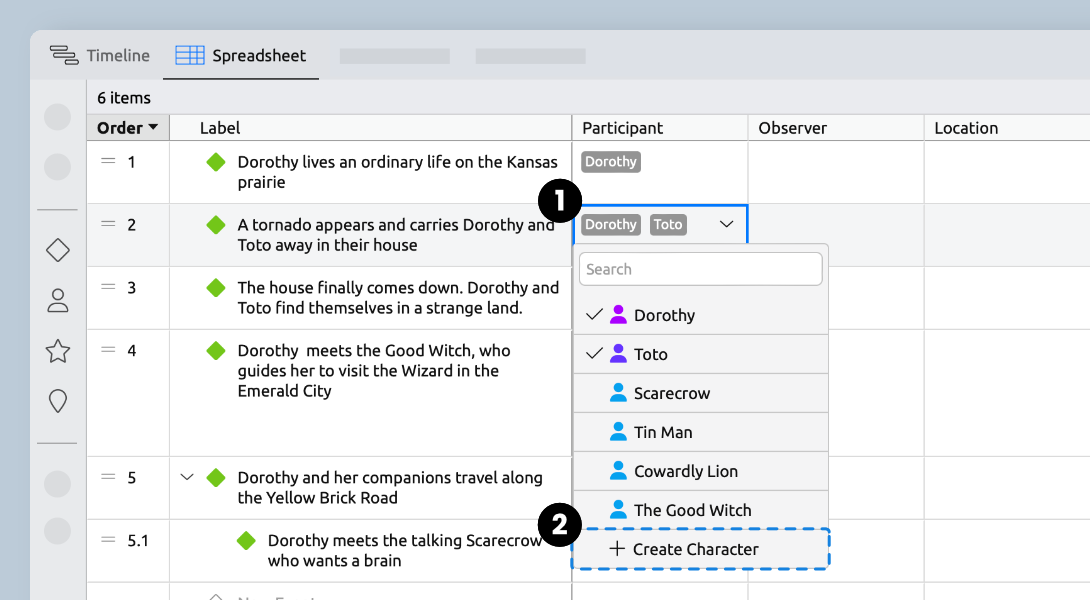
Linking Characters and Events
- In the Participant or Observer columns, use the dropdown menus to show that a character took part in an event.
- To create a new character and link them to an event in one step, select Create Character.
Categorizing With Color
Color is one of many ways to categorize events in Aeon Timeline, doubling as a visual indicator and a method of grouping and filtering story elements.
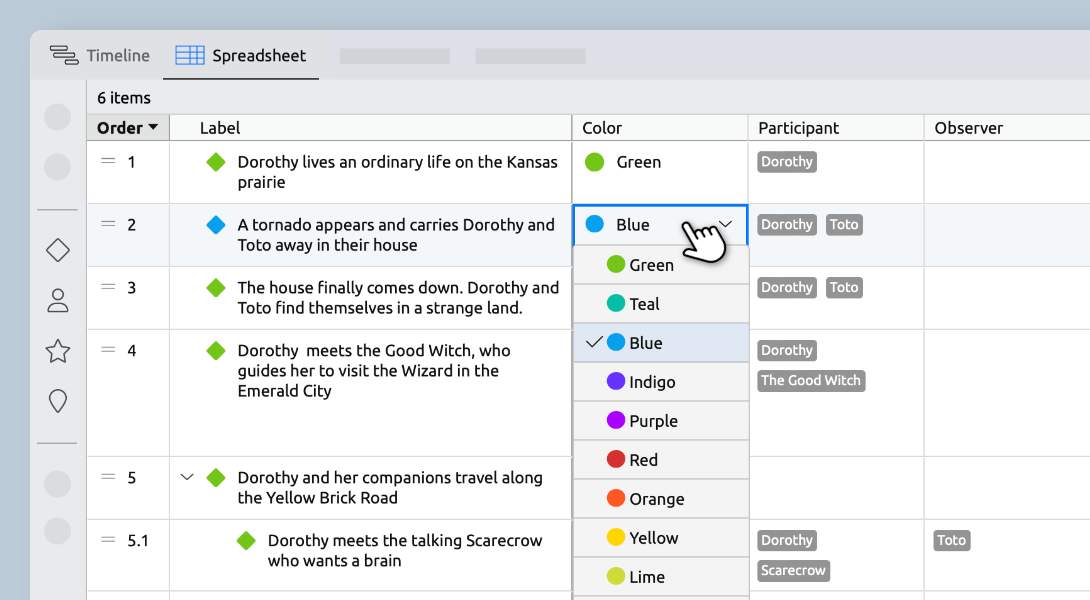
Assigning Colors
In the Spreadsheet view, use the dropdown menu to change the color of the event icon.
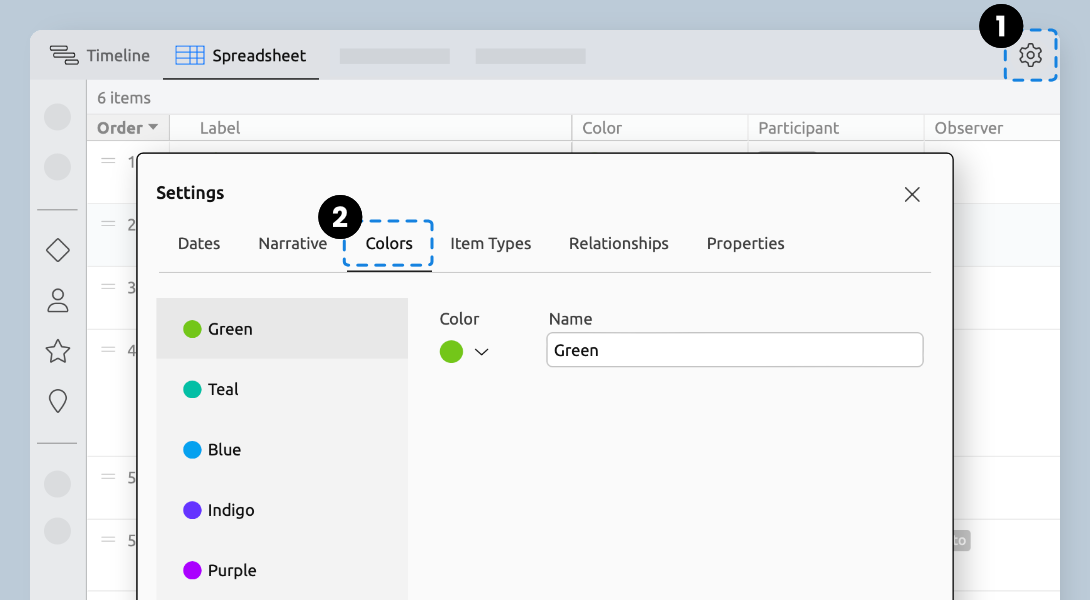
Customizing Colors
- Click theSettingsicon to open the Settings panel.
- Select the Colors tab to rename, add, and delete colors.
Story Arcs
Aeon Timeline allows you to organize your events into different story arcs to help you keep track of separate subplots.
Story Arcs can be created in the Sidebar using the same process shown in the section on Creating Characters & Character Groups, or in the spreadsheet as shown below.
Once the story arcs have been assigned, the group-by function can display events on the timeline according to their respective arcs.
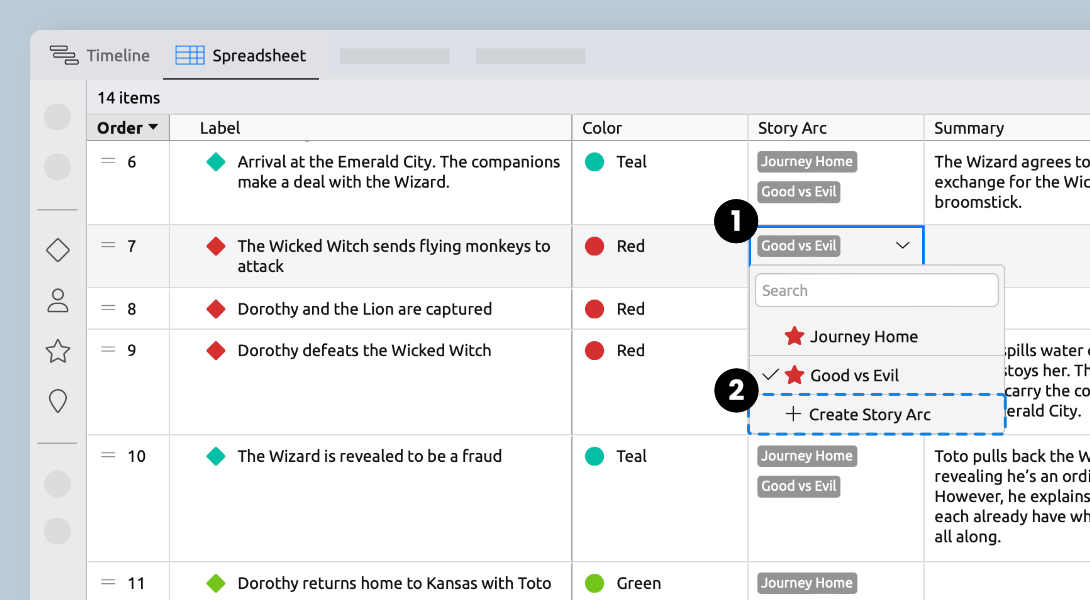
Creating and Assigning
- In the Spreadsheet view, select a cell and open the dropdown menu.
- Select Create Story Arc and give it a title or a brief description. The new story arc is now assigned to the event.
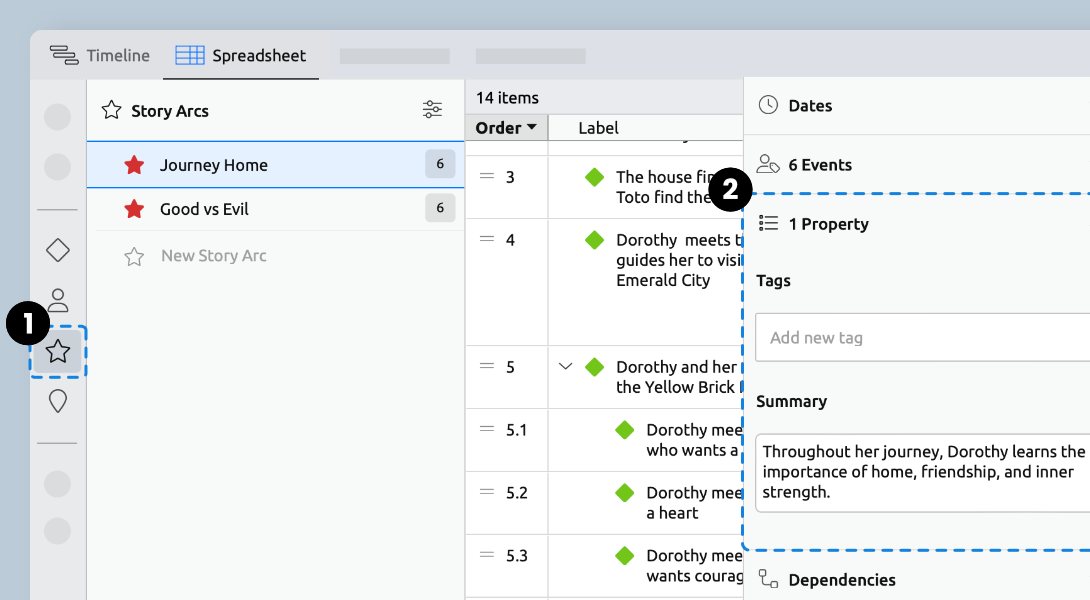
Adding Extra Details
- Open theStory Arcpanel and select an item to open the Inspector.
- Use thePropertiespanel in the Inspector to write a summary or more detailed notes.
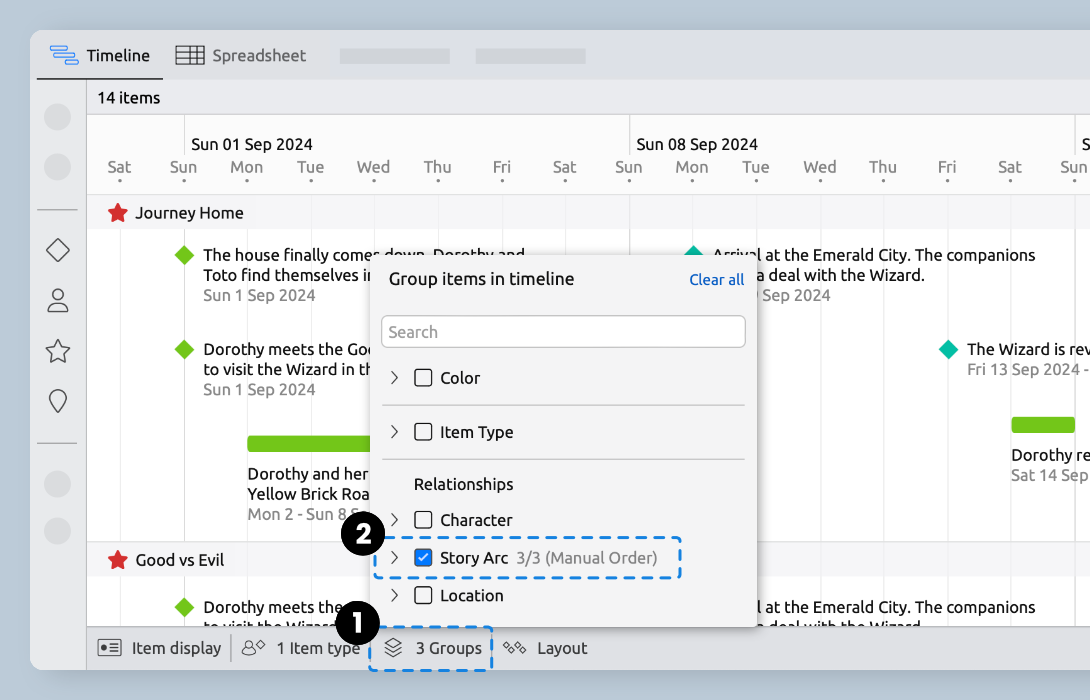
Grouping and Visualizing
- In the Timeline view, open theGroupspanel in the footer.
- Click theStory Arcarrow to show all story arcs, and choose which ones to display.
Try Aeon Timeline free for 14 days
Get Aeon Timeline and easily visualize and organize your project.