Create Your First Event
Events are the foundation of most timelines and often the first thing you’ll add to a new file. They can represent anything from a character’s actions to historical moments, personal activities, and much more.
How to create events
Aeon Timeline gives you multiple ways to view your events, like on a timeline or in a spreadsheet, with information shared between them.
You can create events in different ways to fit various tasks and workflows, giving you multiple options wherever you’re working.
Double-click on the timeline
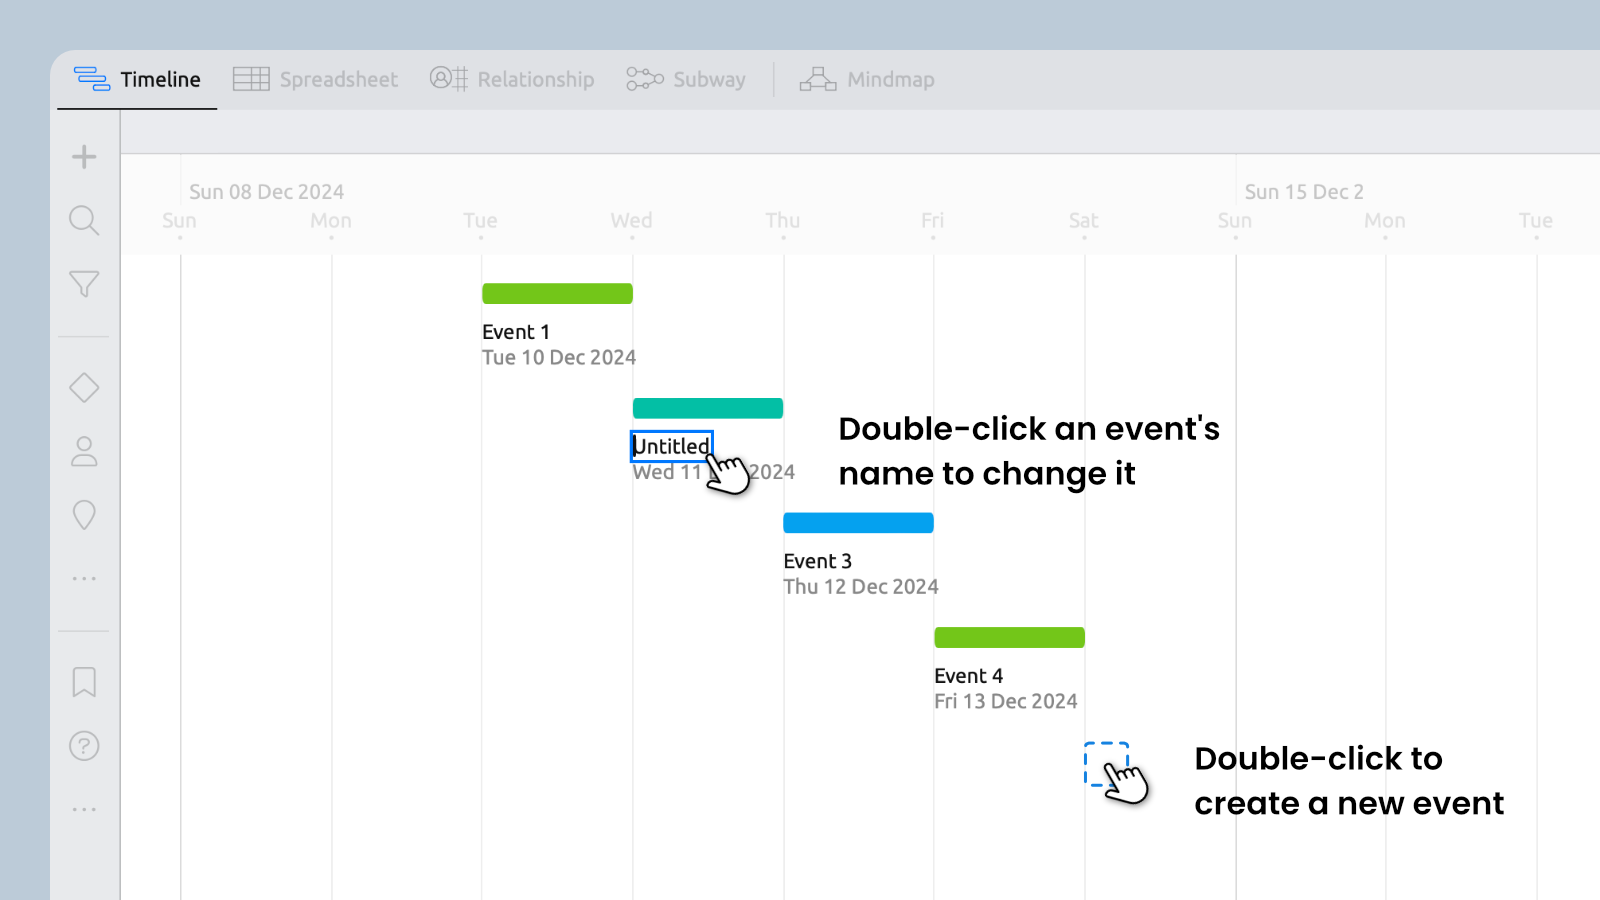
In the Timeline view, double-click an empty space to create a new event at that point. You can then click and drag to reposition the event, or double-click the name to change it.
The level of detail in the date depends on how far you’re zoomed in on the timeline. A larger timescale might set the date to the month and year (e.g. Oct 2024), while a narrower timescale might set a full date and timestamp (e.g. Tue 1 Oct 2024 6am). See how to set your timeline's scale >
To give an event a specific date, select it and use the date field in the inspector panel.
New spreadsheet row
The Spreadsheet view lets you work in a familiar table layout and efficiently create and edit new events.
Creating a new event in the spreadsheet is as simple as adding a label. Dates are optional, but events won’t appear on the timeline without them.
- Switch to the Spreadsheet view.
- Select New Event at the bottom of the spreadsheet.
- Type a label and press enter.
- Each event is created on a new row.
Create an event before/after another
If you know you want an event to come immediately before or after another, you can do just that with Create item.
- Right-click an event in the Timeline or Spreadsheet.
- Hover the cursor over Create item.
- Choose an option to create the event before or after the selected event.
Duplicate an event
Duplicating an event creates an exact copy, which is super handy when the original already has most of the details you need for the new one.
- Right-click an event in the Timeline or Spreadsheet.
- Select Duplicate.
- Edit the label to make it distinguishable from the original.
Adding details to events
Now that you’ve created your first event, you can build on it in various ways to enrich your timeline.
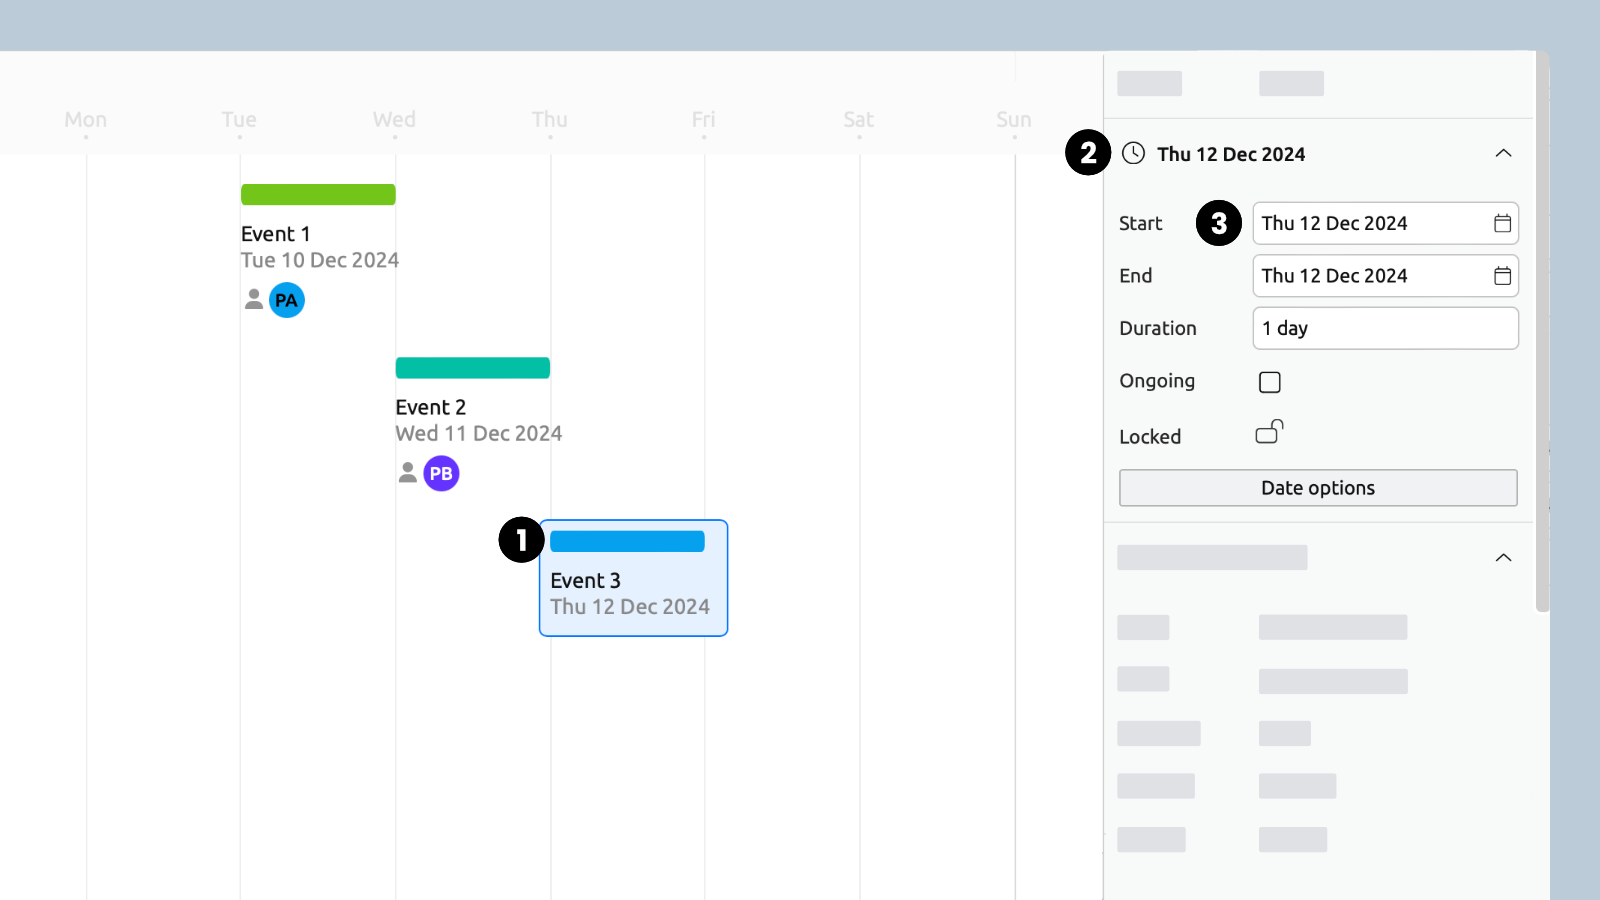
Set a date and duration
Dates can be as rough as the year only, or as precise as the exact second something takes place.
Learn more about entering and customizing dates >
- Select the event to open the Inspector panel.
- Click to open the Dates panel.
- Enter a date and/or duration.
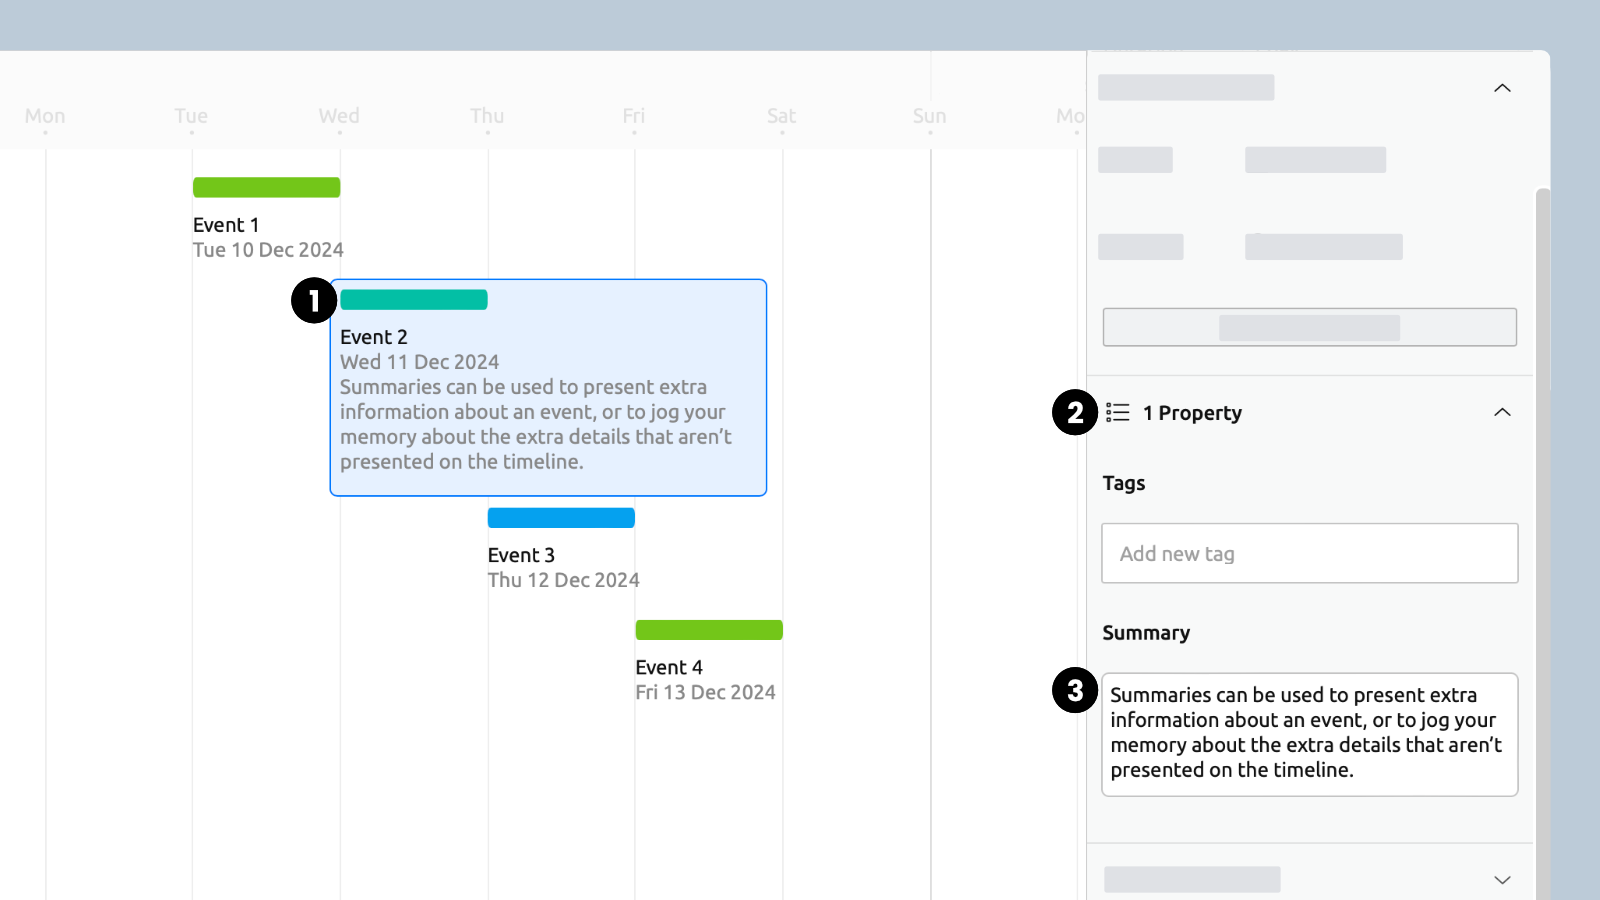
Add a text summary
Keeping the event name short and keeping more detailed information in the summary gives you more control over what appears on the timeline.
The summary can always be viewed in the Spreadsheet or Inspector, whether it’s shown on the timeline or not.
- Select the event to open the Inspector panel.
- Click to open the Properties panel.
- Enter the information in the Summary field.
Add an image
A picture tells a thousand words, and an image is often the perfect way to represent an event on the timeline.
- Select the event to open the Inspector panel.
- Click to open the Files & Links panel.
- Attach Image: Use this to upload an image from your hard drive.
- Link to Image: Use this to add a URL to an image on your hard drive or somewhere on the internet.
You can toggle whether images are displayed on the timeline on or off at any time.
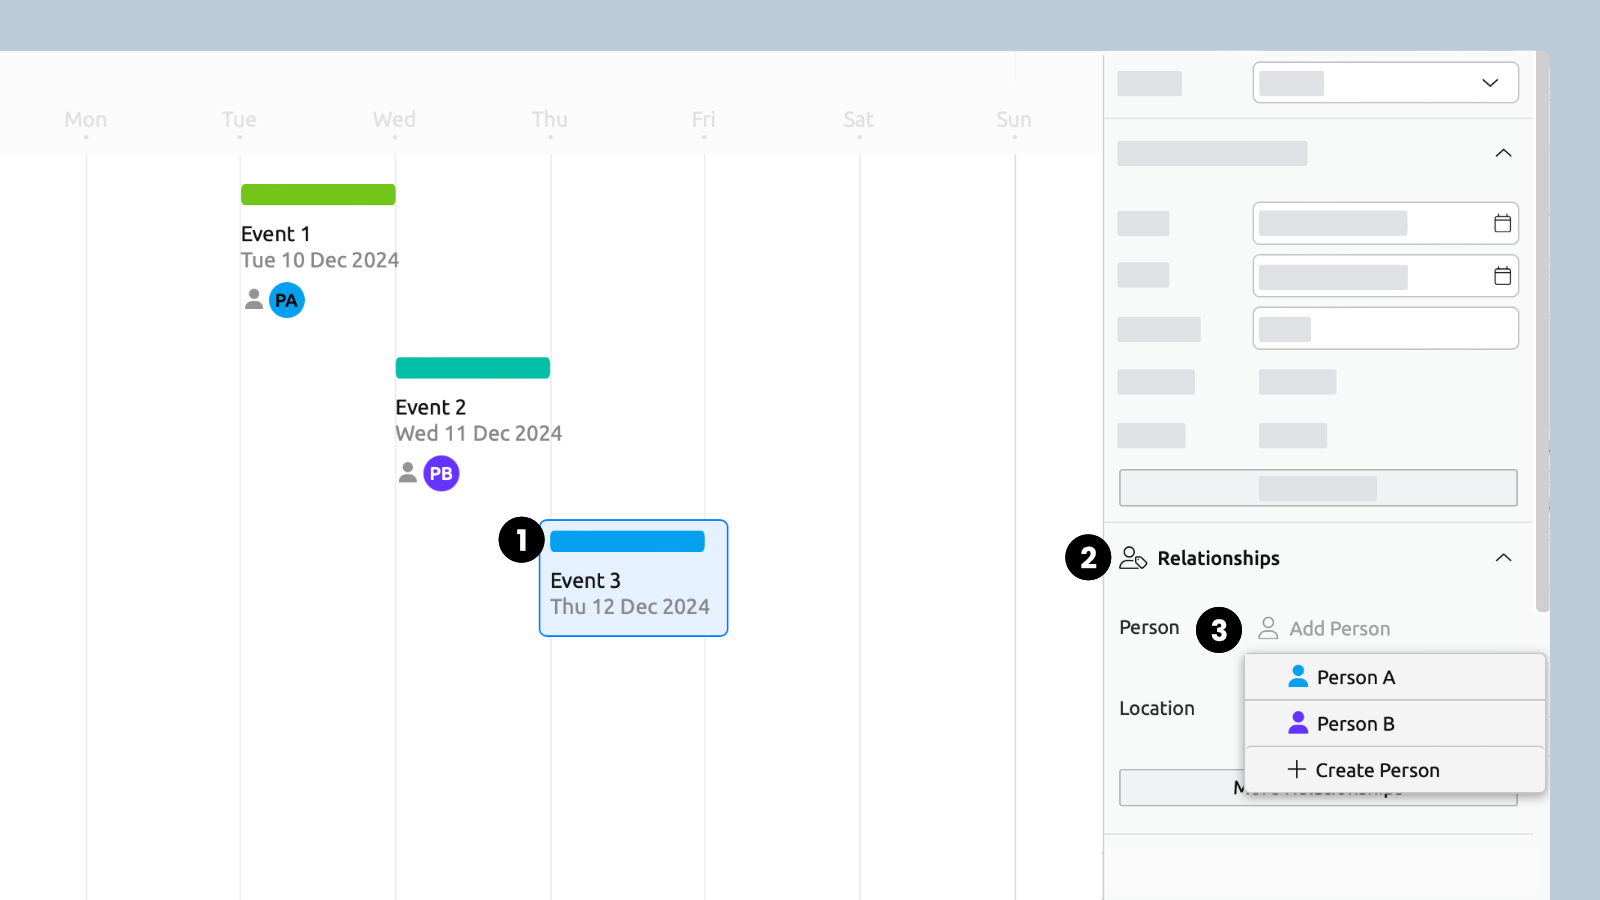
Assign a person to an event
Relationships help you connect different pieces of information in your project and show how they relate.
One common use of relationships is linking a person (or character) to an event.
Most templates allow you to assign people to events by default. If yours doesn’t, you can set it up by following the instructions in the Item Types guide.
- Select the event to open the Inspector panel.
- Click to open the Relationships panel.
- Click Add Person.
- If there are no people in your file yet, type a name and press enter to create one.
If your file already contains people, select from the list, or create a new one.
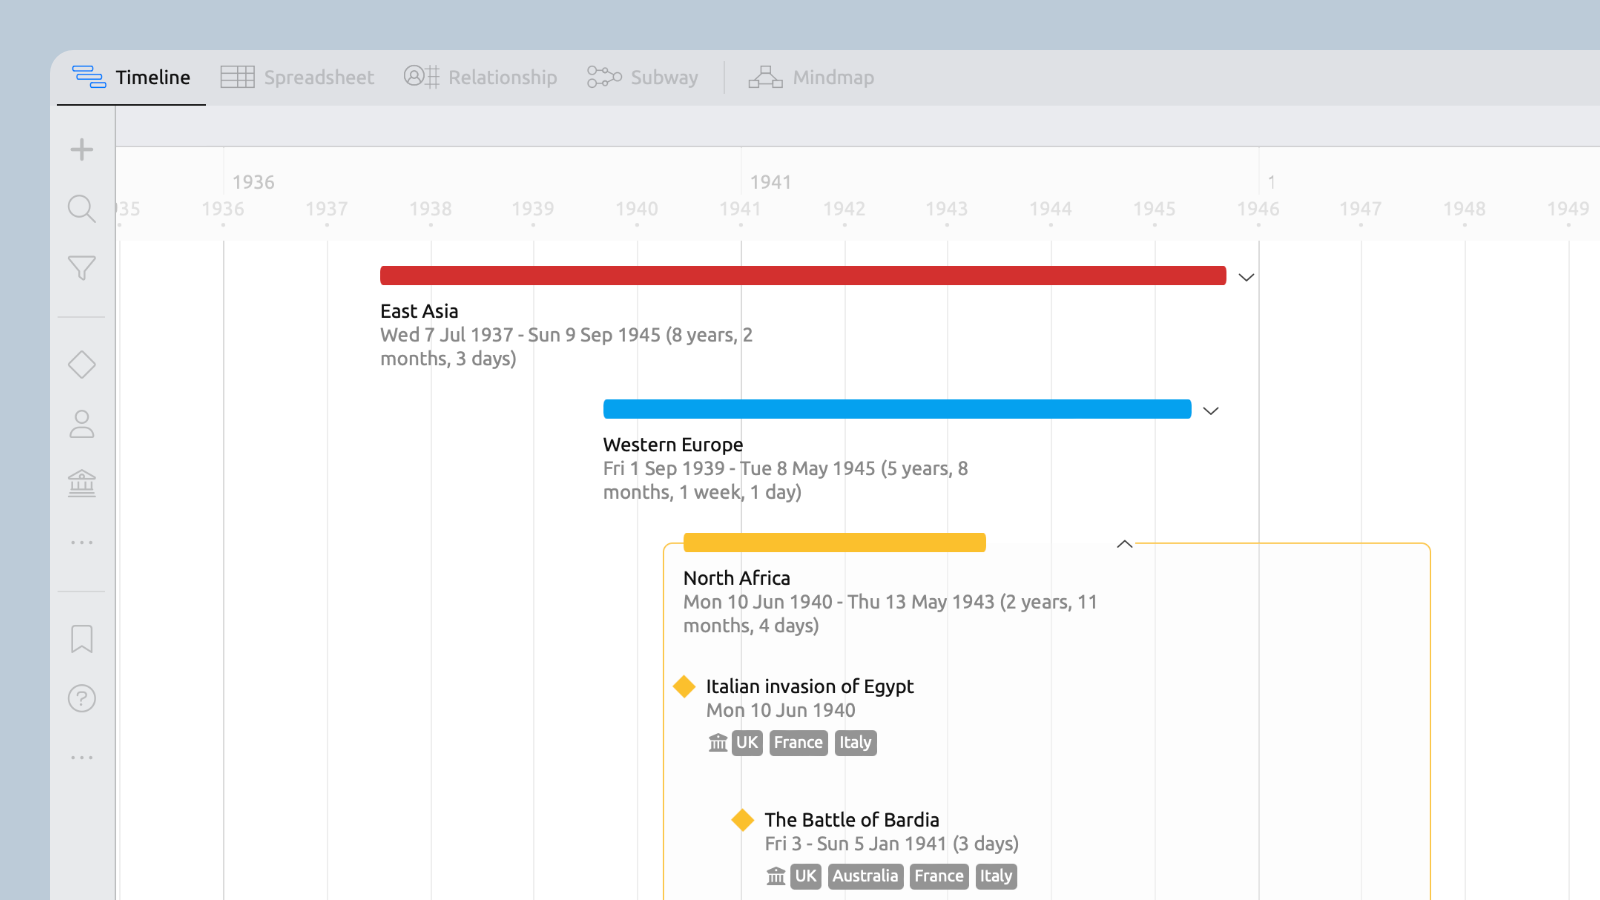
Nested events
Nesting is useful for breaking up large events into sub-events. Track the individual battles within a military conflict, or organize tasks within a project.
Learn more about grouping and nesting >
Choose which details are shown on the timeline
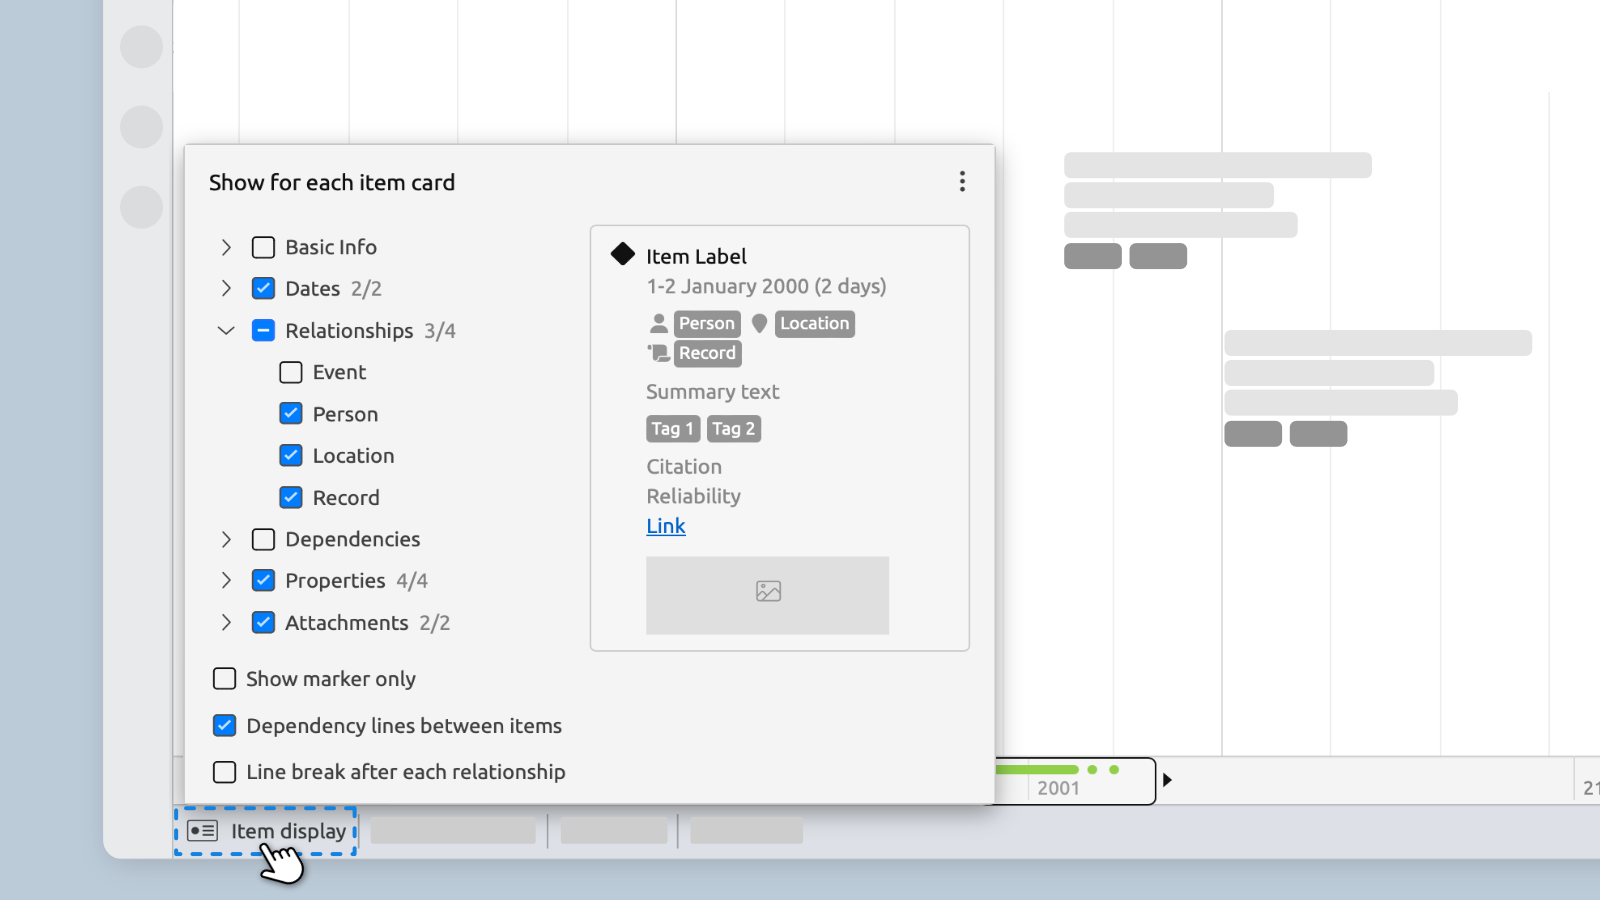
You can control what appears on the timeline using the Item Display menu.
For a full breakdown of the options, check out our Timeline Display guide. Here’s a quick overview:
- In the Timeline view, click the Item Display button.
- Click thearrowsto expand the available options.
- Use the checkboxes to show or hide each option on the timeline.
Try Aeon Timeline free for 14 days
Get Aeon Timeline and easily visualize and organize your project.